
KMS ver. 1.2.398 – MapleStory NEXT: 3rd & 4th Mastery Cores!
The first patch of the MapleStory winter update, NEXT, has been released! The main attraction is the completion of Mastery Cores with the 3rd and 4th Cores being added at the same time, but there’s also a ton of game changes and improvements like cross world Auction House/Meso Market, Genesis Weapon Liberation changes, and the Skill Sequence system which lets you buff up with a single key!
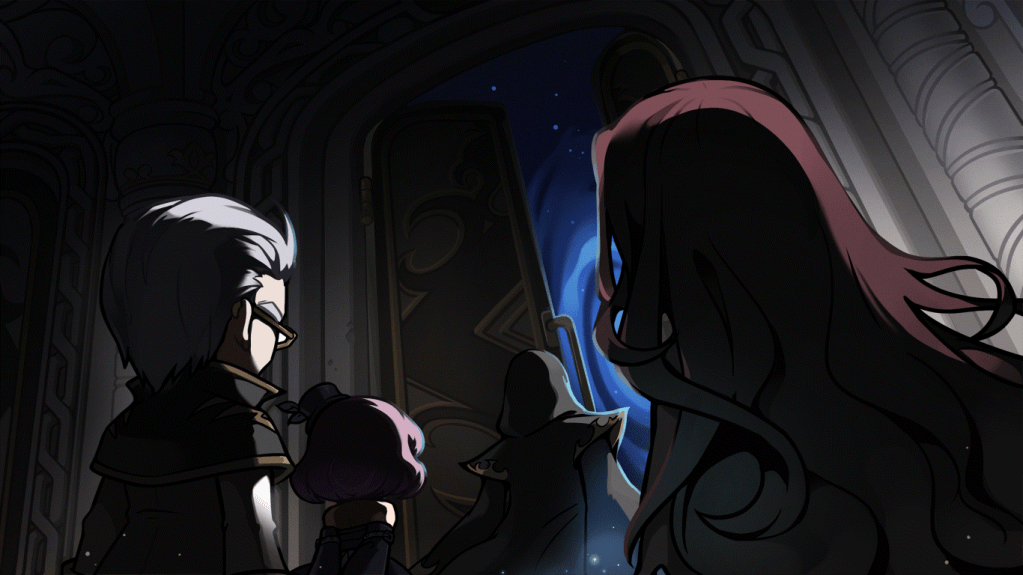
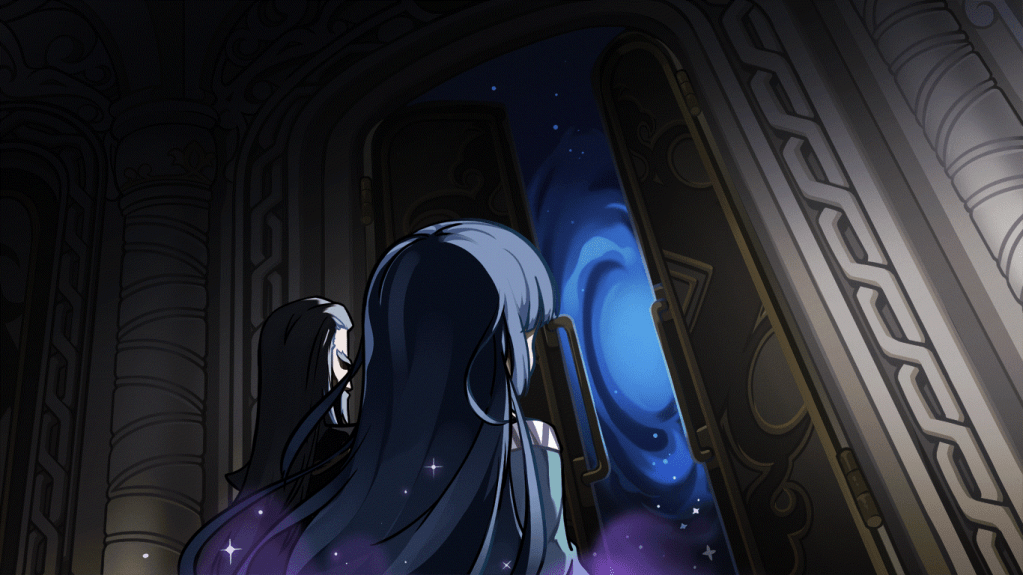
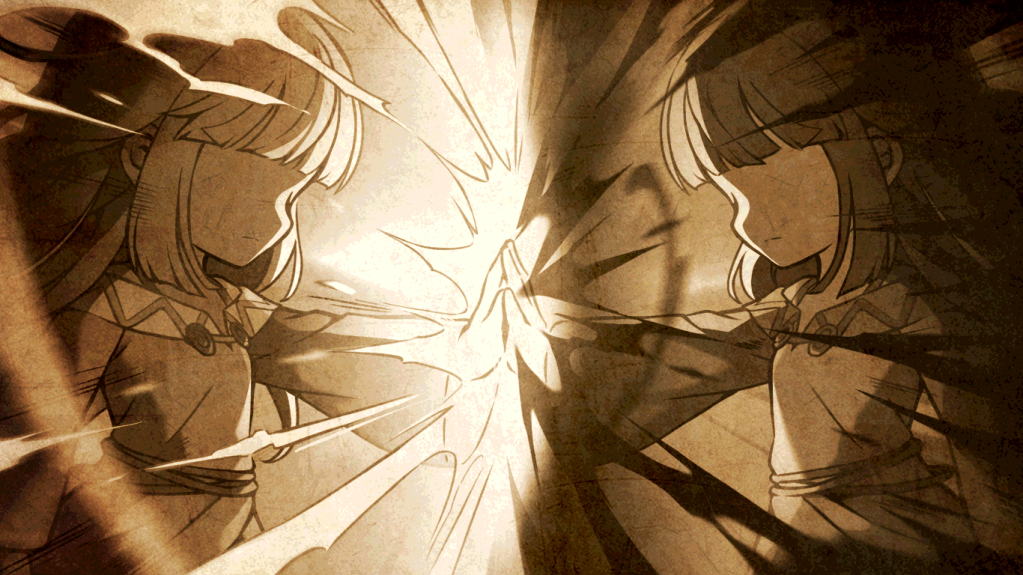
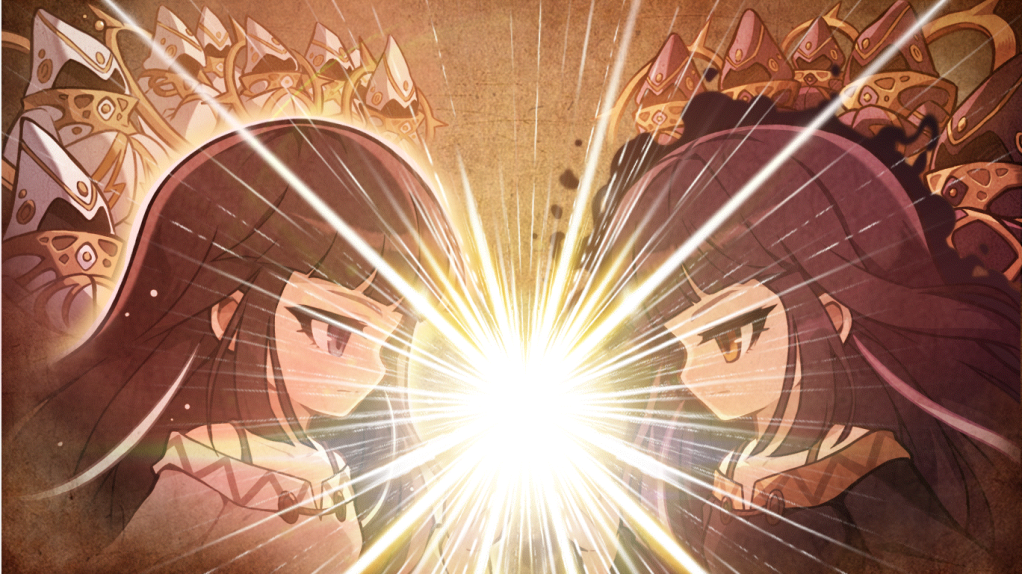
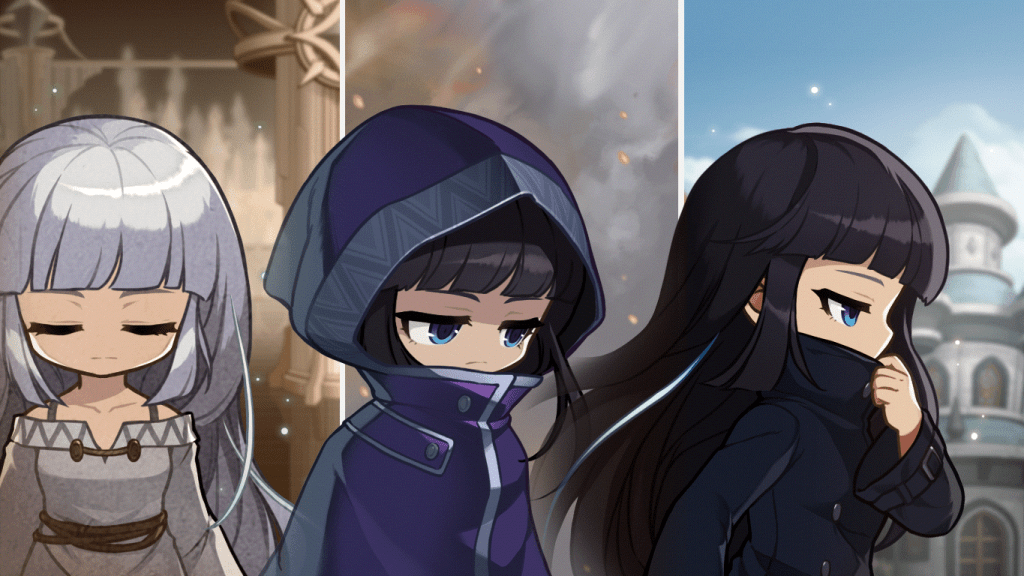
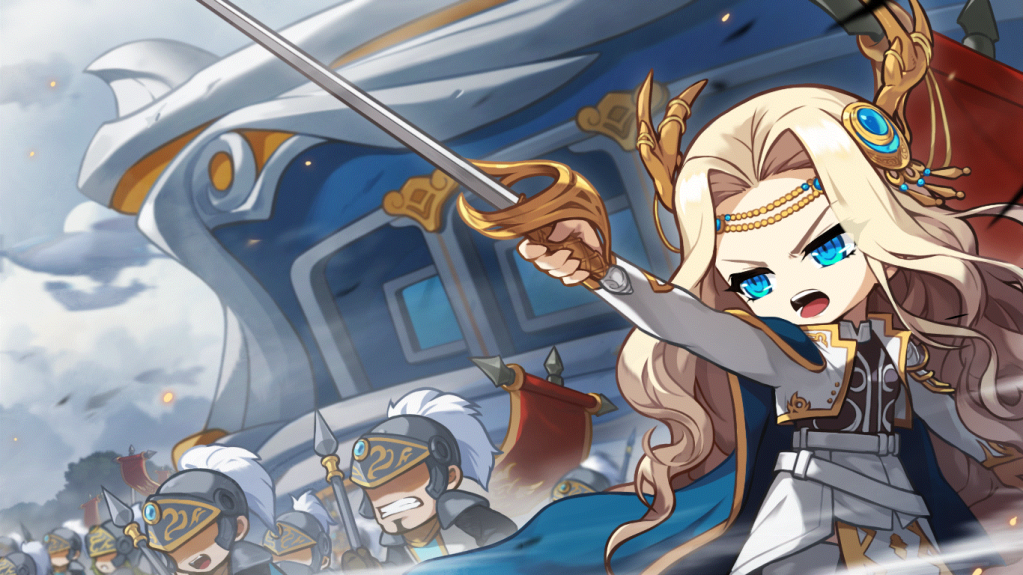
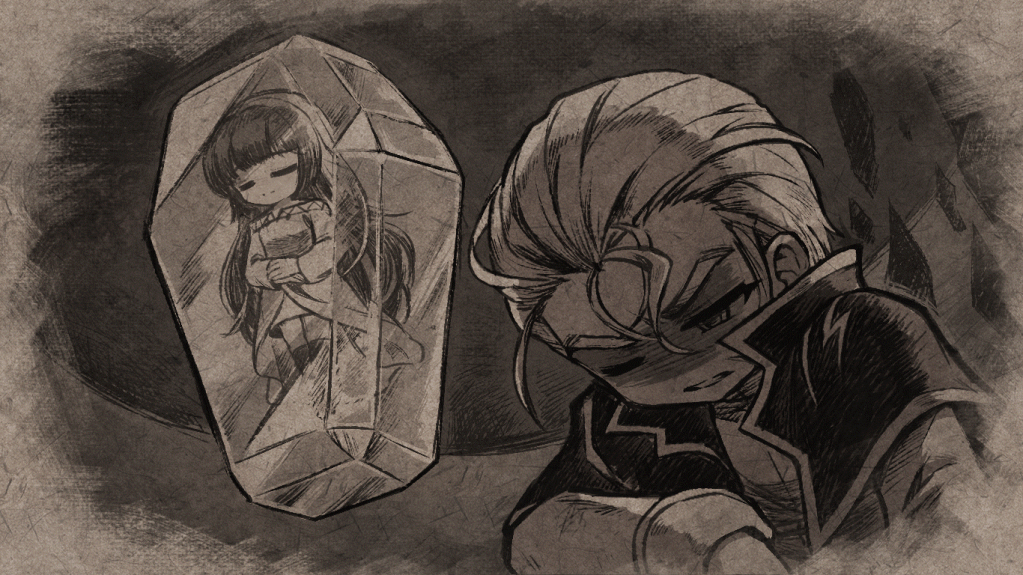
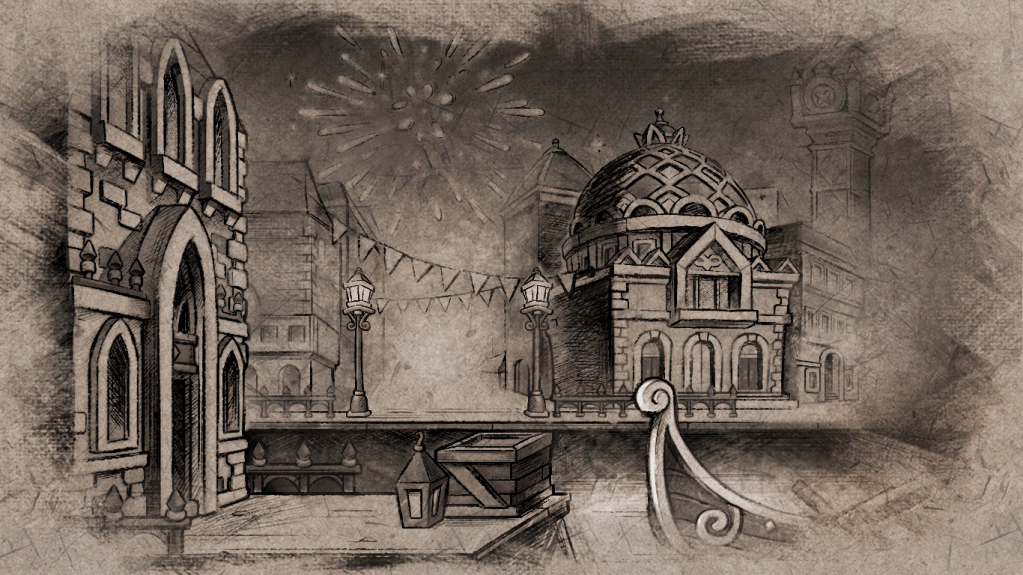
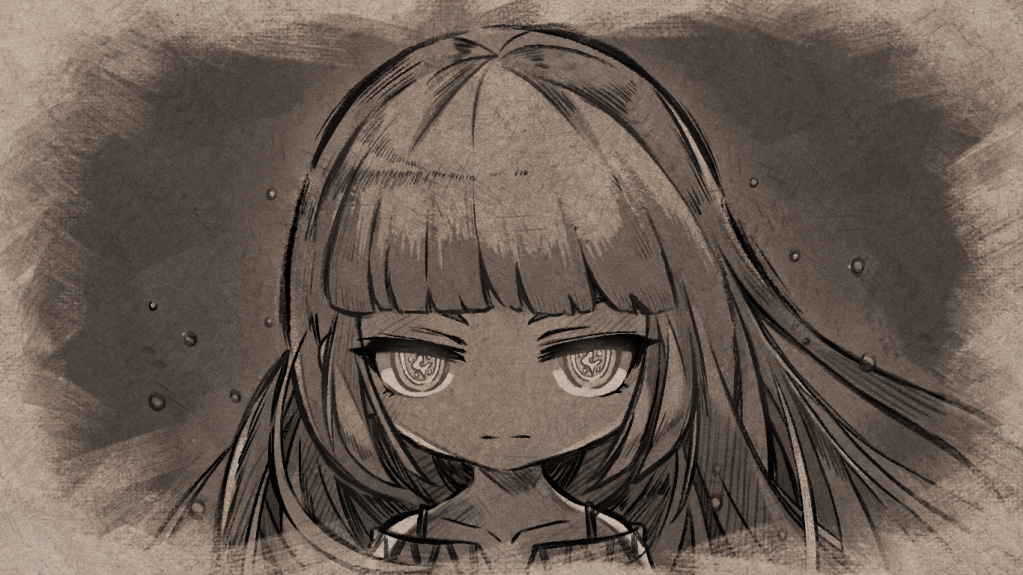
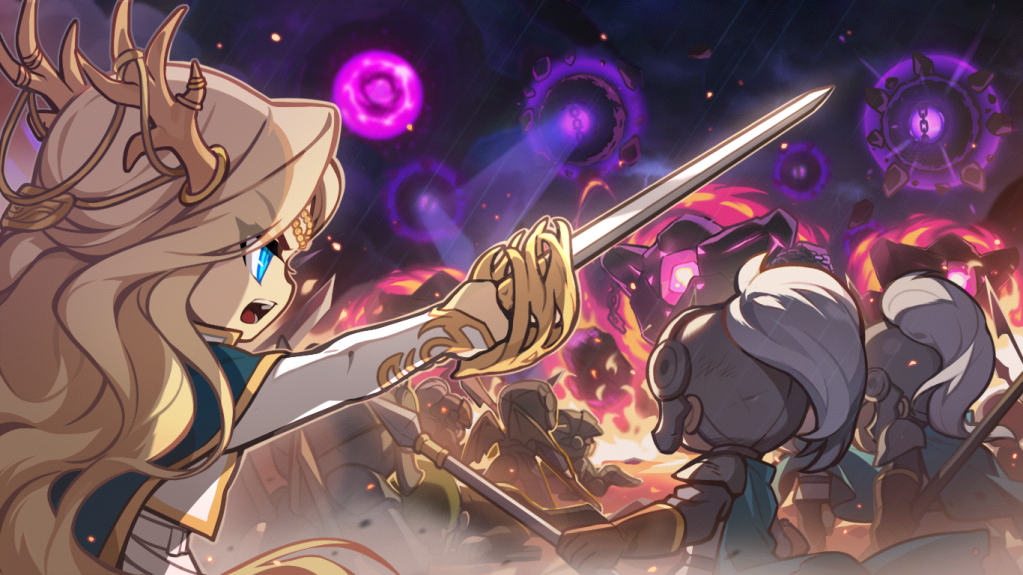
The main event for the next two months is the Dawn Star Banquet, a New Year’s banquet held at Darmoor’s royal villa in Arboris where many of the Apostles have gathered. Together with Primacy, you infiltrate the banquet to find more information on your enemies.
The next official server patch will be on January 16, so expect a test world update on January 9, where we will learn more about the new Union Champion system.
MapleStory NEXT Roadmaps
Content Roadmap:
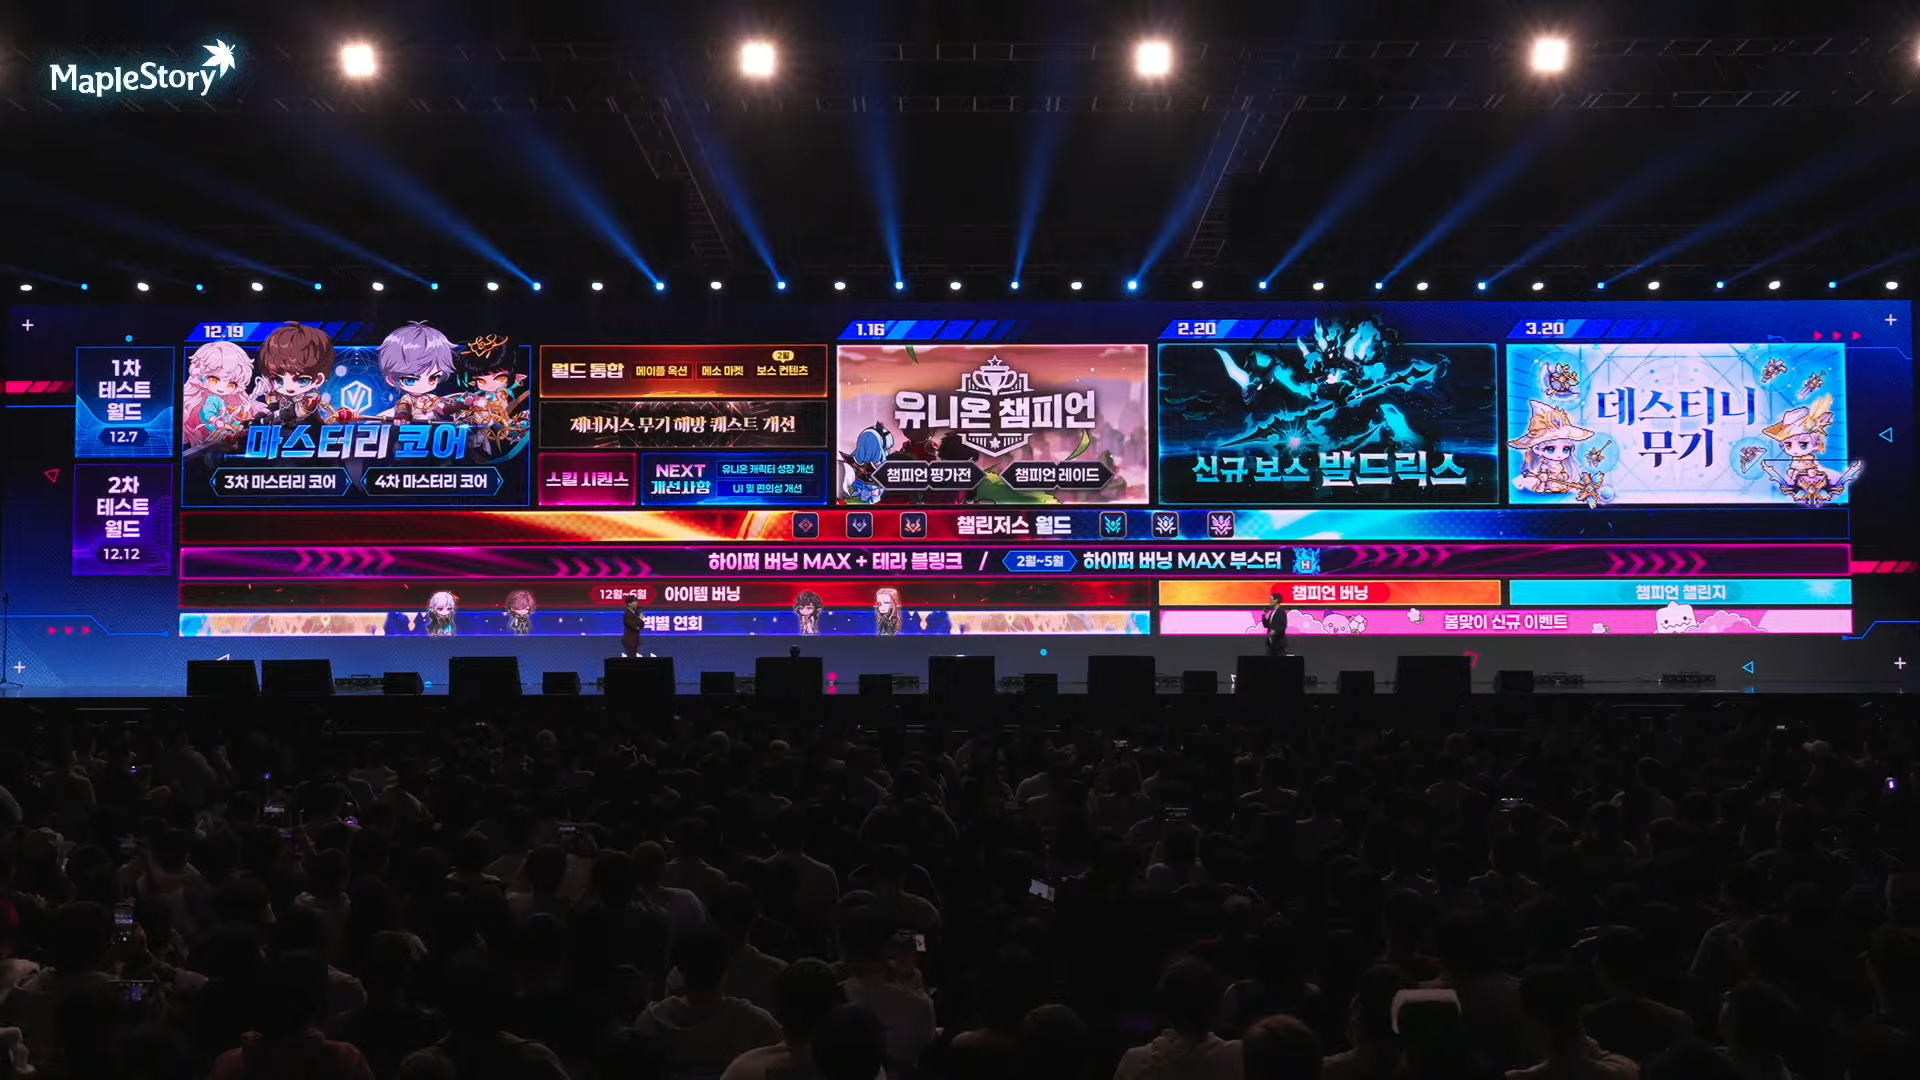
- December 19:
- Mastery Cores
- Cross World Maple Auction and Meso Market
- Genesis Weapon Liberation quest improvements
- Skill Sequence
- NEXT Improvements (Union character growth improvements, UI and convenience improvements)
- January 16:
- Union Champion (Champion Missions and Champion Raid)
- February 20:
- New Boss Baldrix
- March 20:
- Destiny Weapon
Event Roadmap:
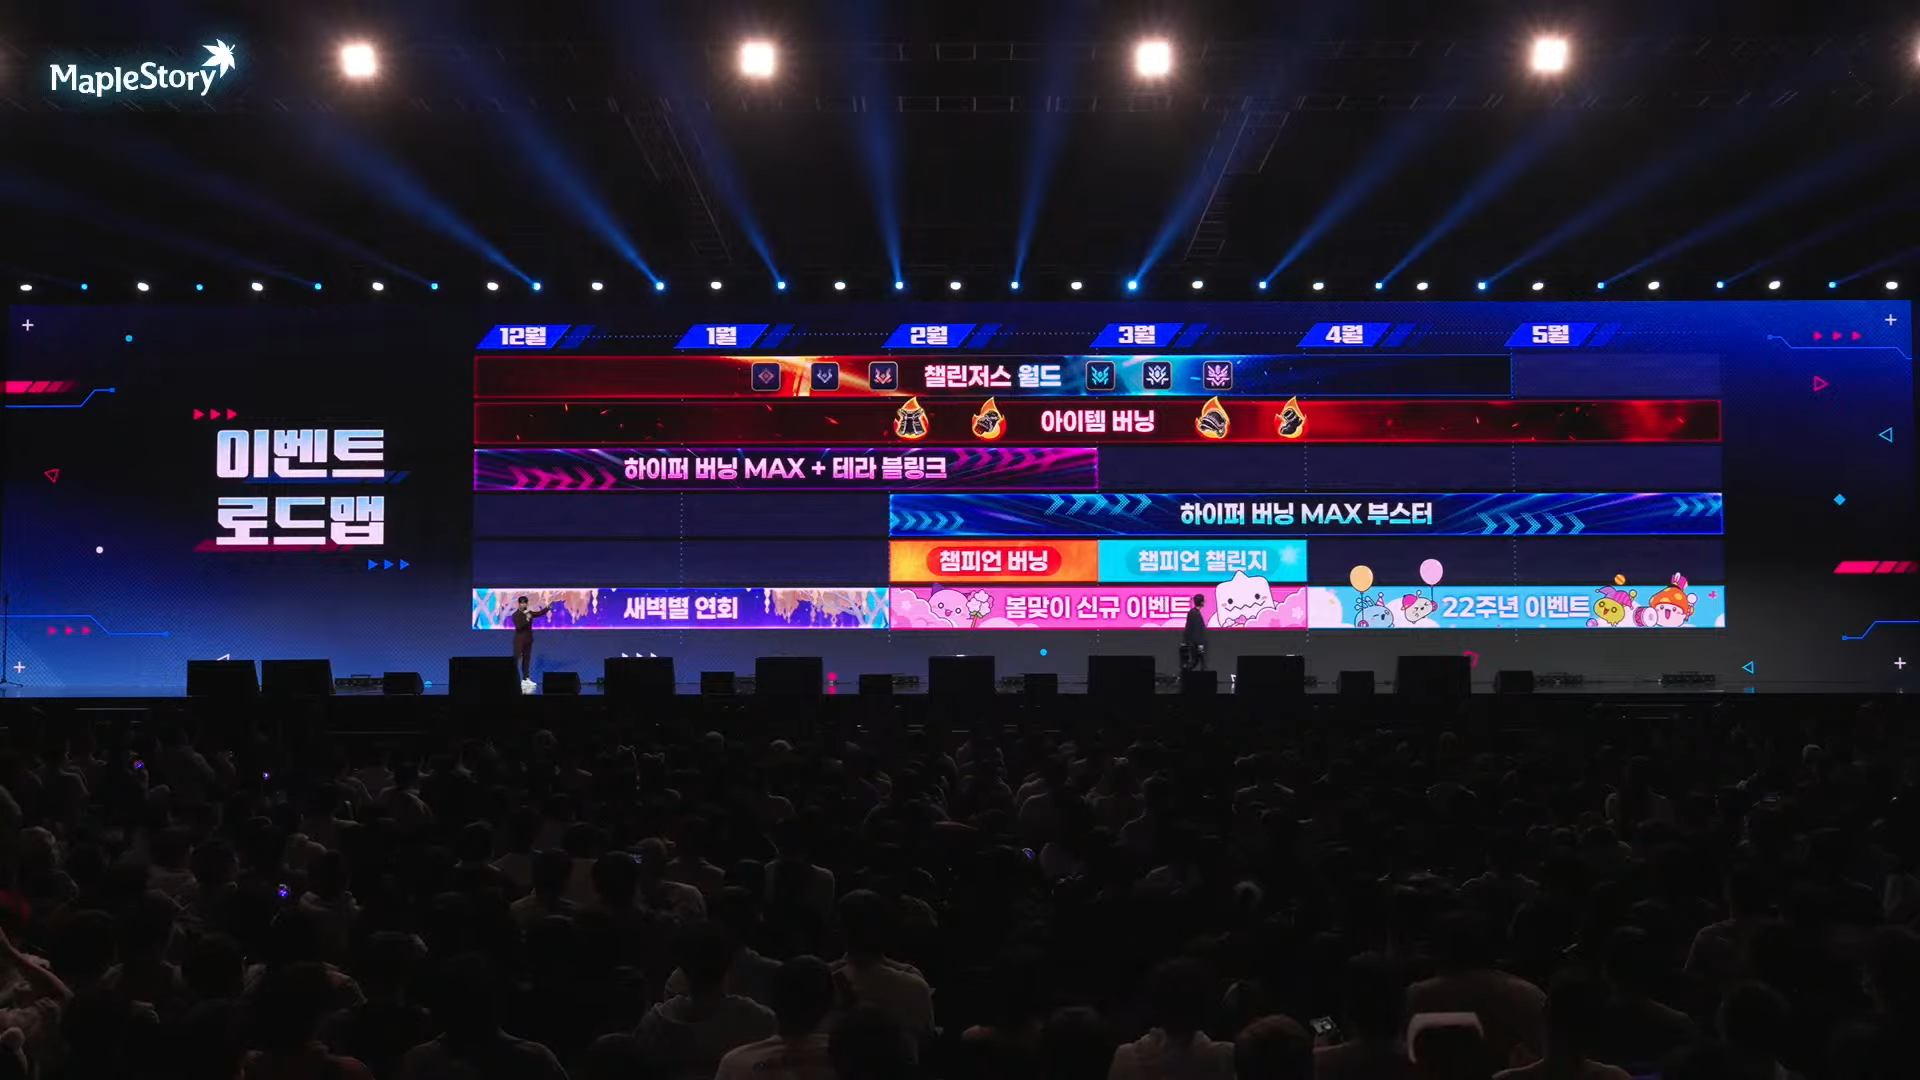
- December: Challengers World, Item Burning, Hyper Burning MAX + Tera Blink, Dawn Star Banquet
- February: Hyper Burning MAX Booster, Champion Burning/Champion Challenge, New Spring Event
- April: 22nd Anniversary Event
Overview
- Cross World Maple Auction
- Cross World Meso Market
- Genesis Weapon Liberation Missions Condition Changes
- Profession/Harvesting Farm Level Limit Changes
- Story Quest Improvements
- Symbol Quests and Content Improvements
- Monster Park Improvements
- Epic Dungeon Entry Limit Changes
- Sol Erda Conversion
- Arcane River Quest Reorganization
- Reboot World Changes
- Quest UI Reorganization
- World Map UI Reorganization
- Minimap UI Reorganization
- Movement Convenience Improvements
- Union Attacker Placement Mode Improvements
- Medal/Title Appearance Setting
- Guild Name Change
- Cash
- Improvements
- Error Fixes
- Skill Sequence
- Skill Changes
- Skill Error Fixes
- New Mastery Cores
- Hero
- Paladin
- Dark Knight
- Archmage (F/P)
- Archmage (I/L)
- Bishop
- Bowmaster
- Marksman
- Pathfinder
- Night Lord
- Shadower
- Dual Blade
- Viper
- Captain
- Cannon Shooter
- Mikhail
- Soul Master
- Flame Wizard
- Wind Breaker
- Night Walker
- Striker
- Aran
- Evan
- Luminous
- Mercedes
- Phantom
- Eunwol
- Blaster
- Battle Mage
- Wild Hunter
- Xenon
- Mechanic
- Demon Slayer
- Demon Avenger
- Kaiser
- Kain
- Cadena
- Angelic Buster
- Zero
- Kinesis
- Adele
- Illium
- Khali
- Ark
- Lara
- Hoyoung
- Events
Cross World Maple Auction
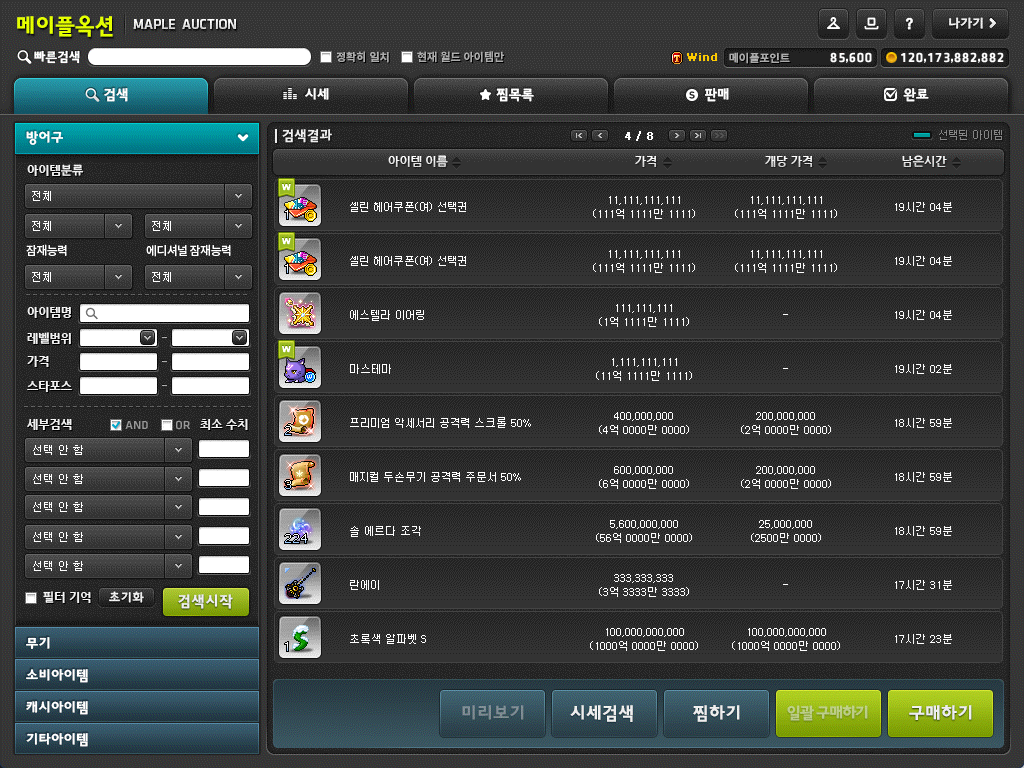
The Maple Auction will be integrated into 3 groups, allowing equipment/cash item trading between different worlds in each group.
- Group 1: Scania, Bera, Luna, Zenith, Croa, Union, Elysium, Enosis, Red, Aurora, Arcane, Nova
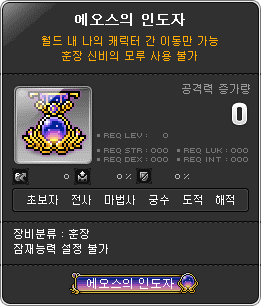
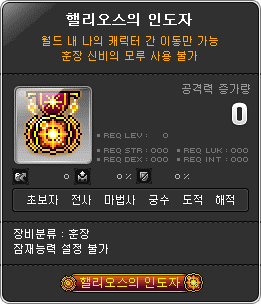
- Group 2: Eos, Helios
- Group 3: Challengers, Challengers 2, Challengers 3, Challengers 4
※ However, you cannot use the bulk purchase feature for cash items from other worlds.
※ Item re-registering, reclaiming, and receiving payments can only be done in the world where the item was registered for sale.
The Maple Auction UI will now display your current Maple Points.
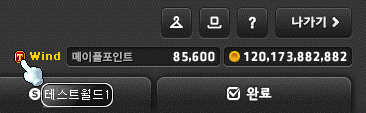
Your world will now be displayed to the left of the character name currently connected to the Maple Auction.

A feature has been added when searching for items that lets you search for items only from the currently connected world.
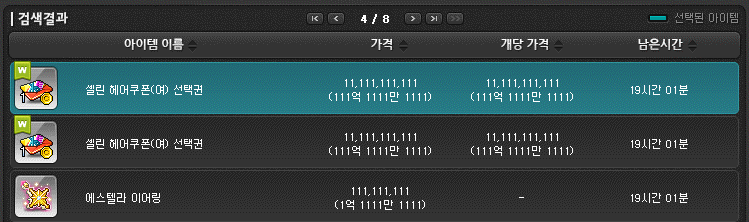
Items from other worlds will be displayed with a special label on the top left of the icon.

When buying items from other worlds, an additional fee of Maple Points equal to 10% of the item price will be consumed. The minimum fee is set at 10 Maple Points.
The Maple Point fee conversion rate will be updated every day at 10:00 AM. Items from other worlds cannot be bought from 9:55 AM to 10:05 AM, while the conversion rate is being updated.
If there are any items or mesos that are left unclaimed (from purchases, sales, and failed sales) before the December 19, 2024 patch, they can be received by using the ‘Claim Existing Auction Items’ button in the Maple Auction UI’s Completed tab until January 18, 2026 at 11:59 PM.
※ The ‘Claim Existing Auction Items’ button will disappear on January 19, 2026 at 12:00 AM. Items that exceed their storage period will be deleted automatically.
※ Items traded in the Maple Auction before November 24, 2017 and had no claim period restrictions can still be claimed through the ‘Claim Existing Auction Items’ button, but they can no longer be claimed after January 19, 2026 at 12:00 AM.
Cross World Meso Market
The Meso Market will be integrated into 2 groups, facilitating transactions in each group.
- Group 1: Scania, Bera, Luna, Zenith, Croa, Union, Elysium, Enosis, Red, Aurora, Arcane, Nova, Challengers, Challengers 2, Challengers 3, Challengers 4
- Group 2: Eos, Helios
※ When a trade is in progress in each group, you cannot apply for a trade, cancel a trade, or receive mesos & Maple Points in any world other than the one you applied for the trade in.
※ You can apply for up to 100 trades per day per Maple ID.
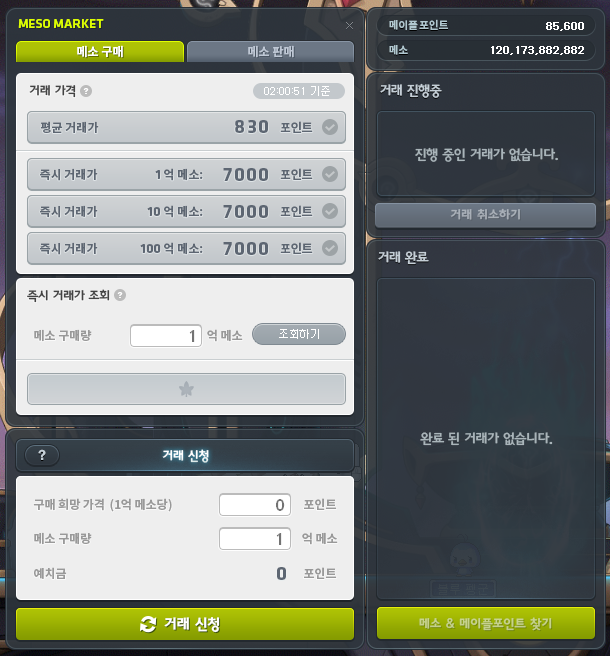
The maximum trade amount for buying and selling mesos has been changed to 100b.
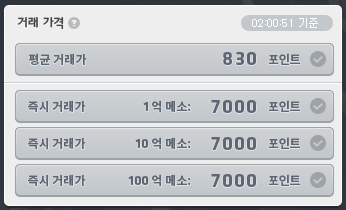
The Average Trade Price has been changed to display the average price of the most recently traded 100b.
The Instant Trade Price has been changed to display the prices required for 100m/1b/10b trades.
※ Information related to the Average Trade and Instant Trade Prices for 100m/1b/10b will be automatically updated periodically.

The Instant Trade Search feature has been added, which lets you check the price required to conclude a trade with the set quantity.
※ The Instant Trade Search feature can be used periodically.
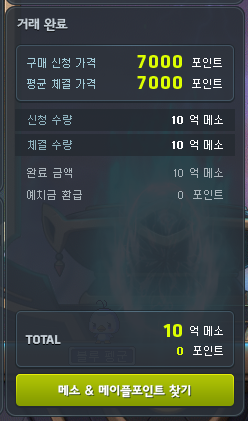
After applying for a trade, you can now check the status of your current trade and completed trade details.
You can now claim the amounts for certain completed trades while you have other trades in progress.
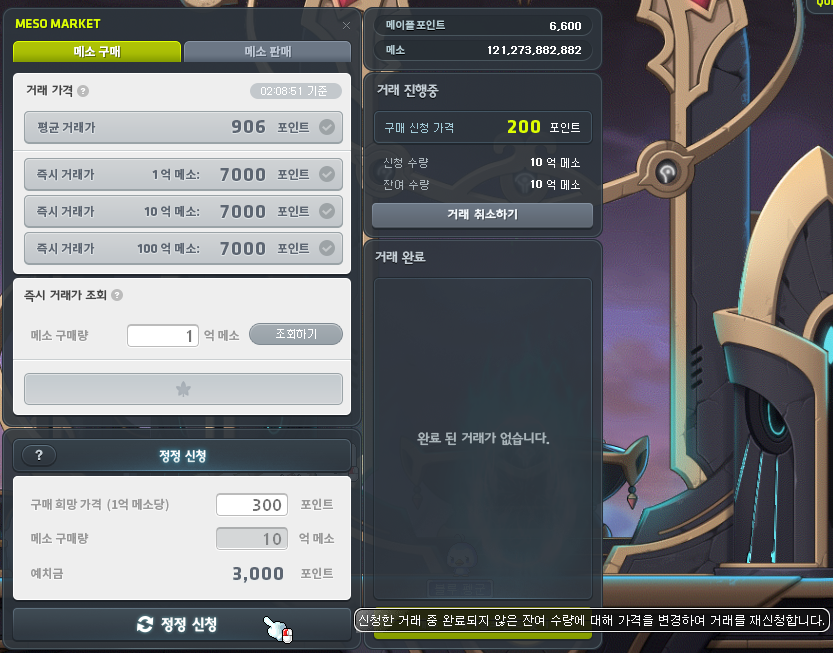
A Correction Request feature has been added that lets you re-register a trade by changing only the application price for trades that have not been completed but are still in progress.
※ If you use the Correction Request feature, the current trade will be cancelled, and after receiving the mesos & Maple Points, the trade will be applid for the remaining quantity at the requested price.
You can claim the completed amounts and deposits for transactions registered before the December 19 maintenance in the Meso market in each world through the NPC Miss Brainy.
※ You can talk to Miss Brainy by clicking the Quick Move button displayed on town maps.
※ You can use the Cross World Meso Market after claiming your completed amounts and deposits from the existing Meso Market.
Genesis Weapon Liberation Missions Condition Changes
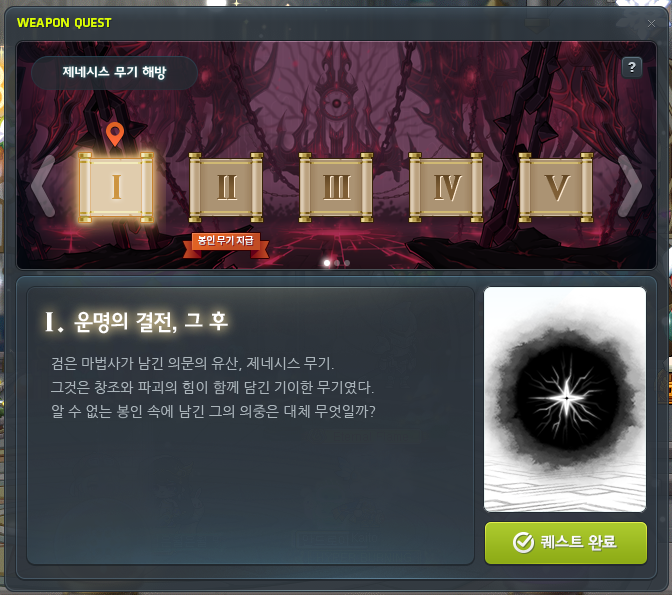
The Genesis Weapon Liberation missions’ completion conditions of defeating the Genesis Egg have been changed to defeating the Black Mage and his Commanders to extract Traces of Darkness.
- The ‘[Genesis] Battle of Destiny, and Afterwards’ quest’s completion condition of defeating the Genesis Egg has been removed.
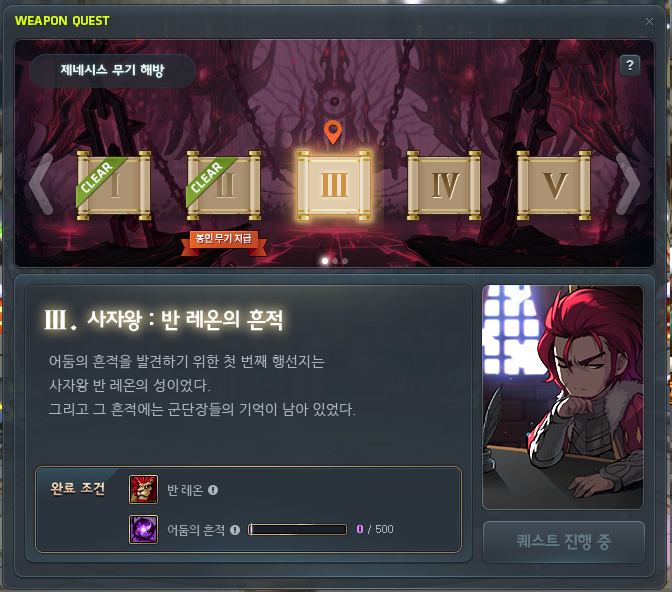
- A completion condition of extracting 500 Traces of Darkness has been added to the ‘[Genesis] Traces of the Lion King: Von Leon’ quest.
For each Commander’s Remnant quest, the Traces of Darkness required will increase based on the difficulty.
- Traces of Darkness can be accumulated up to 1,500.
- Traces of Darkness that exceed the current in-progress Commander quest can be used for the subsequent Commander quest.
| Commander’s Remnant Quest | Traces of Darkness Required |
|---|---|
| Traces of the Lion King Von Leon | 500 |
| Traces of the High Priest of Time Arkarkium | 500 |
| Traces of the Tyrant Magnus | 500 |
| Traces of the Wing Master Suu | 1,000 |
| Traces of the Sword of Destruction Damien | 1,000 |
| Traces of the Spider King Will | 1,000 |
| Traces of the Master of Nightmares Lucid | 1,000 |
| Traces of the Red Witch Hilla | 1,000 |
※ Users who currently have a Commander’s Remnant quest in-progress and have already defeated the Genesis Egg will have it changed so that they will have acquired 100% of the Traces of Darkness required to clear that Commander’s Remnant quest.
※ Existing Black Mage’s Remnant items will be removed. Characters who had them will be changed so that they have acquired 100% of the Traces of Darkness required to clear that Commander’s Remnant quest.

Traces of Darkness can be extracted by defeating the Black Mage and his Commanders above a certain difficulty.
| Boss | Traces of Darkness |
|---|---|
| Normal Suu | 10 |
| Normal Damien | 10 |
| Easy Lucid | 15 |
| Easy Will | 15 |
| Normal Lucid | 20 |
| Normal Dusk | 20 |
| Normal Will | 25 |
| Normal Dunkel | 25 |
| Normal Jin Hilla | 45 |
| Hard/Extreme Suu | 50 |
| Hard Damien | 50 |
| Hard Lucid | 65 |
| Chaos Dusk | 65 |
| Hard Will | 75 |
| Hard Dunkel | 75 |
| Hard Jin Hilla | 90 |
| Hard/Extreme Black Mage | 600 |
※ When you defeat a boss, the Traces of Darkness will be divided and extracted evenly based on the number of people who entered the boss.
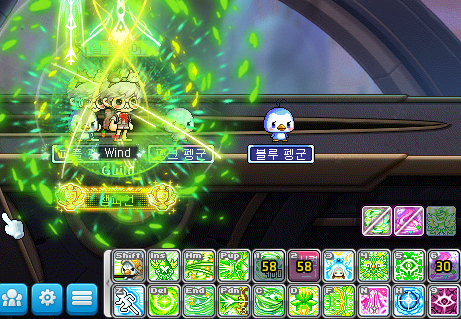
Note: I have seen some confusion about these changes. In particular, you CAN start and complete all of the Genesis Weapon quests without defeating Black Mage at all (‘[Genesis] Battle of Destiny, and Afterwards’ quest condition removed). And the Traces of Darkness ARE divided by all party members that entered with you, even if they are liberated. For example, in my screenshot above, I cleared Normal Suu with one liberated party member and I only received 5 Traces of Darkness instead of the full 10.
If you had a Commander’s Remnant quest in progress from December 19, 2024 at 12:00 AM to before the maintenance, and have records of defeating boss monsters that you could acquire Traces of Darkness from, you can receive those Traces of Darkness by talking to the Maple Admin NPC.
※ The Traces of Darkness compensation through the Maple Admin NPC will be available from after the update on December 19 until December 25, 2025 at 11:59 PM.
※ The Traces of Darkness compensation is not divided by the number of people. You will receive the full amount of Traces of Darkness for the bosses you defeated.
Profession/Harvesting Farm Level Limit Changes
Profession skill related quests’ beginning levels have been changed to level 100.
※ Existing level 35~99 characters that learned profession skills can continue to use profession skills.
The harvesting farm’s entry level limit has been changed to level 100.
For Zero, you must complete the Zero story Chapter 4 to start the ‘[Profession Skill] Herbalism and Mining’ quest.
Story Quest Improvements
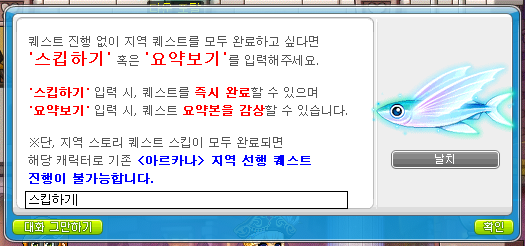
The criteria for skipping Arcane River/Grandis area story quests has been expanded to be per Maple ID, and the Story Skip feature has been improved.
- If there is at least one character within the Maple ID that has completed an Arcane River or Grandis area’s story quests, other characters within the Maple ID will be able to view the story summary without completing the pre-quests or instantly complete them.
- The existing Story Skip feature for viewing the story summary will be renamed to the View Summary feature. A new Story Skip feature that lets you complete the pre-quests immediately without viewing the story summary has been added.
- When you view the story summary or skip it, all related quests will be completed and you will be given all item rewards. However, you will not be given the experience rewards.
The criteria for being able to use certain boss content that has pre-quests has been expanded from per world to per Maple ID.
- If there is at least one character within the Maple ID that has completed the pre-quests for Caoong, Papulatus, Von Leon, Arkarium, Pink Bean, Cygnus, Magnus, or Guardian Angel Slime, other characters within the Maple ID will be able to use the boss content without having to do the separate boss pre-quests.
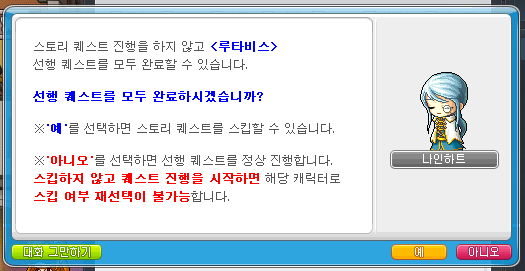
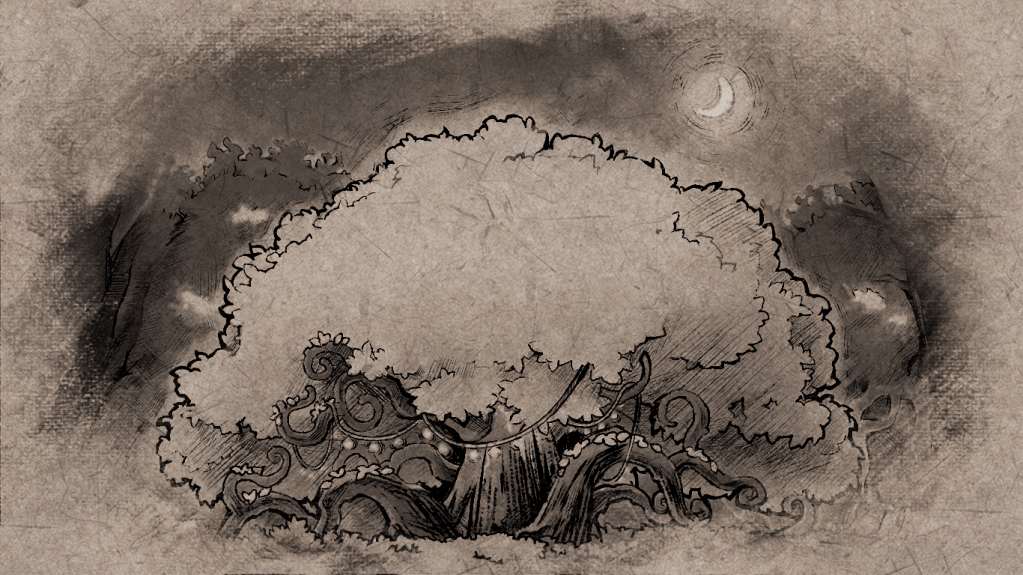
The Root Abyss Story Skip feature has been added.
- If there is at least one character within the Maple ID that has completed the ‘[Root Abyss] Rescue the World Tree’ quest, other characters can use the Story Skip feature for that quest.
- When you skip the quests, all related quests will be completed and you will be given all item rewards. However, you will not be given the experience rewards.
- You can choose to use the Story Skip feature in the ‘[Root Abyss] Nineheart’s Emergency Call’ quest. Characters who have already completed that quest and started the rest of the story quests cannot skip them.
Profession skill related quests’ beginning levels have been changed to level 100.
- [Profession Skill] Learning Profession Skills
Symbol Quests and Content Improvements
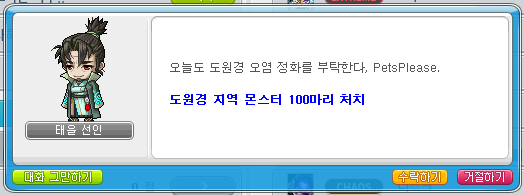
Symbol daily quests have been simplified.
- The Grandis daily quest completion conditions will gradually decrease to defeating 500, 300, and 100 monsters of the corresponding area’s monsters, based on the number of areas above it that have been unlocked.
※ If you had any Grandis daily quests in-progress from Thursday at 12:00 AM before the patch until the maintenance, your progress records will be reset.
※ If you already completed any Grandis daily quests from Thursday at 12:00 AM before the patch until the maintenance, your completion records will be maintained.

- The Arcane River daily quest completion conditions will gradually decrease to defeating 500, 300, or 100 monsters of the corresponding area’s monsters, based on the number of areas above it that have been unlocked.
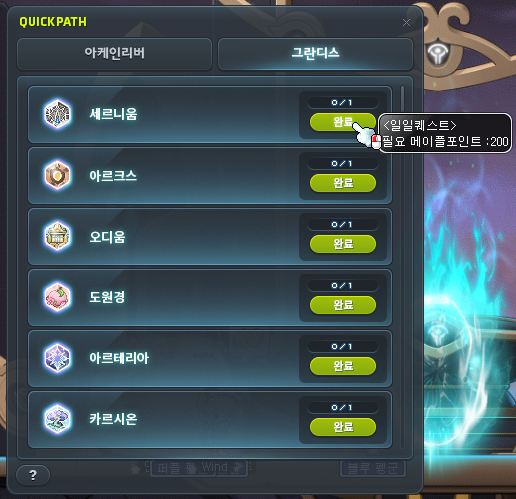
Symbol Quick Path costs have been discounted.
- The Grandis daily quests instant completion costs will gradually decrease to 1,000, 600, or 200 Maple Points, based on the number of areas above it that have been unlocked.
- The Arcane River daily quests instant completion costs will gradually decrease to 1,000, 600, or 200 Maple Points, based on the number of areas above it that have been unlocked.
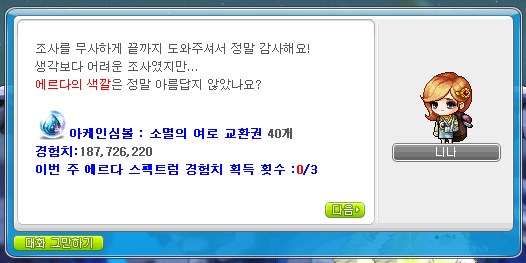
The number of Arcane Symbols provided when clearing Arcane River special content per run has been increased from 15 to 40.
Monster Park Improvements
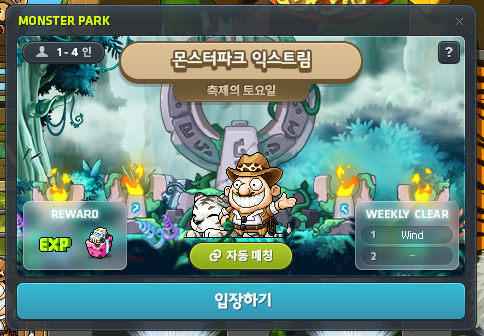
Monster Park Extreme has been changed into weekly content. It has been improved so that you can clear it on 2 characters per world (once per character).
- Clear records will be reset every Thursday at 12:00 AM.
- The amount of experience given upon clearing has been increased by 400%.
- The Sunday 1.5x experience benefit will no longer be applied.
- Sunday Maple’s Monster Park clear experience benefit will no longer be applied to Monster Park Extreme.
- The Monster Park Extreme UI has been changed to display the characters that have cleared it this week.
- The ‘[Monster Park Extreme] Growing Closer by Fighting’ achievement will be moved to the Memories tab and can no longer be completed.
※ Characters that have cleared Monster Park Extreme on December 19 from 12:00 AM to before the maintenance can also play the newly changed weekly Monster Park Extreme after the maintenance.
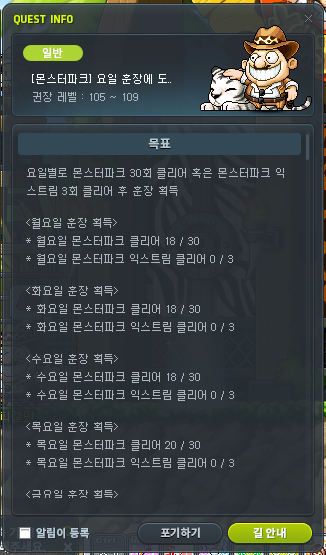
The Monster Park medals’ acquisition difficulty has been decreased.
- The completion conditions for the following quests have been changed from ‘clearing Monster Park 77 times per day’ to ‘clearing Monster Park 30 times on that day or clearing Monster Park Extreme 3 times on that day’.
- [Monster Park] Monday Medal Challenge
- [Monster Park] Tuesday Medal Challenge
- [Monster Park] Wednesday Medal Challenge
- [Monster Park] Thursday Medal Challenge
- [Monster Park] Friday Medal Challenge
- [Monster Park] Satday Medal Challenge
- [Monster Park] Sunday Medal Challenge
- The Seven Day Monster Parker medal’s description has been changed to match the changed quest completion conditions.
※ Even after the quest completion condition changes, characters who had the quests in-progress will maintain their number of Monster Park clears.
Epic Dungeon Entry Limit Changes

It has been improved so that you can clear 2 types of Epic Dungeons per week per Nexon ID.
- Each week, you can enter and clear Epic Dungeons with the Maple ID that you first entered on.
- You can clear the 2 types of Epic Dungeons (once each) on 2 separate characters.
※ Even if you reset the progress information for each dungeon, the Maple ID and world that you can enter on for that week will not be reset.
※ Epic Dungeon progress and clear records from December 19 at 12:00 AM until the maintenance will be maintained.
Sol Erda Conversion
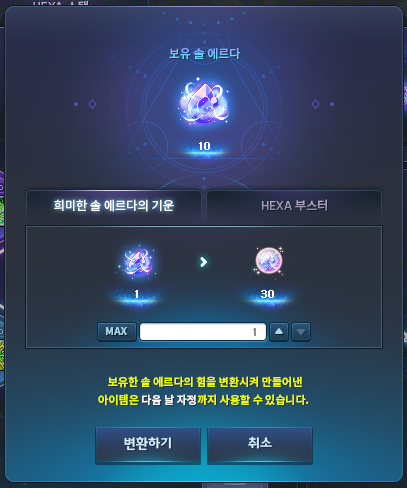
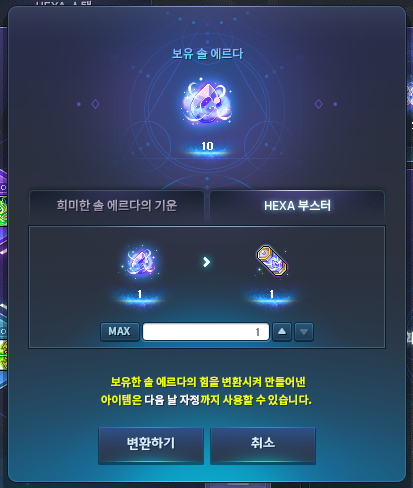
The ‘Sol Erda Conversion’ system, that lets you convert your Sol Erda into other items has been added.
- You can use the system thorough the ‘Sol Erda Conversion’ button on the upper right part of the HEXA Matrix.
- The list of items that you can convert Sol Erda into are as follows.
- You can convert 1 Sol Erda into 30 Faint Sol Erda Energies.
- When you use one, you will acquire 10 Sol Erda Energy.
- The item can only be put into storage.
- You can convert 1 Sol Erda into 1 HEXA Booster.
- When you use one in a map with monsters within your level range, additional monsters that give a large amount of experience points will appear for 100 seconds.
- The item can only be put into storage.
- You can convert 1 Sol Erda into 30 Faint Sol Erda Energies.
※ Items acquired through the Sol Erda Conversion system can only be used from the time of conversion until midnight of the next day.
Arcane River Quest Reorganization
Dimensional Library – Maple Chronicle
- The ‘Book of Arcane River’ usage will be temporarily suspended after the December 19 maintenance. The Book of Arcane River will be reopened through a later update.
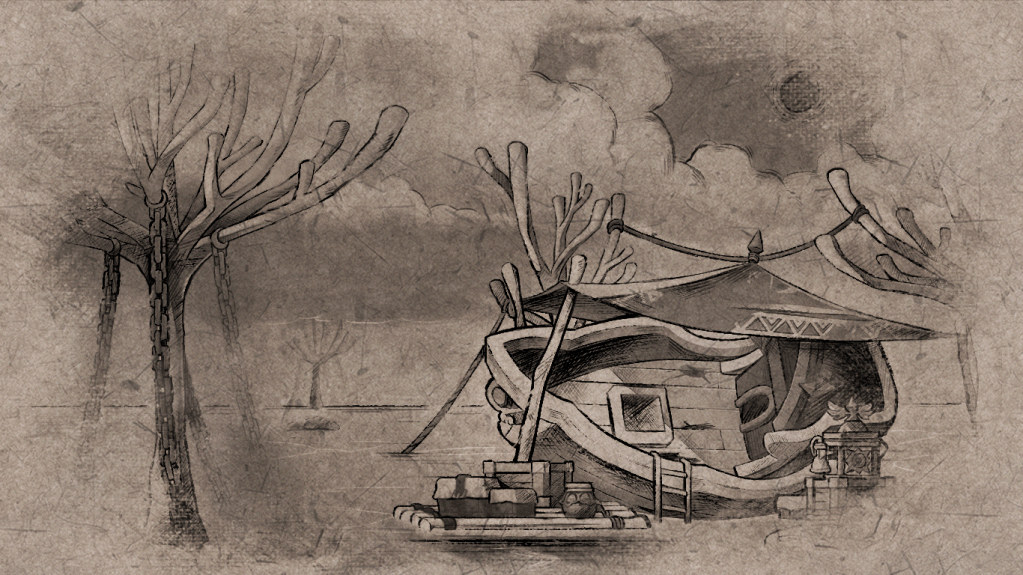
Road of Vanishing


- The existing quests’ progress records have been reset.
- Certain quests’ dialogue and cutscenes have been changed.
- Road of Vanishing related dialogue and cutscenes have been added to the following quests.
- [5th Job] 5th Job: Another Power, Arcane Force
- The following quests have been added.
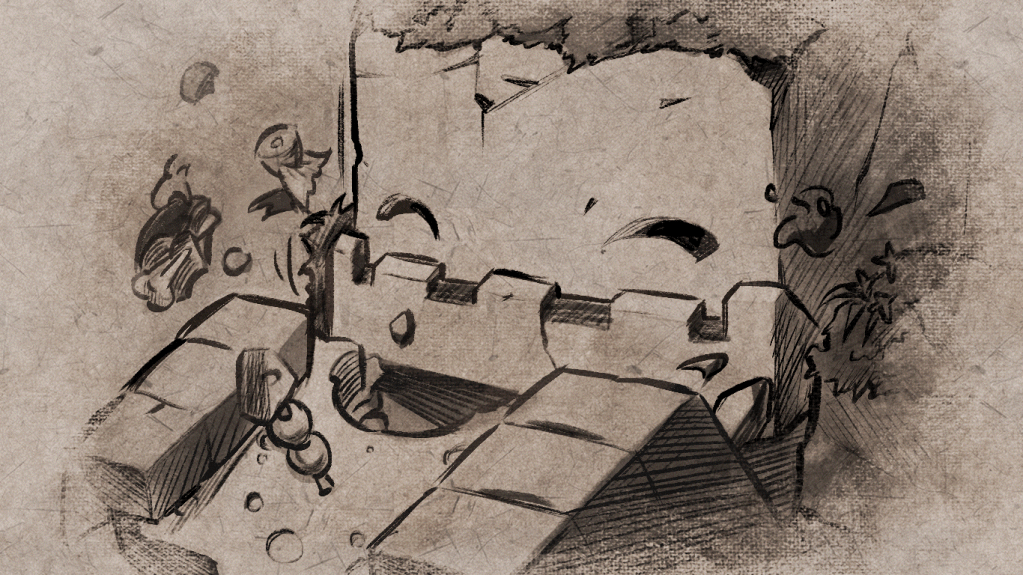
- [Road of Vanishing] The World Visible Under the River
- [Road of Vanishing] Arcane River’s Starting Point
- [Road of Vanishing] Paper Boat Folding
- [Road of Vanishing] Paper Boats Going Up the River
Reverse City
- Certain NPCs’ dialogue window illustrations have been added.
Chew Chew Island


- Navigation has been added to certain quests.
- Certain quests’ dialogue windows have been changed.
- Dialogue has been added to certain quests.
- The following quests have been added.
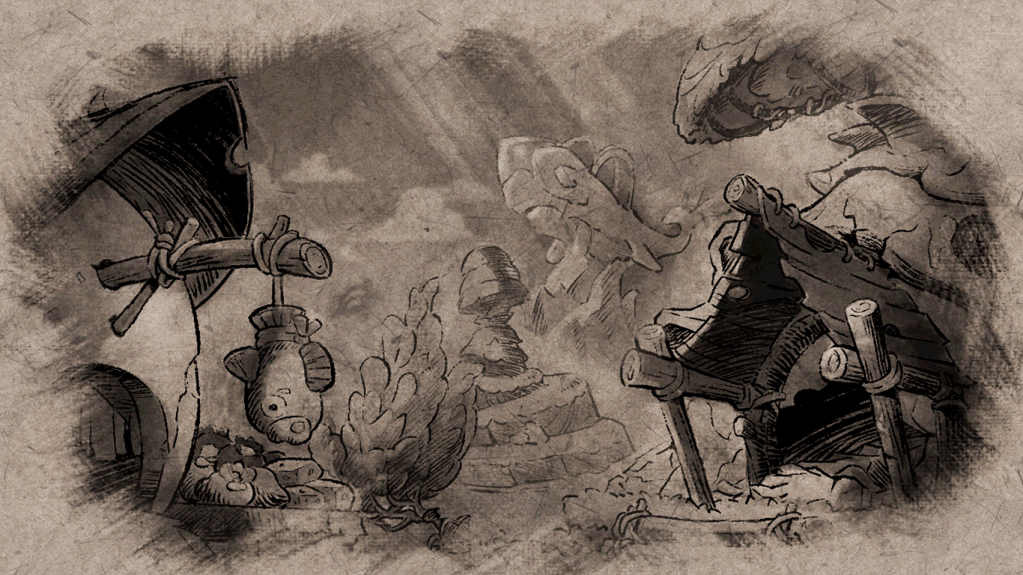
- [Chew Chew] To Handle Erda
Yum Yum Island
- Certain quests’ dialogue windows have been changed.
- Certain quests’ dialogue has been changed.
- Certain quests’ cutscenes have been changed.
Lacheln
- Certain NPCs’ dialogue window illustrations have been added.
- Navigation has been added to certain quests.
- Certain quests’ dialogue windows have been changed.
- Dialogue and illustrations have been added to certain quests.
- The following quests have been added.
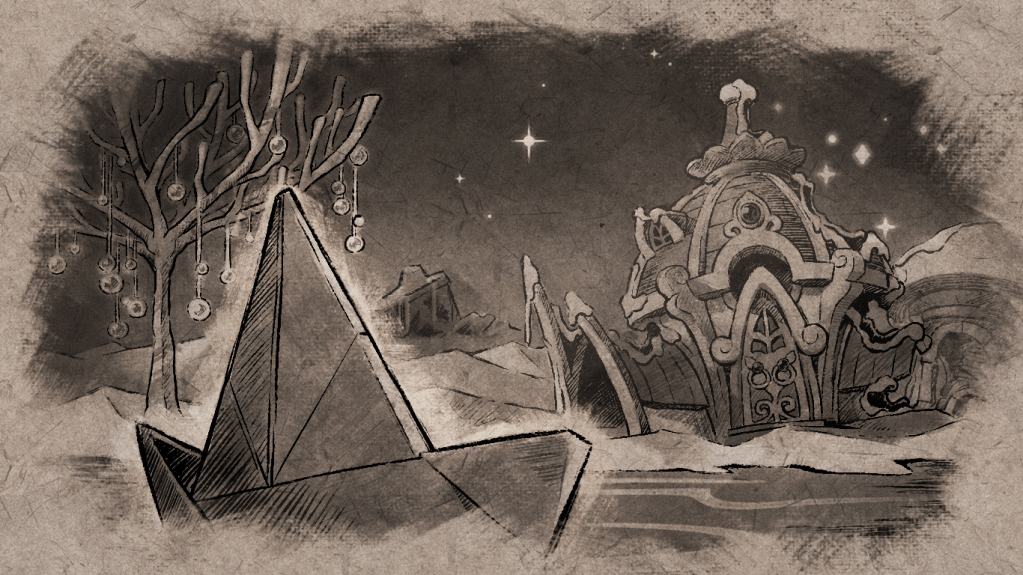
- [Lacheln] Dream Within a Dream
Arcana
- Navigation has been added to certain quests.
- Certain quests’ dialogue windows have been changed.
- Dialogue has been added to certain quests.
- The following quests have been added.
- [Arcana] New Resolution
Morass
- Certain NPCs’ dialogue window illustrations have been added.
- Dialogue and illustrations have been added to certain quests.
- The following quests have been removed.
- [Morass] Message Sent by the Flying Fish
- [Morass] How to Live in Morass
- [Morass] Where did She Go?
- [Morass] Her Footsteps 1
- [Morass] The Person Left Alone
- [Morass] Firmly Closed Door
- [Morass] Unopening Door
- [Morass] To the Laboratory
- [Morass] Memories of That Day
- [Morass] Her Footsteps 2
- [Morass] The Path She Took
- [Morass] For the Flying Fish
- [Morass] Collapsing Memories
- [Morass] It’s Not Time Yet
- [Morass] Following Her Traces
Esfera

- The existing quests’ progress records have been removed and can no longer be completed.
- Certain quests’ details have been removed and simplified.
- Certain quests’ dialogue and cutscenes have been changed.
- The following quests have been added.
- [Esfera] Strangers
- [Esfera] Suspicious Door
- [Esfera] Searching for the Signal Flare
- [Esfera] Base Camp
- [Esfera] Transformed Erda
- [Esfera] Erda Collection
- [Esfera] Traces of Tana
- [Esfera] Erda Collection 2
- [Esfera] Absence of the Sun
- [Esfera] Spider Hunting
- [Esfera] Spiders’ Enemy
- [Esfera] Light and Darkness
- [Esfera] Will of the World
- [Esfera] Finding Tana
- [Esfera] Her Decision
- [Esfera] Sunken Thing
- [Esfera] Trap
- [Esfera] Temple of Light
- [Esfera] Into the Mirror
- [Esfera] Moon and Sun
- [Esfera] The Mirror Within the Mirror
Sellas
- The ‘[Sellas] Follow the Signal’ quest can no longer be completed.
- The ‘[Sellas] Heading Down’ quest’s completion conditions have been changed.
Moonbridge


- Certain NPCs’ dialogue window illustrations have been added.
- Certain quests’ details have been removed and simplified.
- Certain quests’ dialogue and cutscenes have been changed.
- The following quests can no longer be completed.
- [Moonbridge] Back to Maple World
- [Moonbridge] Nautilus Support 1
- [Moonbridge] Nautilus Support 2
- [Moonbrdige] The Fog, It’s Clearing?!
- [Moonbridge] Grand Mage Idea
- [Moonbridge] Idea’s Investigation 1
- [Moonbridge] Idea’s Investigation 2
- [Moonbridge] Shipwreck Rescue
- [Moonbridge] Bringer of Light
- [Moonbridge] Alliance’s All Out Attack
- The boss Dusk’s Story Mode has been updated.
Labyrinth of Suffering
- The existing quests’ progress records have been removed and can no longer be completed.
- Certain quests’ details have been removed and simplified.
- Certain quests’ dialogue and cutscenes have been changed.
- The following quests have been added.
- [Labyrinth of Suffering] Time to Depart
- [Labyrinth of Suffering] Towards the Black Sun
- [Labyrinth of Suffering] Report on the Crash Landing
- [Labyrinth of Suffering] Shooting the Signal Flare
- [Labyrinth of Suffering] Into the Labyrinth
- [Labyrinth of Suffering] Search Operation
- [Labyrinth of Suffering] The One Left Alone
- [Labyrinth of Suffering] Following the Screams Heard
- [Labyrinth of Suffering] Her Story
- [Labyrinth of Suffering] To the Crash Site
- [Labyrinth of Suffering] Traces of Despair
- [Labyrinth of Suffering] Rift
- [Labyrinth of Suffering] Source of Suffering
Limen


- The existing quests’ progress records have been removed and can no longer be completed.
- Certain quests’ details have been removed and simplified.
- Certain quests’ dialogue and cutscenes have been changed.
- The following quests have been added.
- [Limen] Towards the Black Mage
- [Limen] Erda Falls
- [Limen] Guard Captain Dunkel
- [Limen] Resistance Ship Support
- [Limen] Light of Destruction
- [Limen] Destiny is Already…
- [Limen] The Final Operation
- [Limen] Defeat the Black Mage
- [Limen] White Mage
- [Limen] End of the War
- [Limen] Circulating World
Reboot World Changes
- The Reboot passive skill has been removed.
- Additional potential stats will now be applied.
- Stats from scrolling will now be applied.
- Stats acquired through the growth levels of growth type items will now be applied.
- Stats from items that could be acquired through hunting monsters and item crafting in the past will now be applied.
- The feature to exchange between Arcane River Droplet Stones and Primal Droplet Stones through the NPC Kanto in Lacheln and Esfera has been removed.
- When you exchange a Damaged Black Heart for a Black Heart, the item specifications will now be the same as regular worlds.
※ The specifications of Black Hearts exchanged before the patch will be maintained.
- Reboot world has been changed into Eos world.
- Reboot 2 world has been changed into Helios world.
- The Eos World/Helios World Open events will take place.
- Event Participation Requirements:
- A level 101 or higher character in Eos or Helios world.
- Event Period:
- December 19, 2024 after the maintenance ~ January 15, 2025 at 11:59 PM.
- Event Participation Method:
- During the event period, you can receive the World Open Commemoration medals by talking to Cassandra or through the Event List on a level 260 or higher character.
- Event Participation Requirements:
※ The World Open event quest can only be completed 1 time per world.
Quest UI Reorganization

Quest categories that were previously separated by area have been changed to be separated by quest type.
- Story: Story related quests.
- Main: Core storyline related quests.
- Job: Job storyline and job advancement related quests.
- Event: Event quests with strong story focus.
- General: Quests related to stories other than Main/Job/Event.
- Repeatable: Quests that can be repeated to receive rewards.
- Daily: Repeatable quests that can be completed daily.
- Weekly: Repeatable quests that can be completed weekly.
- Guide: Quests that provide assistance with gameplay.
- Cash: Quests related to Cash items or Mileage.
- Time-Limited: Quests that must be completed within a certain time period.
- Special: Cash quests that can be completed regardless of the time period.
- Mileage: Cash quests that can be completed to acquire Mileage.
The Quest UI has been improved.
- The quest list’s tab dividers have been changed into quest status categories.
- A banner area has been added to the top of each quest category to provide convenience features.
- Story: Provides a feature that lets you filter quests by each pre-requisite quest. If you select multiple pre-requisite quests, only quests that satisfy all the conditions of the selected quests will be filtered.
- Required: Tutorial quests that restrict subsequent play if not completed.
- Job Advancement: Quests that let you job advance when completed.
- Skill: Quests that let you acquire skills when completed.
- Area: Quests that let you enter a higher-tier area when completed.
- Boss: Quests that let you challenge a boss when completed.
- Content: Quests that let you enter content when completed (Epic Dungeon, Azmoth Canyon).
- System: Quests that let you use new systems when completed (Collector’s Request).
- Repeatable: When you click on it, it opens the Maple Scheduler UI that lets you conveniently complete repeatable quests.
- Guide: When you click on it, the official guide web page is opened where you can check more detailed guides.
- Cash: When you click on it, it will bring you to the Cash Shop where you can complete and manage Cash-related quests.
- It has been improved so that quests that are not recommended to complete, such as those that don’t match your current level range, will always be displayed dimmer.
- The sorting criteria for the quest list’s ‘can be started’ and ‘in-progress’ quests has been improved. The sorting priority is as follows.
- Quests that can be completed.
- Quests that are recommended to be completed.
- Quests in categories that are likely to be frequently checked.
- Quests that can be started, ordered by highest level first.
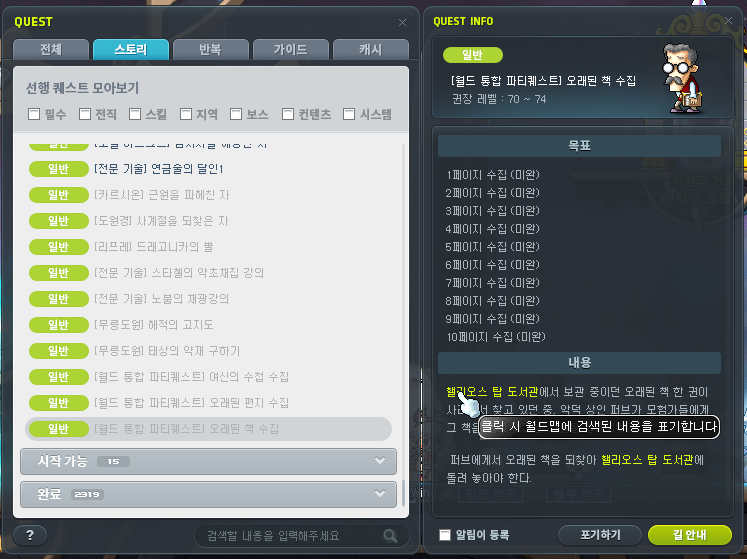
- A feature has been added to the Quest Info window that lets you click a highlighted NPC, monster, or map name to search for the corresponding location on the World Map.
- Quests related to event participation will no longer be displayed in the Quest UI.
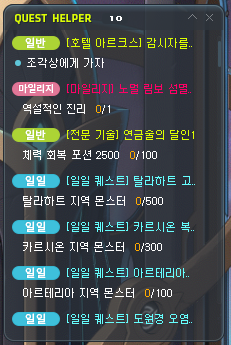
The Quest Helper has been improved.
- The maximum number of quests that can be registered has been increased from 5 to 20.
- If you try to register more than 20 quests, the quest at the bottom will be replaced.
- It has been improved so that quests that can be completed will be located at the top.
- It has been improved so that quests that have been recently registered in the Quest Helper will be located at the top.
- It has been changed so that accepted or completed quests will be automatically registered in the Quest Helper without a separate setting.
In the NPC chat window, quests with categories will now also display the category tag image before the quest name.
When checking quests that can be started through the Lightbulb icon on thel eft side of the screen, the sorting criteria has been changed to be the same as the Quest UI and the beginning level will no longer be displayed.
- Quests that are recommended to be completed.
- Quests in categories that are likely to be frequently checked.
- Quests that can be started, ordered by highest level first.
World Map UI Reorganization
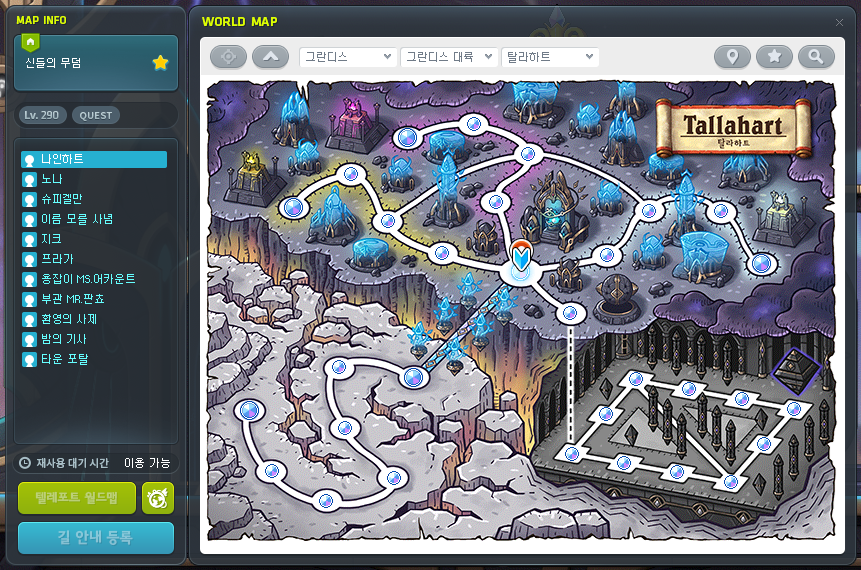
The Map Detailed Info area has been added.
- The Detailed Info area displays the details of the map selected on the World Map. The information displayed is as follows.
- Whether it is a town/instanced map or not.
- Minimum entry level and entry quest conditions.
- Star Force, Arcane Force, Authentic Force.
- NPC, monster appearance information.

The map functionality convenience has been improved.
- A feature has been added to view the map your character is currently located at.
- A feature has been added to view the higher stage map.
- The World Map stage display has been changed to display up to 4 stages, depending on the area.
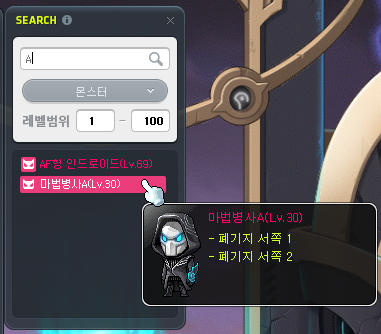
A filter feature has been added to the search window.
- A filter feature has been added to search by selecting only the desired content such as monsters, NPCs, or maps.
- When you select the monster category, you can specify the monster level range to search.
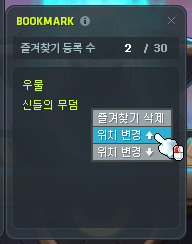
A Location Change feature has been added to the Bookmarks.
- You can change the order that maps are displayed in your Bookmarks list through the menu that appears when you right-click a map name.
The Smart Riding feature has been removed.
- The Smart Riding Feature can no longer be used.
- The following Smart Riding related quests have been removed.
- [Smart Riding] Delivering Manji’s Object
- [Smart Riding] Delivering Fairy Wing’s Homework
- [Smart Riding] Delivering Mrs. Ming Ming’s Lunchbox
- [Smart Riding] Help Me Out~!
- [Smart Riding] Social Entrepreneur Irvin’s Words
- [Auto Flight Riding] Irvin’s Customer Service Center
- [Smart Riding] Irvin, Your Success Story Starts Now!
- [Smart Riding] Accept Irvin’s Gift~!

The Teleport World Map will be changed into a basic feature in the World Map UI.
- The Teleport World Map can be used every 5 minutes without having to use a separate item.
- You can teleport to the map you want to move to by double-clicking the map on the World Map or by clicking the Teleport World Map button at the bottom of the Detailed Info window.
- The Teleport World Map’s cooldown is applied per character and is displayed above the Teleport World Map button.
※ Existing Teleport World Map items’ cooldowns will not be reflected in the cooldown displayed on the UI.
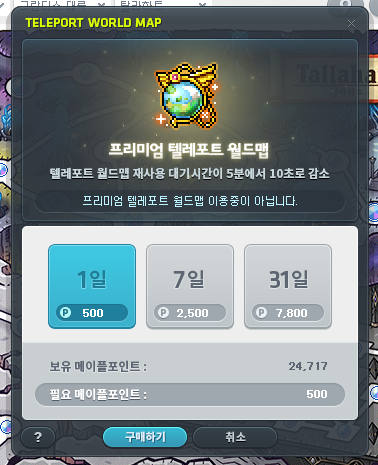
- The Premium Teleport World Map has been added that reduces the Teleport World Map’s cooldown.
- When a Premium Teleport World Map is applied, the Teleport World Map’s cooldown is changed to 10 seconds.
- You can purchase it using Maple Points by clicking the button on the right side of the Teleport World Map to apply it to that character. The prices are follows.
- 1 Day – 500 Maple Points
- 7 Days – 2,500 Maple Points
- 31 Days – 7,800 Maple Points
- The Premium Teleport World Map is applied instantly after purchase, and can be used for the selected period of time. If you purchase it while your current period has not ended yet, the time period will be extended by the selected period of time. The duration can be extended up to 1 year.
Minimap UI Reorganization
The Move to Town feature has been added.
- When you hover over the Move to Town button, the name of the nearest town that is designated as the return point will be displayed. When you click it, you will be moved to that town.
- This cannot be used in certain teleport restricted areas.
The Open Navigation UI feature has been added.
- When you click it, the Navigation UI will be opened.
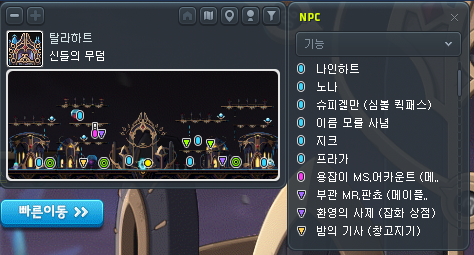
The View NPC Info feature has been improved.
- You can now sort the current map’s NPC list by function, name, or location.
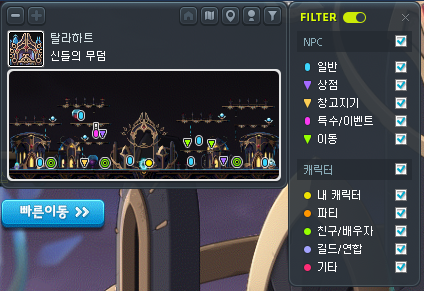
A filter feature has been added.
- You can now select and display the icons of the NPCs and characters that you want to see on the minimap. The categories you can select are as follows.
- NPCs: General, Shop, Storage, Special/Event, Teleport.
- Characters: my character, party, buddy/spouse, guild/alliance, etc.
Certain icons displayed on the minimap have been changed.
Movement Convenience Improvements
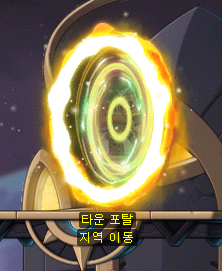
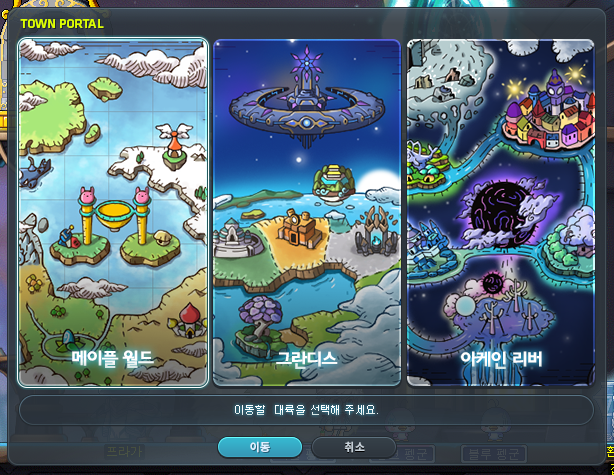
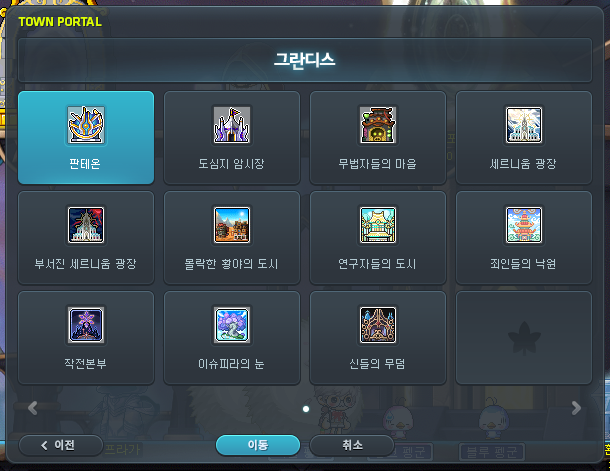
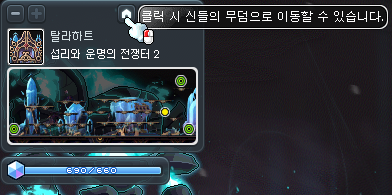
The Town Portal has been added.
- The Town Portal NPC has been added to major towns.
- When you press the NPC Chat key or press ↑ near the Town Portal NPC, the Town Portal UI will be opened.
- When the UI is opened, it will display the continents that you can teleport to. After selecting the continent, you can select the town you want to move to in that area.

The Navigation UI has been added.
- You can open the UI through the buttons on the minimap or World Map.
- The Navigation buff icon that was displayed previously will no longer be displayed.
- You can change the UI’s size through the Minimize/Maximize buttons at the top.
- The destination you are currently being navigated to will be displayed at the top. When you are being navigated for a quest, the related quest name will also be displayed.
- If the navigation is interrupted, you can click the Start Navigation button to be navigated to the previous destination again.
- An Instant Teleport feature has been added. When you use it, you will use the Teleport World Map to teleport to your destination.
Union Attacker Placement Mode Improvements
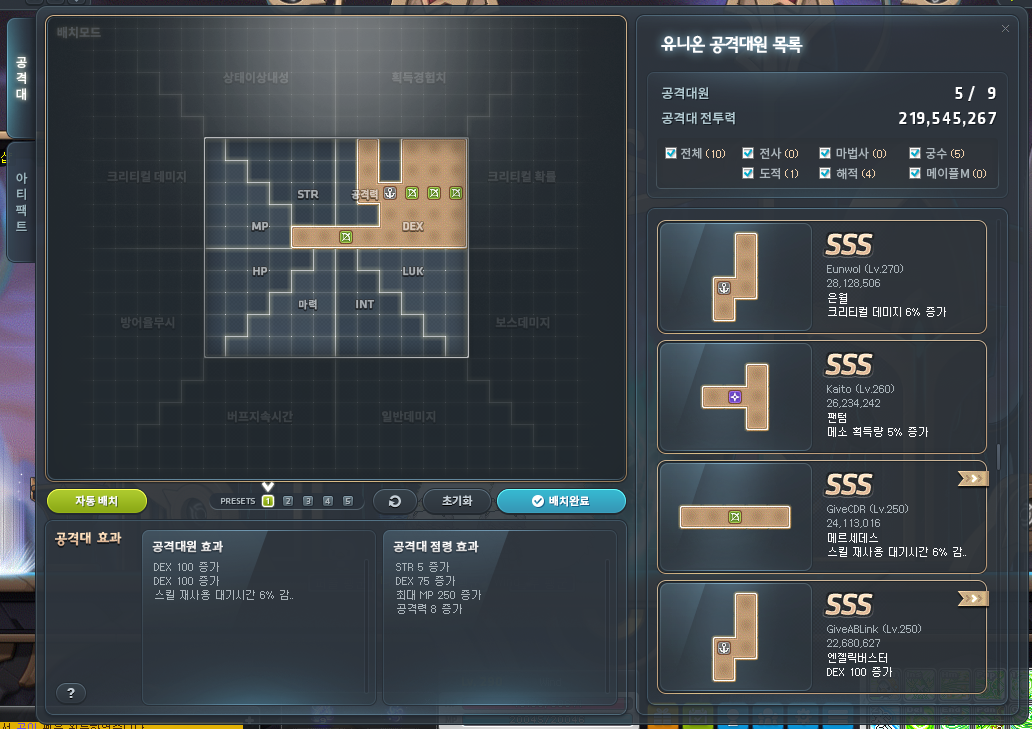
The Union Attacker Placement Mode UI has been improved.
- Certain changes have been made to the Union attacker placement mode’s structure.
- A filter feature has been added that separates the Union attacker list based on job branch.
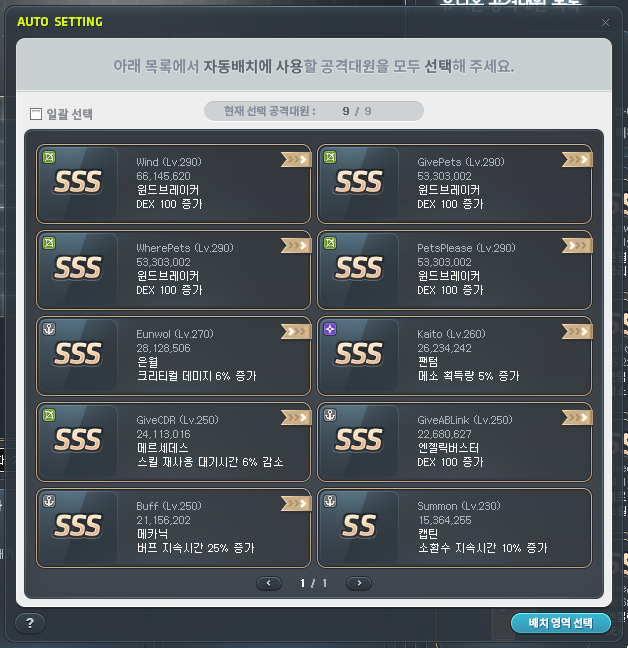
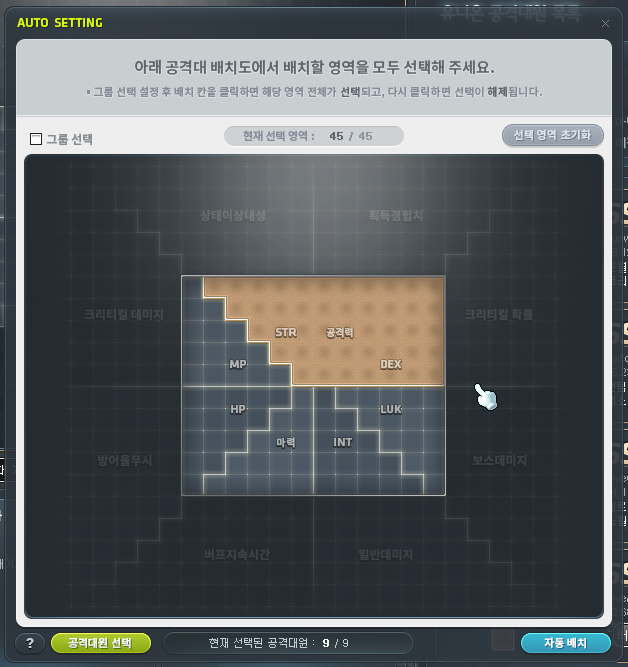
The Union Attacker Auto Placement feature has been added.
- You can use the Union Attacker Auto Placement feature by clicking the Auto Placement button on the Union attacker placement mode UI.
- After selecting the attacks you want to place and the placement area, running the Auto Placement will search for placement results that match those settings.
- If it successfully finds a placement result that matches the selected settings, you can immediately apply the result to the Union attacker placement mode.
Medal/Title Appearance Setting
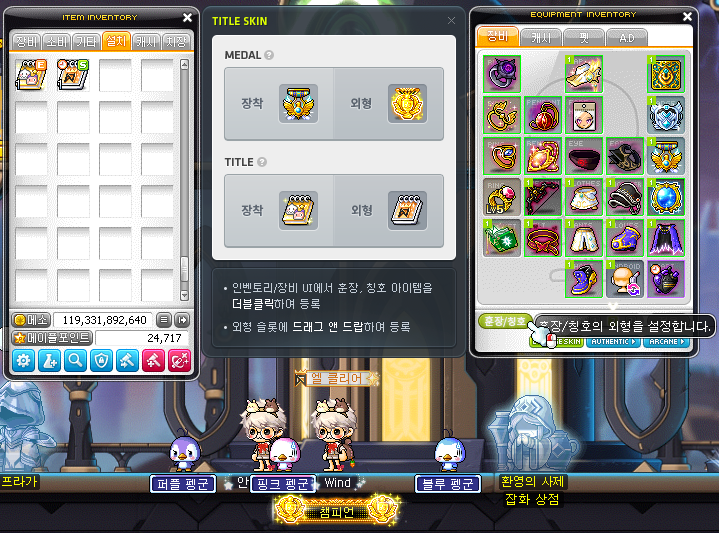
The Medal/Title Appearance Setting feature has been added.
- You can now set the Medal/Title appearance applied to a character separately from their currently equipped Medal/Title.
- When you click the Medal/Title button in the Character Equipment UI, the Medal/Title Appearance Setting UI will be displayed.
- While the Medal/Title Appearance Setting UI is open, equipping a Medal/Title item from the inventory or equipment UI will apply that item’s appearance to the character.
- However, if the character does not have a Medal/Title item currently equipped, the registered appearance will not be applied to the character.
- Regardless of the Equipment Preset, only one Medal appearance can be registered.
- When setting a Medal item applied with a Mysterious Anvil as the appearance, the Mysterious Anvil appearance will be applied.
- The stats of the currently equipped Medal/Title item will be applied to the character separately from the set apperance.
Guild Name Change
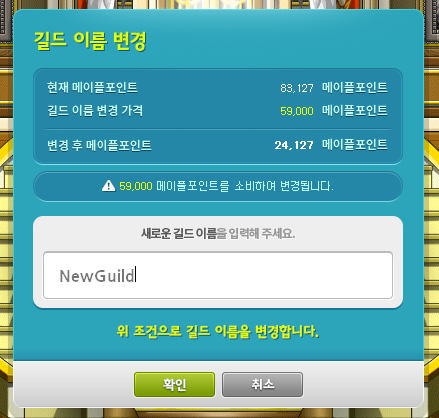
The Guild Name Change feature has been added.
- You can change your guild name through the NPC Heracle in the Guild Headquarters <Hall of Heroes>.
- However, only the Guild Master can change the guild name.
- When you change a guild name, 59,000 Maple Points will be consumed.
- When a guild name change is completed, that guild cannot change its name again for one week.
Cash
The MapleStory Boss Collection packages will be sold. You can see all of the outfits, hairs, and faces here.
- Sale Duration: December 19, 2024 after the maintenance ~ January 15, 2025 at 11:59 PM.
You can purchase the following items/packages.
- Boss Package (59,600 Cash)
- 4 Selective Boss Packages
- Boss Title Voucher (30% normal monster damage, 40% experience acquired, 30 attack/magic attack for 30 days)
- BOSS Package (59,600 Cash)
- 4 Selective Boss Packages
- BOSS Title Voucher (30% boss damage, 30% defense ignore, 30 attack/magic attack for 30 days)
- Boss Hair Coupon (5,500 Cash)
- Boss Face Coupon (3,500 Cash)
- Seperate boss packages (14,900 Cash)
Platinum Apples have been changed to be sold at all times.
The following items will no longer be sold in the Cash Shop.
- Teleport World Map
- Teleport Rock
- VIP Teleport Rock
- Premium VIP Teleport Rock
※ All previously purchased/acquired Teleport World Map items’ cooldowns will be changed to 5 minutes.
Starting from January 2025, the MVP Special Pack’s Teleport World Map Voucher will be changed into the Premium Teleport World Map [30 Days] Voucher.
Improvements
Quests
Fixed the dialogue in profession skill related quests that did not match the current specifications.
- [Profession Skill] Learning Profession Skills
- [Profession Skill] Stachel’s Herbalism Class
- [Profession Skill] Novum’s Mining Class
Certain quest NPCs in Lion King’s Castle have been changed.
- You can complete the ‘King’s Majesty’ quest through the Broken Stone Tablet.
- You can complete the ‘Ifia’s Treasure’ quest through Cecilia.

A quest has been added to Lion King’s Castle.
- [Lion King’s Castle] At Last, Forever
Fixed an issue where the Arcana daily quest’s content were not visible due to the NPC image.
Items
It has been improved so that the Flame monsters that appear when you use VIP Boosters are now included in the number of defeated monsters within your level range for the Maple Daily Gift, gathering/mining requirement conditions, Union Artifact weekly missions, guild weekly Hunting Points, and achievements.
You can now use Stamp items on Genesis Lazuli/Genesis Lapis that have transferred 2 line potential or additional potential.
When sitting on the Yeti Snowball Fight Chair or Pink Bean Snowball Fight Chair, the Christmas version of the Cernium BGM has been added to the list of background music that plays.
UI
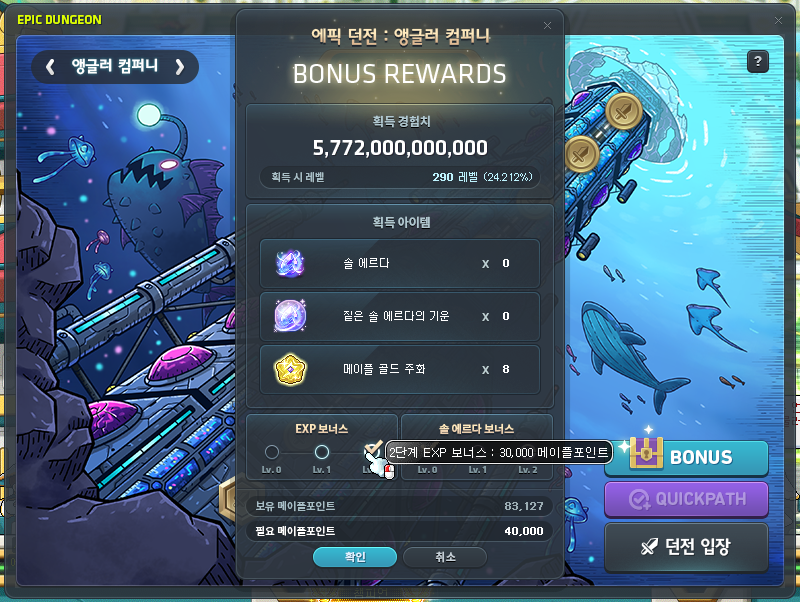
The Epic Dungeon Reward and Bonus Reward UI will now display your current Maple Points. When you hover over the Bonus Rewards selection button, it will now display the required Maple Points.
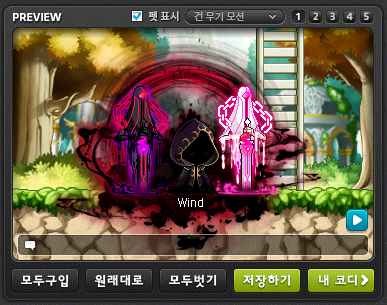
The Maple Auction and Cash Shop previews have been improved.
- You can now check the equipped item images for skill attack actions in the preview. The action will be displayed based on the equipped normal weapon, and the attack action cannot be played if you have no weapon equipped, are jumping, using a ladder, chair, or riding.
- You can check the images for Cash weapons that cannot be equipped on your currently equipped normal weapon. The attack image will be based on the Cash weapon.
- When you have a Claw, Dual Bowguns, Hand Cannon, Soul Shooter, or Breath Shooter equipped and use the attack key, the basic attack action will now match the equipped weapon. When a skill is used with the attack key, the basic attack action will be displayed instead of the skill action.
A Blacklist icon will now be displayed on the names of characters or guilds registered in the Blacklist.

The Character Name Change UI’s design has been changed.

Certain system confirmation windows’ designs have been changed. (e.g. dropping mesos)
The buttons at the bottom of Evan and Zero’s skill books have been changed.
The Skill Alarm’s display location has been changed. Up to 3 alerts can now be displayed at a time.
It has been improved so that when you double click a monster image in Monster Collection, the area where that monster is located will be displayed on the World Map.
When you are choosing to return to the Underground Culvert Entrance through the NPC Daedal or the exit portal in ‘Path from the Altar’, it will now ask for confirmation if you want to leave or not.
DirectX 11
When an error occurs while DirectX 11 is applied, the confirmation window has been changed to include the graphics driver’s version and date. Updating to the latest version of the graphics driver may resolve the issue.
While DirectX 11 is applied, fixed an issue where the game screen appeared awkwardly in environments using notebooks or multiple monitors.
Achievements
Certain achievements related to defeating bosses have been changed to be achieved by dealing the most damage to the boss over all phases. For the ones with a ‘last hit’ condition, they have been changed to be achieved based on the boss monster’s final phase.
- [Black Mage] Final Winner
- [Black Mage] End of Revenge
- [Black Mage] Taste of a Transcendent
- [Kaling] Monster Seal: Complete
- [Kaling] The Bell That Washes Away Sins
The following achievements’ conditions have been changed to be more clear.
- [Lucid] The Queen’s True Education
- [Will] Let’s Kill Will. Will is Our Enemy.
- [Suu] I Want to See Your Smiling Face One More Time
Shortcut Key Setting System Improvements
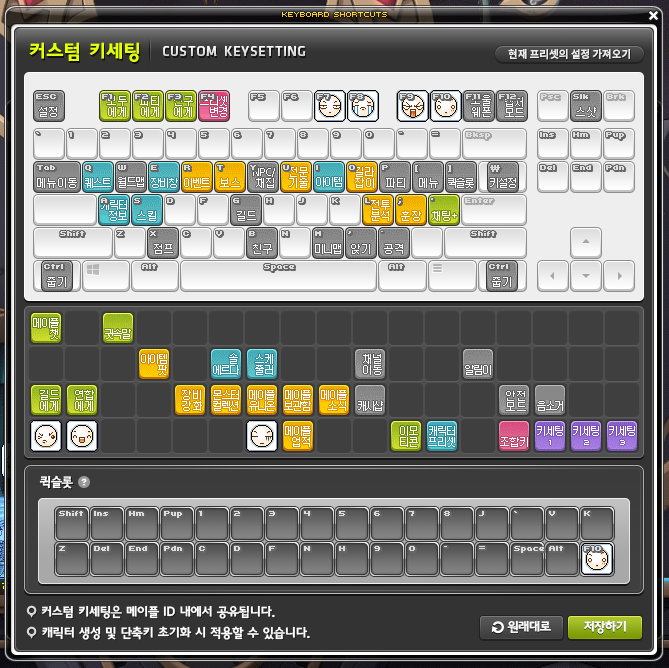
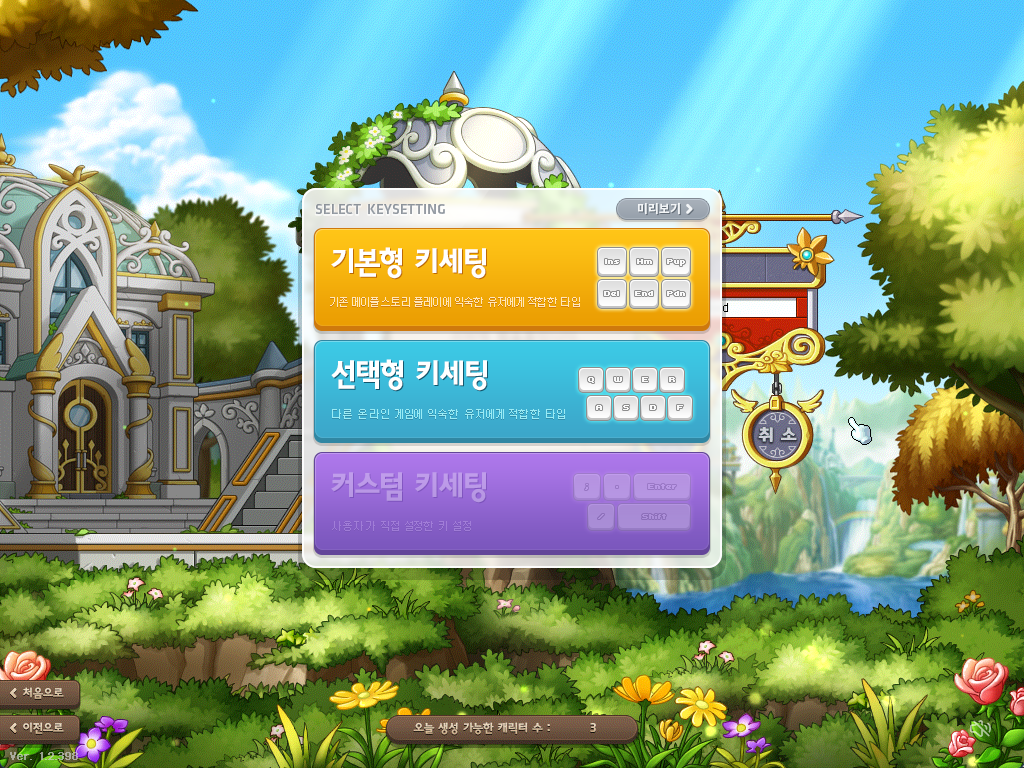
The Custom Key Settings feature has been added.
- You can now set the default layouts for shortcut keys and quick slots. This information is saved for the Maple ID and can be applied when creating a character and resetting shortcut keys.
※ However, for certain jobs where setting shortcut keys is not allowed in the tutorial maps, the Custom Key setting cannot be selected when creating a character. You can apply it from the Shortcut Key Settings UI’s reset menu after the tutorial ends.
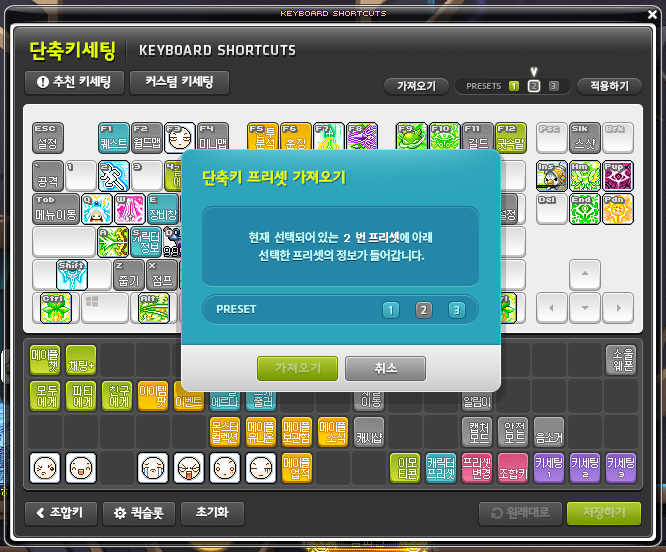
The Preset Import feature has been added.
- You can now copy the set information of another shortcut key preset to the currently selected shortcut key preset.
It has been improved so that the Shortcut Key Setting UI now displays tooltips for the corresponding fuctions when hovering over certain buttons.
Login Process Improvements
It has been improved so that when you run the game launcher and log in, it will now automatically log in with the Maple ID you most recently logged in on.
When you run the game launcher and log in, a ‘Log In to Another Maple ID’ button will be added to the Server Select screen. You can select another Maple ID linked to your Nexon ID to connect to through this button.
※ However, if you have only 1 Maple ID linked to your Nexon ID, the ‘Log In to Another Maple ID’ button will not be displayed.
Coin Exchange Improvements
The Coin Exchange’s trade restriction time has been changed from 9:50 AM~10:10 AM to 9:55 AM~10:05 AM.
Daily Gift
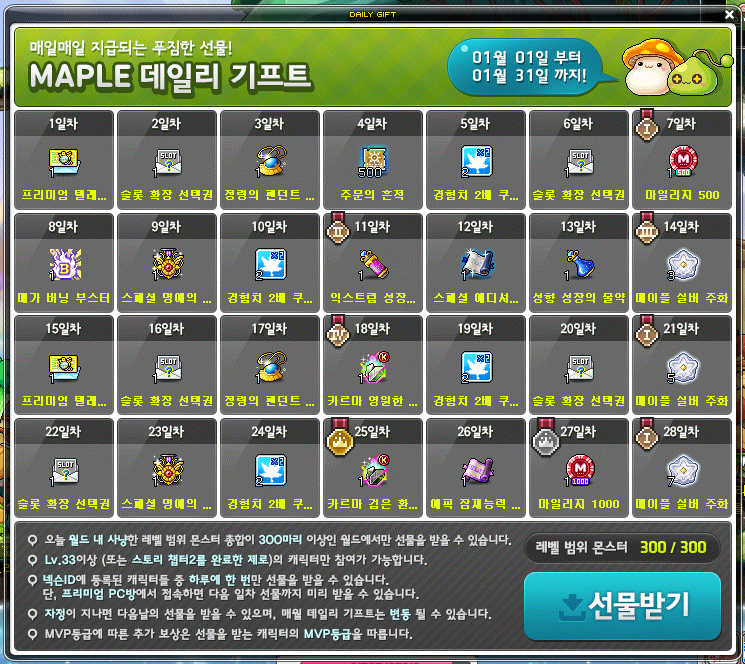
Starting from January 2025, the Maple Daily Gift’s 1st and 15th day’s completion rewards will be changed as follows.
- Day 1: Premium Teleport World Map [1 Day] Voucher
- Day 15: Premium Teleport World Map [1 Day] Voucher
Open API Additional Features
When searching for character appearance images in the MapleStory Open API, a feature to search for more diverse actions, emotes, and weapon motions than before has been added.
※ The Open API update will be applied after the MapleStory Open API service maintenance (12/19).
Error Fixes
Monsters
Limbo (Normal/Hard)
- Fixed an issue in Phase 2’s Space Existing on the Other Side of Truth where the Shadow of the Source sometimes did not move.
- Fixed an issue in Phase 3 where sometimes you would not be inflicted with status effects even if you were hit by the grasping hand or devourers.
Quests
Fixed an error where the background music was not played during the ‘[Shangri-La] Collapsing Shangri-La 2’ quest.
Fixed an issue when using the Quest UI’s navigation feature for the ‘[Morass] King’s Rage’ quest where it included Mirror Touched Sea 3 and 4 in the navigation.
Items
Fixed an issue where if you were continuously hit by a monster, the pet’s registered potion usage count was limited.
Fixed an issue where Cash items could be used in non-combat stages in Azmoth Canyon.
UI
Fixed certain awkward issues when using shortcut keys while the Guild UI was open.
Fixed an issue in the Symbol Quick Path UI where hovering over the Tallahart area even when it was not unlocked would display the corresponding tooltip.
Fixed an issue in the Character Select window where characters that did not login after Combat Power was added were displayed with a negative number for Combat Power.
Fixed an issue in Dimensional Library where sometimes you could not enter Maple Chronicle even if no other actions were being performed.
Fixed a problem where after a profession skill crafting completed, the completion window would not close.
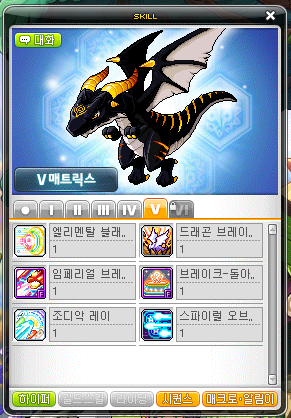
Fixed an issue with Evan and Zero’s skill books where hovering over the V Matrix and HEXA Matrix did not display their descriptions.
Fixed an error where the 10 minute cooldown for uploading and changing a Guid Mark was not applied.
Fixed an issue in the Shortcut Key Settings UI where if the quickslots were changed by resetting them, the ‘Restore Original’ and ‘Save’ buttons were not activated.
Achievements
Fixed an issue where daily quest related achievements did not progress when completing Tallahart daily quests.
- [Daily Quest] The Weather Was Nice so I Daily Quested
- [Daily Quest] The Weather Was Bad so I Daily Quested
- [Daily Quest] The Weather Was Just Right so I Daily Quested
If you completed certain Azmoth Canyon achievements on October 17, 2024 by clearing Azmoth Guardians with a different difficulty level than the conditions, they will be reset.
- [Azmoth Canyon] Just an Incomplete Being
- [Azmoth Canyon] Wanderer of Hell!
- [Azmoth Canyon] It’s Too Hot, Stop…
Skill Sequence

The Skill Sequence system has been added.
- You can open the Skill Sequence UI by clicking the ‘Sequence’ button in the skillbook.
- You can use multiple skills in quick succession with a single button press using the Skill Sequence.
- You can use the Skill Sequence by registering skills in your desired order. You can save multiple skill combinations and use them in different situations.
- You can see the list of registered skills by pressing the Skill Sequence Only key and the Skill Sequence shortcut key at the same time.
- You cannot use the Skill Sequence in areas where you cannot use skills.


Here’s some more miscellaneous stuff that wasn’t mentioned in the patch notes.
- You can change the layout of the Skill Sequence UI by setting the number of rows (up to 10). Each row will be its own Skill Sequence with its own hotkey. You can put the same skill on multiple rows.
- You can change the name of each Skill Sequence. This will also change the hotkey name.
- The Skill Sequence key (when placed on a hotkey) will show the longest remaining cooldown of the skills registered on that Sequence.
- The skills that can be placed on a Skill Sequence are pre-determined for each class.
- You must put a minimum of 3 skills in a Skill Sequence.
- When you use a Skill Sequence, it will use all registered skills except for those that are still on cooldown or those that you have not met the usage conditions for. (i.e. it will skip those skills and still use the rest)
- You can turn on the Sequence Alert setting. When it is on, every time you try to use a Skill Sequence, the skill icons will be displayed at the bottom right corner of the screen. This alert will also notify you if a skill cannot be used to do being on cooldown, or lack of MP/Demon Force/HP/gauge (this will also be written in the chat as text).
- You can also press Skill Sequence Only key + a Skill Sequence key or hover over the hotkey to pop up a UI of the registered skills. This will stay on screen for as long as you hold the Skill Sequence Only key down and can be moved to anywhere on the screen.
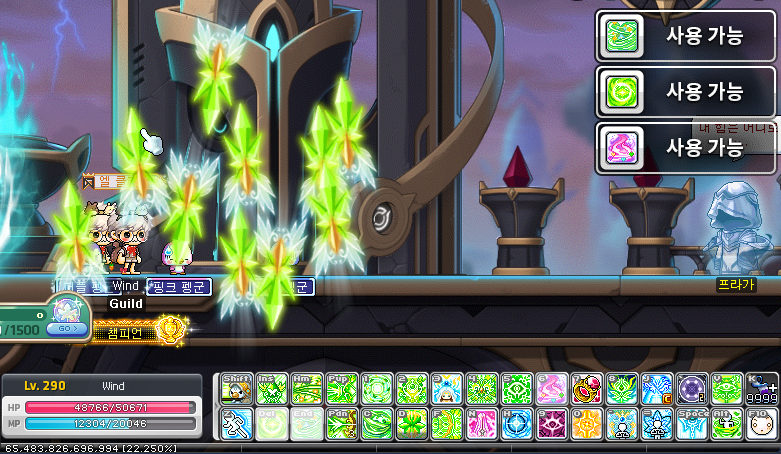
I recorded a short video of how it works. It’s pretty straightforward: put the buffs you want to use in the order you want on a Skill Sequence, put the Skill Sequence on a hotkey, then use it!
Skill Changes
Common
- The following skills’ skill descriptions have been changed.
- Hero: Final Attack, Advanced Final Attack
- Paladin: Final Attack, Sanctuary
- Dark Knight: Final Attack, Beholder Shock, Beholder Shock II, Beholder’s Revenge
- Archmage (F/P): Ignite, Poison Region, Meteor, Ifrit, Megiddo Flame
- Archmage (I/L): Elquines
- Bishop: Genesis, Bahamut, Heaven’s Door, Triumph Feather VI
- Bowmaster: Quiver Cartridge, Phoenix
- Marksman: Final Attack: Crossbow, Split Arrow
- Pathfinder: Raven, Combo Assault (Discharge/Blast/Transition), Ancient Astra (Discharge/Blast/Transition)
- Night Lord: Dark Flare, Showdown Challenge, Sudden Raid, Four Seasons
- Shadower: Dark Flare, Cruel Stab, Sudden Raid, Veil of Shadows
- Dual Blade: Blade Fury, Sudden Raid, Hidden Blade
- Captain: Head Shot, Fusillade, Sign of Bombard
- Cannon Shooter: Monkey Furious, Support Monkey Twins, Rolling Cannon Rainbow
- Mikhail: Final Attack, Advanced Final Attack, Soul Majesty
- Soul Master: Cosmic Burst
- Flame Wizard: Inferno Rise, Phoenix Drive, Blzing Extinction VI
- Wind Breaker: Monsoon
- Night Walker: Element: Darkness, Darkness Omen
- Aran: Final Attack, Adrenaline Maximum, Advanced Final Attack
- Evan: Dragon Sparking, Circle of Wind, Advanced Dragon Sparking, Dive of Thunder
- Luminous: Baptism of Light and Darkness, Endless Darkness
- Mercedes: Final Attack: Dual Bowgun, Strike Dual Shot, Unicorn Spike, Gust Dive, Elemental Knights, Advanced Strike Dualshot, Advanced Final Attack
- Phantom: Noire Carte, Rose Carte Finale
- Eunwol: Soul Splitter
- Blaster: Revolving Cannon Mastery, Hammer Smash, Shock Wave Punch, Hurricane Mixer, Punch – Reinforce
- Battle Mage: Dark Genesis
- Wild Hunter: Summon Jaguar, Final Attack, Assistant Hunting Unit, Drill Container, Advanced Final Attack
- Xenon: Virtual Projection, Blade Dancing, Instant Shirk, Meltdown Explosion, Hologram Gravity: Fusion
- Mechanic: Robot Launcher: RM7, Magnetic Field, Robot Factory: RM1, Distortion Field
- Demon Slayer: Devil Cry, Metamorphosis, Cerberus, Demon Explosion VI
- Demon Avenger: Surpass Limit, Enhanced Exceed, Thousand Swords
- Kaiser: Wing Beat, Petrified, Infernal breath
- Kain: Strike Arrow, Strike Arrow II, [Possess] Strike Arrow, Scattering Shot, [Possess] Scattering Shot, Dragon Fang, Strike Arrow III, Shaft Break, [Possess] Shaft Break, [Execute] Tearing Knife, [Execute] Phantom Blade, Remain Incense, Death Blessing, Falling Dust, [Possess] Falling Dust, [Execute] Chain Sickle, [Execute] Poison Needle, Sneaky Sniping, [Possess/Execute] Sneaky Sniping, Chasing Shot, Incarnation
- Cadena: Summon Cutting Scimitar, Summon Scratching Claw, Summon Throwing Wing Dagger, Summon Shooting Shotgun, Summon Slashing Knife, Summon Releasing Bomb, Summon Beating Needle Bat, Summon Striking Brick, Chain Arts: Crush, Professional Agent, Chain Arts: Takedown Enhancement
- Angelic Buster: Primal Roar, Super Nova
- Zero: Advanced Power Stomp, Spin Cutter/Throwing Weapon Enhancement
- Kinesis: Telekinesis, Ultimate – Train, Ultimate – B.P.M
- Adele: Shard, Aether Crystal, Impale, Resonance, Creation, Territory, Gathering, Order, Feather, Nobility, Grave, Tread, Blossom, Dike, Lef Hero’s Will, Marker,Ruin, Infinite, Restore, Storm, Divide VI
- Illium: Crystal Skill: Deus, Longinus Zone
- Khali: Resonate, Deceiving Blade, Hex: Chakram Sweep, Hex: Chakram Fury, Death Blossom
- Ark: Ominous Nightmare, Ominous Dream, Vivid Nightmare, Vivid Dream, Vengeful Hate, Endless Nightmare, Endless Dream, Blissful Restraint, Battle Arts – Reinforce, Battle Arts – Ignore Guard, Battle Arts – Boss Killer, Endless Agony
- Lara: Wakeup Call, Absorption: River Puddle Douse, Absorption: Fierce Winds, Absorption: Sunlit Grain, Dragon Vein Eruption VI
- Hoyoung: Talisman: Clone, Talisman: Seeking Ghost Flame, Scroll: Star Vortex, Scroll: Butterfly Dream, Heaven: Consuming Flames VI, Earth: Stone Tremor VI, Heaven: Iron Fan Gale VI, Earth: Ground Shattering Wave VI
 Evolve:
- The attack range has been increased by about 30%.
Hero
 Final Attack:
- This skill has been changed to prioritize activating on the boss monster with the highest max HP.
 Advanced Final Attack:
- This skill has been changed to prioritize activating on the boss monster with the highest max HP.
 Valhalla:
- Fixed an issue where all of the sword strikes played the same sound.
Paladin
 Falling Justice:
- The damage has been decreased from 1560% to 1491%.
- This skill is now affected by cooldown reduction effects.
Dark Knight
- Final Attack:
- This skill has been changed so that it activates when Dark Spear hits an enemy.
 Beholder’s Revenge:
- This skill will now be displayed in the Battle Analysis system.
Archmage (F/P)
 Meteor:
- The point at which you can use Teleport after using this skill has been decreased.
Archmage (I/L)
 Blizzard:
- The point at which you can use Teleport after using this skill has been decreased.
 Blizzard VI:
- The point at which you can use Teleport after using this skill has been decreased.
- The action delay has been decreased by about 13%.
Bishop
 Genesis:
- The point at which you can use Teleport after using this skill has been decreased.
Bowmaster
 Phoenix:
- The attack mechanism has been changed.
Marksman
- Final Attack: Crossbow:
- This skill has been changed so that it activates at a certain percentage whenever your own directly attacking skills hit an enemy.
 Freezer:
- The attack mechanism has been changed.
Pathfinder
 Raven:
- The attack mechanism has been changed.
- The attack interval has been increased.
 Relic Charge II:
- The Relic Gauge charged when the Raven attacks has been increased from 10 to 30.
 Curse Transition:
- The debuff effect has been fixed.
 Ancient Astra (Blast):
- This skill has been changed so that you can adjust the firing angle when you fire the first shot.
Night Lord
 Dark Flare:
- The skill duration will now be displayed as a buff icon.
- You can now right-click the buff icon to cancel the skill.
Shadower
 Dark Flare:
- The skill duration will now be displayed as a buff icon.
- You can now right-click the buff icon to cancel the skill.
 Veil of Shadows:
- The skill duration will now be displayed as a buff icon.
- You can now right-click the buff icon to cancel the skill.
Dual Blade
 Sudden Raid:
- The feature where Final Cut’s cooldown was decreased by a certain percentage when this skill was used has been removed.
 Final Cut:
- The cooldown has been decreased from 90 seconds to 63 seconds.
 Haunted Edge:
- Haunted Edge – Sura’s attack range has been increased by about 8%.
Captain

 Continual Aiming:
- This skill has been changed so that the special bullet is fired from a slightly closer location to the character.
- The action delay has been decreased by about 13%.
- The range has been increased by about 25%.
- The cast effect has been changed.
- The hit effect has been changed.
- The homing effect has been changed.
 Battleship Nautilus:
- The skill description has been changed.
 Strange Bomb:
- This skill can now be used in the air.
Soul Master
 Soul Blessing III:
- The final damage boost when Cosmic Orbs are created has been increased from 10% to 12%.
 Sword Expert:
- The critical damage boost has been increased from 15% to 20%.
 Cosmos:
- The damage has been increased from 1000% to 1100% (at level 25).
 Soluna Power:
- Fixed an issue where MP was not consumed when this skill activated.
Flame Wizard
- The Command Lock feature has been added to the following skills. When you use the Command Lock, even if you use the skill with the down arrow key, the opposite mode’s skills will not be activated.
- Blazing Extinction, Inferno Rise, Flame Discharge, Blazing Extinction VI
- The Command Lock feature has been added to Spirit of Flame. When you use the Command Lock, using the skill key will summon the Flame Fox and using the skill with the down arrow key will summon the Fire Lion.
 Infinity Flame Circle:
- When this skill is used while Flame Fox is summoned, the number of Phoenix Feathers consumed per second is doubled and the skill’s final damage is increased by 100%.
Night Walker
 Element: Darkness:
- The Mark of Darkness’ duration has been increased from 5 seconds to 15 seconds.
 Darkness Omen:
- The damage has been decreased from 500% to 370%.
- The attack duration has been increased from 5 seconds to 7 seconds.
- The number of hits has been increased from 1 to 6.
- The cooldown has been increased from 20 seconds to 60 seconds.
- The feature where if Dark element attacks hit an enemy, the cooldown would be decreased has been removed.
- The maximum number of Darkness Omens that can be summoned has been decreased from 2 to 1.
- This skill has been improved so that the duration is displayed as a buff icon.
- Fixed an issue where if summon duration increasing effects were applied, the skill effect appeared awkwardly.
 While Shadow Bats is applied, this skill will now summon a weakened bat swarm for 60 seconds that deals 300% damage 2 times on up to 6 enemies every 1.5 seconds.
Aran
 Frozen Ground:
- The skill effect has been changed.
 Adrenaline Boost: Ice Wave:
- It has been improved so that you do not become in-combat even when this skill is activated.
- When you have not learned Adrenaline Maximum, the skill name will be changed to Adrenaline Boost: Ice Wave.
- When you have learned Adrenaline Maximum, the skill name will be changed to Adrenaline Maximum: Ice Wave.
 Adrenaline Boost Activate:
- When Adrenaline Boost and Adrenaline Maximum are on cooldown, the cooldown displayed on the quick slot will be changed to display Adrenaline Boost’s cooldown.
 Golden Flash:
- The skill name has been changed to Adrenaline Maximum: Golden Flash.
- The reactivation cooldown has been decreased from 1.2 seconds to 0.8 seconds.
 Beyonder – Reinforce:
- The skill icon has been changed.
 Beyonder – Bonus Attack:
- The skill icon has been changed.
 Beyonder – Ignore Guard:
- The skill icon has been changed.
Evan

 Swift – Return!:
- The effect will be changed after learning Dragon Swift VI.
 Advanced Dragon Sparking:
- This skill has been changed to require level 10 Dragon Sparking.
 Dive of Thunder:
- The frequency of the system message displayed when Electric Spheres could not be created has been decreased.
Luminous
 Morning Starfall:
- This skill has been removed.

- NEW!


 Twilight Nova:
[Master Level: 30]
Create an explosion with the power of light and darkness. This skill is not affected by Equilibrium’s effect of not applying cooldowns. In addition, permanently increases final damage and boss damage.- [Level 30]
Consumes 80 MP. Attacks up to 8 enemies.
Sunfire: 1200% damage 7 times.
Eclipse: 1200% damage 7 times.
Equilibrium: Activate 3 explosions that deal 450% damage 6 times.
Cooldown: 15 seconds.
[Passive Effect: 40% final damage, 15% boss damage]
- [Level 30]
- Morning Starfall V Cores have been changed into Twilight Nova V Cores.
Mercedes
 Strike Dualshot:
- The feature where enemies hit had a chance to be stunned has been removed.
- The feature where final damage was increased on stunned enemies has been removed.
 Lightning Edge:
- The passive effect’s damage boost to Gust Dive has been increased from 237%p to 245%p.
 Advanced Strike Dualshot:
- The feature where enemies hit had a chance to be stunned has been removed.
- The feature where final damage was increased on stunned enemies has been removed.
Phantom
- Joker:
- The skill cast effect and hit effect have been changed.
Eunwol
 Spirit Frenzy:
- The duration has been increased from 45 seconds to 60 seconds.
- The feature where the duration increased by 1 second for every enemy defeated by Spirit Frenzy has been removed
Blaster
 Gauntlet Mastery:
- The final damage boost has been removed.
 Hammer Smash:
- The feature where a shockwave was installed if you used this skill while Charging has been removed.
- The damage has been decreased from 200% to 150%.
- The final damage boost debuff duration has been increased from 30 seconds to 60 seconds.
 Shock Wave Punch:
- The shockwave has been removed.
- The damage has been decreased from 265% to 180%.
- The increased damage when attacking normal monsters has been increased from 85% to 210%.
 Hurricane Mixer:
- The passive effect’s Hammer Smash damage boost has been decreased from 195%p to 150%p.
 Gauntlet Expert:
- The critical damage boost has been increased from 15% to 20%.
- The boss damage boost has been increased from 15% to 20%.
 Punch – Shock Wave Bonus Attack:
- This skill has been removed.
- NEW!
 Punch – Bonus Attack:
[Required Level: 140]
Hammer Smash and Shock Wave Punch’s number of hits is increased by 2.  Bunker Buster:
- The damage has been increased from 400% to 500% (at level 25).
 Vulcan Punch:
- The first attack’s damage has been increased from 1000% to 1200% (at level 25).
- The damage has been increased from 850% to 1000% (at level 25).
Battle Mage
 Dark Lightning:
- The Black Mark’s duration has been increased from 15 seconds to 30 seconds.
 Abyssal Lightning:
- The Black Mark’s number of attack activations has been increased from 30 to 45.
Xenon
 Pinpoint Rocket:
- This skill has been removed.

- NEW!
 Rocket System:
[Master Level: 5]
When your own attacking skills hit an enemy, fire rockets that enemies within range.
When activated, there is a short fire preparation time required. You will not take damage if it hits an enemy using Damage Reflect.
On/Off skill.
Level 5 of this skill is required to learn the 2nd job skill ‘Rocket System 1st Enhancement’.- [Level 5]
When your own directly attacking skills hit an enemy, fire 4 rockets that deal 50% damage.
When attacking normal monsters, damage is increased by 250%p.
Reactivation cooldown: 2 seconds.
- [Level 5]
 Pinpoint Rocket 1st Enhancement:
- This skill has been removed.
- NEW!
 Rocket System 1st Enhancement:
[Master Level: 4]
Rocket System is enhanced.
Required Skill: Level 5 Rocket System.
Level 4 of this skill is required to learn the 3rd job skill ‘Rocket System 2nd Enhancement’.- [Level 4]
Rocket System’s damage is increased by 40%p.
- [Level 4]
 Aegis System:
- This skill has been removed.
 Pinpoint Rocket 2nd Enhancement:
- This skill has been removed.
- NEW!
 Rocket System 2nd Enhancement:
[Master Level: 14]
Rocket System is further enhanced.
Required Skill: Level 4 Rocket System 1st Enhancement.
Level 14 of this skill is required to learn the 4th job skill ‘Rocket System Final Enhancement’.- [Level 14]
Rocket System’s damage is increased by 85%p.
- [Level 14]
 Pinpoint Rocket Final Enhancement:
- This skill has been removed.
- NEW!
 Rocket System Final Enhancement:
[Master Level: 10]
Rocket System’s performance is maximized.
Required Skill: Level 14 Rocket System 2nd Enhancement.- [Level 10]
Rocket System’s damage is increased by 60%p.
- [Level 10]
- Pinpoint Rocket V Cores have been changed into Rocket System V Cores.
- Aegis System V Cores have been removed. Existing Enhancement Cores that have Aegis System as a skill will have them replaced with the following skills in the given order.
- Rocket System
- Fuzzy Lop Masquerade
- Hologram Gravity
Kaiser
 Petrified:
- The number of hits has been increased from 1 to 3.
- This skill now deals 50% increased damage when attacking normal monsters.
 Infernal Breath:
- The action delay has been decreased by about 29%.
- The damage has been increased from 300% to 970%.
- The number of hits has been increased from 8 to 14.
- The Flames’ damage has been increased from 200% to 240%.
 Infernal Breath – Reinforce:
- This skill has been improved so that Infernal Breath’s Flames also receive the effects of Infernal Breath – Reinforce.
- Infernal Breath – Persist:
- This skill has been removed.
 Infernal Breath – Tile Persist:
- This skill has been removed.
- NEW!
 Infernal Breath – Ignore Guard:
[Required Level: 165]
Infernal Breath’s defense ignored is increased by 20%. - NEW!
 Infernal Breath – Boss Killer:
[Required Level: 180]
Infernal Breath’s boss damage is increased by 10%.
Kain
 Death Blessing:
- Death Blessing’s skill name during Annihilation’s Malice Domain will be changed to Annihilation: Death Blessing.
Cadena
 Chain Arts: Takedown:
- This skill now instantly activates the strike if you reach the maximum number of Weapon Variety additional hits within 5 seconds.
- The strike’s maximum number of enemies hit has been increased from 1 to 10.
 Summon: Beating Needle Bat:
- The 1st attack’s damage has been decreased from 495% to 330%.
- The 1st attack’s number of hits has been increased from 8 to 12.
- The 2nd attack’s damage has been decreased from 640% to 443%.
- The 2nd attack’s number of hits has been increased from 9 to 13.
- The 3rd attack’s damage has been decreased from 915% to 653%.
- The 3rd attack’s number of hits has been increased from 10 to 14.
Kinesis
 Telekinesis:
- This skill has been changed so that it is activated by all Ultimate skills except for Ultimate – B.P.M.
- This skill has been changed so that 1 object will be created regardlesss of the number of enemies hit. number of enemies hit when a nearby object is created
- When an object is created it will now prioritize attacking the boss monster with the highest maximum HP that was hit.
Adele
 Resonance:
- The damage has been decreased from 502% to 105%.
 Ascent:
- The damage boost to Resonance has been decreased from 125%p to 115%p.
 Perfection:
- The damage boost to Resonance has been decreased from 265%p to 170%p.
 Territory:
- This skill has been improved so that if it is affected by a cooldown reset, it cannot be re-installed for a certain period of time.
- This skill has been improved so that the duration is displayed as a buff icon.
 Restore:
- Sol Janus: Dawn will no longer be activated by HEXA Enhancement Core boosted Restore.
Illium
- Primal Protection will no longer be affected by skill effect transparency options.
- The Command Lock feature has been added to Soul of Crystal. When you use the Command Lock, using the skill key without any directional keys will consume all of your Crystal Fragments and install all Soul Crystals at once.
- Unlimited Crystals’ Crystalline Crystals’ enemy re-search range has been increased by about 178%.
Ark
 Vengeful Hate:
- The attack range has been increased by 3000%.
 Grievous Wound VI:
- This skill now passively increases Vengeful Hate VI’s damage by 60%p.
Skill Error Fixes
Common
- Fixed an issue where only one of the debuffs from Monkey Furious, Flash Bang, and Unicorn Spike was applied.
- Fixed an issue where certain skills that were not preserved when clearing an Azmoth Canyon stage were preserved until changing maps. The changed skills are as follows.
- Archmage (I/L): Thunder Sphere
- Bowmaster: Arrow Platter Install Mode
- Pathfinder: Ancient Astra (Transition)
- Phantom: Shroud
- Fixed an issue where certain 6th skills were not displayed in the skillbook UI after resetting 1st~4th job skill levels.
Archmage (I/L)
- Freezing Effect:
- Fixed an issue where the debuff effect remained even after all of the Freeze stacks were reduced.
- Thunder Sphere:
- Fixed an issue where Thunder Sphere’s hit effect was displayed in an awkward location to other users.
Bishop
- Fixed an issue where Heaven’s Door’s cast effect was displayed awkwardly.
Bowmaster
- Fixed an issue where Flash Mirage’s arrows fired by the afterimage applied a wider search range than intended due to an error in monster search logic. After this change, the monster search range has been decreased by 37.5%.
Dual Blade
- Flash Bang’s debuff has been changed to apply to all Dual Bladers instead of only yourself.
Viper
- Fixed an issue where Serpent Stone’s cast effect was sometimes displayed at an awkward time.
Captain
- Fixed an issue where Summon Crew’s summons would not start attacking even when you used Fusillade.
- Fixed an issue where Assemble Crew’s summons would not start attacking even when you used Fusillade.
- Fixed an issue where bullets’ attack was not applied to Rapid Fire VI’s Wild Fire Mode.
- Fixed an issue where Battleship Bomber VI would not end if the activation conditions were not met.
Cannon Shooter
- Monkey Furious:
- Fixed an issue where Final Attack sometimes did not activate.
- Fixed an issue where the damage over time was applied individually.
- The debuff has been changed to apply to all Cannon Shooters instead of only yourself.
- Fixed an issue where casting Rolling Cannon Rainbow would sometimes not play the skill voice.
Soul Master
- Fixed an issue where Cosmic Burst’s cast effect was displayed awkwardly to other characters.
- Fixed an issue where Solunar Slash’s hit effect was displayed awkwardly.
Night Walker
- Fixed an issue where Element: Darkness’ Mark of Darkness effect was sometimes displayed awkwardly.
- Fixed an issue where Darkness Omen’s skill effect was displayed awkwardly to other characters.
- Fixed an issue where certain skill effects disappeared awkwardly when Dominion ended.
Aran
- Fixed an issue where Adrenaline Maximum’s cast effect was displayed awkwardly.
Luminous
- Fixed an issue where Light Magic Enhancement/Dark Magic Enhancement’s skill effects did not apply to Armageddon.
Mercedes
- Fixed an issue where the following skills’ effects looked awkward to other characters.
- Final Attack: Dual Bowgun, Strike Dualshot, Advanced Strike Dualshot, Advanced Final Attack
- Elemental Knights’ skill voice has been changed.
- Fixed an issue where after casting Rolling Moonsault, sometimes you could cast Spirit Jump twice.
Phantom
- Fixed an issue where the Judgement skill UI sometimes disappeared.
Blaster
- Fixed an issue where some of Hammer Smash’s skill effects were not affected by transparency options.
Mechanic
- Fixed an issue with the following skills where the self-destruct effects sometimes displayed awkwardly to other characters.
- Robot Launcher: RM7, Support Waver: H-EX, Magnetic Field, Robot Factory: RM1, Support Waver Enhancement
- Fixed an issue with the following skills where the hit effects were displayed in awkward locations to other characters.
- Robot Launcher: RM7, Magnetic Field, Robot Factory: RM1
- Magnetic Field:
- Fixed an issue where the Magnetic Field’s attack would sometimes not activate based on the location where the coils were installed.
- Fixed an issue where after installing 3 coils, if some were removd, the remaining coils would appear to still be in attacking state.
- Fixed an issue where after installing 3 coils, if some were removed, the buff icon would be removed even if there was at least 1 coil remaining.
- Fixed an issue where if Magnetic Field disappeared, Magnetic Field would appear to disappear before the coils to other characters.
- Robot Factory: RM1:
- Fixed an issue where this skill would sometimes display awkwardly to other characters.
Cadena
- Fixed an issue where Chain Arts: Takedown’s strike skill effect was not displayed to other characters.
Zero
- Advanced Throwing Weapon:
- Fixed an issue where the summon would sometimes disappear awkwardly.
- Fixed an issue where the summon would not be created on the edges of the map.
- Fixed an issue where if Assist or Transcendent Blessing of Time cast this skill, sometimes the summon would be displayed in the opposite direction to other characters.
- Fixed an issue where the summon would rotate in the opposite direction when it was cast to the right.
- Fixed an issue where Shadow Rain’s delay was different based on the character that cast it.
- Transcendent:
- Fixed an issue where Flash Assaulter’s effect when activated by the Blessing of Time was not visible to other characters.
- Fixed an issue where skills’ hit sound effects when activated by the Blessing of Time were not played.
Kinesis
- Ultimate – Train:
- Fixed an issue where if you cast it consecutively, the skill sound effect would play awkwardly.
Adele
- Gathering:
- Fixed an issue where Creation/Gathering Enhancement Core’s level 20 effect was not applied.
- Blossom:
- Fixed an issue where Blossom/Squall Enhancement Core’s level 20 effect was not applied.
- Marker:
- Fixed an issue where the skill effect was not displayed to other characters.
Illium
- Rio:
- Fixed an issue where the skill did not attack properly.
- Crystal Skill: Deus:
- Fixed an issue where the satellites did not attack properly.
- Primal Protection:
- This skill has been changed to not be affected by your own and other characters’ skill effect transparency options.
- Craft: Javelin VI, Glory Wings: Javelin VI:
- Fixed an issue where the Crystal Fragment buff icon was sometimes not displayed properly.
- Unlimited Crystals:
- Fixed an issue where if you used Crystal Ignition, sometimes the infinite crystals would not activate resonations.
- Fixed an issue where the infinite crystals’ resonation effect did not properly apply skill effect transparency options.
Khali
- Death Blossom:
- Fixed an issue where the hit effect was not displayed to other characters.
- Fixed an issue where Death Blossom’s hit effect did not change based on the monster’s size.
Ark
- Fixed an issue where if you cast Endless Agony, the action would be displayed continuously.
- Fixed an issue where the following skills’ skill desecriptions looked awkward in Combination Keys, Shortcut Key Settings, and Buff Bookmark settings.
- Grievous Wound VI
- Insatiable Hunger VI
- Unbridled Chaos VI
Lara
- Wakeup Call:
- Fixed an issue where the skill cast effect was not displayed to other characters.
- Fixed an issue where the hit effect was displayed abnormally to other characters.
- Fixed an issue where Absorption: River Puddle Douse’s hit effect sometimes was not displayed.
- Fixed an issue where Absorption: Fierce Winds’ skill effect was not displayed to other characters.
- Free Dragon Vein:
- The skill description will now be displayed in the buff icon.
- Fixed an issue where you could not create Free Dragon Veins in towns.
- Big Stretch:
- Fixed an issue where the skill cast effect was not displayed to other characters.
- Fixed an issue where the hit effect was displayed abnormally to other characters.
Hoyoung
- Fixed an issue where Scroll: Butterfly Dream’s skill effect was displayed awkwardly.
New Mastery Cores
Hero
3rd Mastery Core: Aura Blade VI/Furious Edge
4th Mastery Core: Valhalla VI/Incising VI/Final Attack VI


 Aura Blade VI:
[Master Level: 30]
Fire a sword slash in your desired direction that tears enemies apart. You can fire it in 8 directions, and if you use the skill with the arrow keys, it will be fired in that direction.
If you use the skill consecutively, you can link to Final Blade.
Required Skill: Level 20 Aura Blade.- [Level 30]
Consumes 32 MP. Fire a sword slash that deals 462% 5 times on up to 8 enemies.
Aura Blade VI’s damage is increased by 290%p when attacking normal monsters.
You will prepare 1 Aura Blade every 4 seconds and you can hold up to 2.
If you re-use the skill within 2 seconds, the next attack will be replaced with Final Blade. Final Blade: Deals 693% damage 5 times on up to 8 enemies.
- [Level 30]
 Furious Edge:
[Master Level: 30]
Your swordsmanship reaches its peak, leaving behind Sword Scars. Sword Scars are created when your directly attacking skills hit enemies a certain number of times. The Sword Scars are created prioritizing the boss monster with the highest max HP.- [Level 30]
When your own directly attacking skills hit an enemy 5 times, create a Sword Scar.
Sword Scar: Deals 277% damage 3 times on up to 8 enemies.
When Valhalla, Combo Instinct, and Spirit Caliber hit an enemy 2 times, they count as 1 attack.
When a Sword Scar attacks 4 times, it disappears. Up to 5 can be created.
During Combo Instinct, up to 10 can be created.
- [Level 30]
 Valhalla VI:
[Master Level: 30]
Call upon great power imbued with the will of ancient warriors. When Hero uses Swordsmanship skills, Sword Strikes remain at the attack location for a certain period of time like afterimages to additionally attack. The Sword Strikes prioritize being created at the boss monster with the highest max HP. Common skills and 5th job skills do not activate Sword Strikes.
Required Skill: Level 1 Valhalla.- [Level 30]
Consumes 360 MP. For 30 seconds, you cannot be knocked back by any enemy attacks and your Combo is fully charged to the maximum value.
During the buff, gain 50 attack, 30% critical rate, 100 status resistance, and 100% elemental resistance.
Every few seconds, activate 3 Sword Strikes that deal 1010% damage 2 times on up to 6 enemies. The Sword Strikes can be activated up to 12 times, and after they have all been activated, they will no longer appear.
Cooldown: 120 seconds.
- [Level 30]

 Incising VI:
[Master Level: 30]
[Swordsmanship] Concentrate your mind and swing your sword in front of you. The sword engraved in your soul through ultimate swordsmanship appears to materialize and attacks enemies. Enemies hit are inflicted with a wound that deals damage over time and increases damage taken from critical hits.
Required Skill: Level 30 Incising.- [Level 30]
Consumes 42 MP. Deals 640% damage 4 times on up to 8 enemies. When attacking normal monsters, damage is increased by 50%.
Enemies hit taken 266% damage every 2 seconds for 60 seconds and take 26% increased damage from critical hits. When party members attack, the enemy takes 11% increased damage.
- [Level 30]

 Final Attack VI:
[Master Level: 30]
There is a certain chance for an additional hit to be activated after using your directly attacking skills. The attack will prioritize hitting the boss monster with the highest max HP.
Required Skill: Level 30 Advanced Final Attack.- [Level 30]
[Final Attack Type Skill] 61% chance to activate a Final Attack that deals 266% damage 3 times.
- [Level 30]
Paladin
3rd Mastery Core: Sanctuary VI
4th Mastery Core: Final Attack VI/Rising Justice
 Sanctuary VI:
[Master Level: 30]
Slam a giant hammer to the ground, creating a shockwave that attacks multiple enemies.
Sanctuary VI deals additional damage to boss monsters. You cannot be knocked back by any enemy attacks while casting this skill. Enemies hit are inflicted with Divine Judgement’s Holy Stigma. In addition, Blast VI and Divine Judgement VI’s damage is permanently increased.
Required Skill: Level 30 Sanctuary.- [Level 30]
Consumes 90 MP. Activate 4 shockwaves that deal 237% 8 times on up to 15 enemies. When attacking boss monsters, damage is increased by 30%.
Cooldown: 14 seconds.
[Passive Effect: Blast VI’s damage is increased by 80%p, Divine Judgement VI’s damage is increased by 410%p.]
- [Level 30]
 Final Attack VI:
[Master Level: 30]
There is a certain chance for a powerful additional hit to be activated when your directly attacking skills hit an enemy.
However, it can only be activated while holding a sword or blunt weapon.
Required Skill: Level 20 Final Attack.- [Level 30]
[Final Attack Type Skill] 65% chance to activate a Final Attack that deals 160% damage 2 times.
- [Level 30]
 Rising Justice:
[Master Level: 30]
Fragments of Judgement emerge from the shockwaves caused by Falling Justice. The Fragments of Judgement track and attack nearby enemies. If they attack an enemy using Damage Reflect, you will not take damage. They will prioritize tracking the boss monster with the highest max HP.
Required Skill: Level 1 Falling Justice.- [Level 30]
When Falling Justice activates, 4 Fragments of Judgement are created from each of the 5 halos.
Each Fragment of Judgement deals 1060% damage 6 times.
- [Level 30]
Dark Knight
3rd Mastery Core: Beholder’s Revenge VI/Final Attack VI
4th Mastery Core: Beholder Shock VI


 Beholder’s Revenge VI:
[Master Level: 30]
Beholder counterattacks enemies. Beholder deals damage to enemies directly attacked by the Dark Knight.
When Beholder attacks a certain number of times, it inflicts the Mark of Vengeance. If the Mark of Vengeance is filled, an enhanced Beholder’s Revenge is activated.
If Beholder’s attacks hit an enemy using Damage Reflect, you will not take damage.
Required Skill: Level 30 Beholder’s Revenge.- [Level 30]
When Dark Knight’s directly attacking skills hit an enemy, there is a 60% chance deal 148% damage 5 times on up to 10 enemies. When this attack hits an enemy 2 times, the Mark of Vengeance is inflicted.
When the Mark of Vengeance reaches 3 stacks, all of the Marks will be consumed and Beholder’s Punishment will activate.
Beholder’s Punishment: Deals 223% damage 5 times.
- [Level 30]
 Final Attack VI:
[Master Level: 30]
There is a certain chance for an additional hit to be activated after using your directly attacking skills. However, it can only be activated while holding a spear or polearm.
Required Skill: Level 20 Final Attack.- [Level 30]
[Final Attack Type Skill] 65% chance to activate a Final Attack that deals 117% damage 2 times.
- [Level 30]
 Beholder Shock VI:
[Master Level: 30]
Beholder screams, stunning and damaging nearby enemies. Condensed dark energy is fired from Beholder to deal additional damage. If this skill hits an enemy using Damage Reflect, you will not take damage.
Required Skill: Level 30 Beholder’s Revenge.- [Level 30]
Beholder moves in front of you and deals 1280% damage 7 times on up to 10 enemies. There is a 90% chance to stun enemies hit for 5 seconds.
At the same time as the attack, 4 dark energy projectiles are fired that deal 860% damage 5 times on up to 3 enemies.
Cooldown: 10 seconds.
[Dark Synthesis VI]’s damage is increased by 307%p.
[Beholder’s Revenge VI]’s damage is increased by 37%p.
[Beholder’s Punishment]’s damage is increased by 55%p.
- [Level 30]
Archmage (F/P)
3rd Mastery Core: Ignite VI/Ifrit VI/Fire Aura VI
4th Mastery Core: Poison Region VI/Meteor VI/Megiddo Flame VI
 Ignite VI:
[Master Level: 30]
When flame magic, except for Fire Aura, attacks an enemy, there is a certain chance to create a Wall of Fire that burns enemies at their location.
If Ignite hits an enemy using Damage Reflect, you will not take damage.
On/Off skill.
Required Skill: Level 10 Ignite.- [Level 30]
When you cast Flame Magic, there is a 50% chance to create a Wall of Fire.
The Wall of Fire lasts for 4 seconds, and periodically deals 75% damage 3 times on up to 8 enemies. A single enemy can be hit up to 3 times.
- [Level 30]
 Ifrit VI:
[Master Level: 30]
Summon the fire elemental Ifrit for a certain period of time. If Ifrit attacks an enemy using Damage Reflect, you will not take damage. This skill is affected by summon duration increasing effects.
Required Skill: Level 30 Ifrit.- [Level 30]
Consumes 143 MP. Summon Ifrit for 270 seconds.
Ifrit deals 228% damage 3 times on up to 5 enemies.
Enemies hit take 215% damage every 1 second for 2 seconds.
- [Level 30]
 Fire Aura VI:
[Master Level: 30]
Activate an aura that burns your surroundings. This skill can deal damage to enemies using Damage Ignore and Damage Reflect.
On/Off skill.
Required Skill: Level 1 Fire Aura.- [Level 30]
Consumes 110 MP per second. Every 3 seconds, deals 800% damage 2 times on up to 10 enemies.
Enemies hit take 500% damage every 1 second for 30 seconds.
- [Level 30]

 Poison Region VI:
[Master Level: 30]
Install a poison magic circle that turns its surroundings into a poison region. Poison is continuously created from the magic circle, and the poison region gradually spreads to the left and right. The poison will stop spreading when it reaches the end of a platform.
The poison region’s poison is flammable, and if you use flame magic or an enemy is hit by flame magic after the poison has been created for a certain amount of time, it will cause a powerful explosion. The explosion will also detonate the nearby poison regions. This skill is a poison element attack. This skill is affected by summon duration increasing effects.
Required Skill: Level 14 Poison Region.- [Level 30]
Consumes 60 MP. Install a poison magic circle for 60 seconds.
Every few seconds, the magic circle will turn its surroundings into a poison region. Enemies standing on the poison region will take 307% damage every 1 second for 10 seconds.
Poison Region Explosion: Consumes 66 MP. Explosions detonated by the Poison Region Explosion do not consume MP. It can explode 1.5 seconds after being created. Deals 340% damage 4 times on up to 10 enemies. The explosion will detonate nearby poison regions.
If a single monster is hit by multiple explosions within 0.4 seconds, the second and later explosions’ final damage will be decreased by 60%.
When attacking normal monsters, the damage is increased by 50%.
Cooldown: 30 seconds.
- [Level 30]


 Meteor VI:
[Master Level: 30]
Summon multiple meteors to create a powerful flame attack. Also, permanently, when your skills other than Fire Aura hit an enemy, there is a certain chance for a meteor to fall and deal damage.
Required Skill: Level 30 Meteor.- [Level 30]
Consumes 330 MP. Deals 700% damage 12 times on up to 15 enemies.
Cooldown: 50 seconds.
[Passive Effect: [Final Attack Type Skill] When your directly attacking skills hit an enemy, there is a 65% chance for a Meteor to fall, dealing 383% damage.]
- [Level 30]

 Megiddo Flame VI:
[Master Level: 30]
Annihilate enemies by firing Blue Flames that burn them down to their souls. The Blue Flames regenerate a certain number of times after burning enemies.
If you use this skill with the down arrow key, Explosion Mode will be activated, where the Blue Flames will not regenerate and activate an explosion when they hit an enemy.
The Blue Flames will prioritize tracking boss monsters within range. If there are multiple boss monsters, they will prioritize tracking the boss monster with the highest max HP. This skill can deal damage to enemies using Damage Ignore and Damage Reflect.
If you use the Custom Command, you can use Explosion Mode by pressing the skill key without inputting a directional key.
Custom Command On/Off: Right-click.
Required Skill: Level 1 Megiddo Flame.- [Level 30]
Consumes 570 MP. Create 3 Blue Flames.
A Flame deals 660% damage 5 times when it hits an enemy, then splits to create 1 additional Flame. Up to 11 Flames can be created, including the first one. When the maximum number is created, they will no longer regenerate.
If multiple Flames hit a single enemy, the second and later Flames’ final damage will be decreased by 55%. Enemies burned by a Flame take 980% damage every 1 second for 30 seconds.
Explosion Mode: The Flames will not regenerate but when they hit an enemy, they activate 3 explosions that deal 455% damage 3 times.
Cooldown: 50 seconds.
- [Level 30]
Archmage (I/L)
3rd Mastery Core: Lightning Sphere VI/Cryo Shock
4th Mastery Core: Thunder Sphere VI/Elquines VI
 Lightning Sphere VI:
[Master Level: 30]
Activate a powerful electric sphere in front of you that continuously hits monsters. If this skill hits an enemy using Damage Reflect, you will not take damage.
Required Skill: Level 1 Lightning Sphere.- [Level 30]
Keydown skill. Consumes 36 MP per attack. Periodically deals 257% damage 15 times on up to 15 enemies. You can hold the keydown for up to 2 seconds. When the keydown ends, activate a finishing attack that deals 1293% damage 15 times.
Cooldown: 60 seconds.
- [Level 30]

 Cryo Shock:
[Master Level: 30]
Activate severe shocks using powerful lightning magic on enemies frozen by cold air.- [Level 30]
Consumes 50 MP. Whenever Freeze stacks are decreased 13 times, activate a shock that deals 1090% damage 15 times.
- [Level 30]
 Thunder Sphere VI:
[Master Level: 30]
Summon a sphere of condensed lightning. The sphere emits high voltage electricity to hit nearby enemies with a lightning element attack. If you re-use the skill with the down arrow key, the sphere will be fixed to its current location. If the sphere is fixed to a location, it will attack enemies in a wider range. The sphere’s attacks will not reduce Freeze stacks.
In addition, Cryo Shock’s damage is increased.
If you use the Custom Command, you can fix the sphere’s location by pressing the skill key without inputting a directional key. Thunder Spear VI is affected by summon duration increasing effects.
Custom Command On/Off: Right-click.
Required Skill: Level 20 Thunder Sphere.- [Level 30]
Consumes 65 MP. Summon a Thunder Sphere for 120 seconds. The sphere deals 587% damage 3 times on up to 6 enemies.
When you re-use the skill with the down arrow key, fix the sphere to its location for 60 seconds. The fixed sphere deals 587% damage 3 times on up to 6 enemies.
When attacking normal monsters, the damage is increased by 180%p.
Sphere location fix cooldown: 30 seconds.
[Passive Effect: Cryo Shock’s damage is increased by 687%p.]
- [Level 30]
 Elquines VI:
[Master Level: 30]
Summon the ice elemental Elquines for a certain period of time. Elquines can attack multiple enemies at the same time. If Elquines attacks an enemy using Damage Reflect, you will not take damage. Enemies hit are inflicted with Freeze. Elquines VI is affected by summon duration increasing effects.
Required Skill: Level 30 Elquines.- [Level 30]
Consumes 7 MP. Summon Elquines for 270 seconds.
Elquines deals 230% damage 3 times on up to 5 enemies.
- [Level 30]
Bishop
3rd Mastery Core: Angelic Touch VI/Fountain for Angels VI/Bahamut VI
4th Mastery Core: Genesis VI/Heaven’s Door VI

 Angelic Touch VI:
[Master Level: 30]
[Vengeance] An angel descends to gift their Angelic Touch to enemies and create a Holy Relic that continuously weakens them. Enemies hit by the Angel or affected by the Holy Relic will be weakened and have their defenses decreased for a certain period of time.
Required Skill: Level 20 Heal.- [Level 30]
Consumes 27 MP. Deals 590% damage 7 times on up to 6 enemies.
Enemies hit will be inflicted with a debuff for 60 seconds that decreases their defenses by 44%.
Create a Holy Relic at the location where the Angel attacked.
Holy Relic: Summon for 90 seconds. Applies the same debuff as Angelic Touch on up to 10 enemies for 10 seconds. This does not stack with Angelic Touch’s debuff.
Cooldown: 10 seconds.
- [Level 30]
 Fountain For Angels VI:
[Master Level: 30]
[Vengeance] Summon an objet that punishes nearby enemies with divine power. The objet emits divine power periodically to attack. Fountain For Angels VI is affected by summon duration increasing effects.
Required Skill: Level 10 Holy Fountain.- [Level 30]
Consumes 45 MP. 60 second duration.
Periodically, deals 310% damage 5 times on up to 8 enemies.
Cooldown: 30 seconds.
- [Level 30]
 Bahamut VI:
[Master Level: 30]
Summon the holy dragon Bahamut for a certain period of time. If Bahamut attacks an enemy using Damage Reflect, you will not take damage. This skill is affected by summon duration increasing effects.
In addition, Angel Ray VI is permanently enhanced.
Required Skill: Level 20 Bahamut.- [Level 30]
Consumes 135 MP. Summon Bahamut for 270 seconds.
Bahamut deals 372% damage 3 times on up to 5 enemies.
[Passive Effect: Angel Ray VI’s damage is increased by 20%p. Angel Ray VI: Angel of Judgement’s damage is increased by 35%p. Angel Ray VI’s number of times the Holy Sword must hit an enemy to activate the Angel of Judgement is decreased by 4.]
- [Level 30]

 Genesis VI:
[Master Level: 30]
Pillars of divine light fall from the sky as a powerful holy attack. Also, permanently, when your directly attacking skills hit an enemy, there is a certain chance for an enemy to be inflicted with the Angel’s Punishment.
Required Skill: Level 30 Genesis.- [Level 30]
Consumes 330 MP. Deals 825% damage 10 times on up to 15 enemies with an additional 20% critical rate.
Cooldown: 30 seconds.
[Passive Effect: [Final Attack Type Skill] When your directly attacking skills hit an enemy, there is a 65% chance to activate the Angel’s Punishment, dealing 405% damage.]
- [Level 30]
 Heaven’s Door VI:
[Master Level: 30]
Open the gates of heaven to punish enemies and give the blessing of life to party members.
Party members that receive the effect cannot receive Heaven’s Door’s effect again for a certain period of time.
Required Skill: Level 1 Heaven’s Door.- [Level 30]
Consumes 560 MP. Deals 805% damage 10 times on up to 15 enemies. At the same time, provide a buff to nearby party members that ignores death 1 time upon hitting 0 HP.
Cooldown: 60 seconds.
Party members that receive the buff cannot receive Heaven’s Door’s buff again for 600 seconds.
- [Level 30]
Bowmaster
3rd Mastery Core: Quiver Cartridge VI/Phoenix VI/Extra Quiver
4th Mastery Core: Flash Mirage VI/Wind of Frey VI


 Quiver Cartridge VI:
[Master Level: 30]
Use special arrowheads. You can re-use the skill to change the arrowheads you are using.
Required Skill: Level 10 Advanced Quiver.- [Level 30]
Magic Arrows: 60% chance to fire Magic Arrows that deal 442% damage.
Drain Arrows: 60% chance to use Drain Arrows that recover 1.8% maximum HP.
- [Level 30]
 Phoenix VI:
[Master Level: 30]
Summon the fire elemental Phoenix for a certain period of time. Phoenix has a certain chance to stun enemies.
If Phoenix hits an enemy using Damage Reflect, you will not take damage. This skill is affected by summon duration increasing effects.
Required Skill: Level 10 Phoenix.- [Level 30]
Consumes 85 MP. Summon Phoenix for 270 seconds.
Phoenix deals 975% damage on up to 6 enemies with a 95% chance to stun.
- [Level 30]


 Extra Quiver Cartridge:
[Master Level: 30]
The Quiver Cartridge is expanded to load Special Arrowheads. When you use a Quiver Cartridge’s arrows, an additional Special Arrowhead is loaded into the currently unused Quiver Cartridge.
When you use Extra Quiver Cartridge, when your directly attacking skills hit an enemy, the loaded Special Arrowheads will also be fired.
In Auto Use Mode, the skill will be used automatically when the number of Arrowheads loaded exceeds a certain number in the entire Cartridge.
You can use Extra Quiver Cartridge while using skills, and Special Arrowheads cannot be loaded while the skill is applied.
If the Special Arrowheads hit an enemy using Damage Reflect, you will not take damage.
Auto Use Mode On/Off: Right-click.
Required Skill: Level 10 Advanced Quiver.- [Level 30]
Consumes 120 MP. For 30 seconds, use additional Special Arrowheads. The skill will automatically end when the Arrowheads run out.
Special Arrowhead: Deals 1300% damage. You can load up to 50 per Quiver Cartridge.
In Auto Use Mode, Extra Quiver Cartridge will be activated automatically when the total number of arrows loaded into each Cartridge is 50 or higher.
Cooldown: 30 seconds.
- [Level 30]

 Flash Mirage VI:
[Master Level: 30]
Fire arrows with archery skills so fast that you leave afterimages.
Whenever your own direct arrow attacks hit an enemy a certain number of times, create an afterimage that shoots a tracking arrow then disappears. The arrow tracks one enemy in front of the afterimage and pierces through all enemies it collides with along the way. Installed Arrow Platter is not considered an attack that you directly used.
On/Off skill.
Required Skill: Level 20 Flash Mirage II.- [Level 30]
Consumes 105 MP. Whenever your attacks hit an enemy 7 times, create 4 afterimages that each fire an arrow towards 1 enemy.
When Arrow Platter, Hurricane, Silhouette Mirage, Afterimage Shot, Quiver Full Burst, or Arrow Rain hit an enemy 7 times, it is considered as 1 attack.
The fired arrows pierce through up to 5 enemies along their paths to their target, dealing 1245% damage 4 times.
Cooldown: 1 second.
- [Level 30]
 Wind of Frey VI:
[Master Level: 30]
Tear apart everything around you with a shockwave of wind.
Required Skill: Level 1 Wind of Frey.- [Level 30]
Consumes 230 MP. Deals 570% damage 12 times on up to 12 enemies.
Enemies hit will have their speed decreased by 30 for 20 seconds.
Cooldown: 15 seconds.
- [Level 30]
Marksman
3rd Mastery Core: Freezer VI/Bolt Swift VI
4th Mastery Core: Final Attack VI/Long Range Trueshot VI

 Freezer VI:
[Master Level: 30]
Summon the ice elemental Freezer for a certain period of time. If Freezer hits an enemy using Damage Reflect, you will not take damage. This skill is affected by summon duration increasing effects. In addition, Sniping VI is permanently enhanced.
Required Skill: Level 10 Freezer.- [Level 30]
Consumes 90 MP. Summon Freezer for 270 seconds.
Freezer deals 480% damage 3 times on up to 6 enemies.
Enemies hit are frozen for 3 seconds.
[Passive Effect: Sniping VI’s damage is increased by 120%p, Enhanced Sniping VI’s damage is increased by 95%p, Enhanced Sniping VI’s additional hit’s damage is increased by 120%p, Ultimate Sniping VI’s damage is increased by 92%p, Ultimate Sniping VI’s additional hit’s damage is increased by 90%p.]
- [Level 30]
 Bolt Swift VI:
[Master Level: 30]
Fire arrows in all directions to attack multiple nearby enemies.
Required Skill: Level 20 Bolt Swift.- [Level 30]
Consumes 110 MP. Deals 680% damage 7 times on up to 8 enemies.
Cooldown: 7 seconds.
- [Level 30]
 Final Attack VI:
[Master Level: 30]
There is a certain chance for an additional hit to be activated when your directly attacking skills hit an enemy. However, it can only be activated while holding a crossbow.
In addition, Sniping VI is permanently enhanced.
Required Skill: Level 20 Final Attack: Crossbow.- [Level 30]
[Final Attack Type Skill] 60% chance to activate a Final Attack that deals 340% damage.
[Passive Effect: Sniping VI’s damage is increased by 30%p, Enhanced Sniping VI’s damage is increased by 30%p, Enhanced Sniping VI’s additional hit’s damage is increased by 30%p, Ultimate Sniping VI’s damage is increased by 30%p, Ultimate Sniping VI’s additional hit’s damage is increased by 30%p.]
- [Level 30]
 Long Range True Shot VI:
[Master Level: 30]
Concentrate your mind to defeat all enemies within range with a single blow.
Required Skill: Level 1 Long Range True Shot.- [Level 30]
Consumes 360 MP. Activate 6 strikes that deal 552% damage 9 times on up to 12 enemies.
Cooldown: 40 seconds.
- [Level 30]
Pathfinder
3rd Mastery Core: Edge of Resonance VI/Cardinal Transition VI/Ancient Astra VI
4th Mastery Core: Combo Assault VI/Raven VI/Relic Materialize

 Edge of Resonance VI:
[Master Level: 30]
[Ancient Force]
Call forth soul blades that resonate with the Ancient Curse to attack surrounding enemies.
The more you use this skill, the stronger its resonance with the Ancient Curse becomes. After using it multiple times, the next Edge of Resonance will be enhanced.
Enemies inflicted with the Ancient Curse debuff will take more damage. You can use this skill while using other skills.
Required Skill: Level 30 Edge of Resonance.- [Level 30]
Consumes 100 Relic Gauge. Deals 1790% damage 6 times on up to 8 enemies.
Final damage is increased by 10% per Ancient Curse debuff stack.
When you use this skill 4 times, the next attack will be replaced with an enhanced Edge of Resonance. Ancient Impact: Deals 1611% damage 10 times on up to 8 enemies.
Cooldown: 15 seconds.
- [Level 30]
 Cardinal Transition VI:
[Master Level: 30]
[Cardinal Force]
Using an archery technique based on movement, activate the Speed Energy stored within your weapon to quickly move then swing the weapon at your destination to attack nearby enemies.
You can use this skill with the directional keys to move the character forwards or upwards. If you use the skill without a directional key, you will swing your weapon at your current location.
Required Skill: Level 20 Advanced Cardinal Force.- [Level 30]
Consumes 36 MP and 1 Speed Energy. Deals 929% damage 5 times on up to 7 enemies surrounding the destination.
You can prepare 1 Speed Energy every 7 seconds and you can hold up to 5.
You cannot be knocked back by any enemy attacks while casting this skill. Enemies hit will be inflicted with 1 stack of the Ancient Curse debuff.
- [Level 30]
 Ancient Astra VI:
[Master Level: 30]
[Enchant Force]
Materialize arrows from legend to unleash a powerful attack on enemies.
Discharge Enhancement
Additional Magic Arrows are created from the enemies hit.
Blast Enhancement
Aim at enemies to fire arrows with maximum destructive power.
Transition Enhancement
You can attack enemies while moving.
Required Skill: Level 1 Ancient Astra.- [Level 30]
Consumes 65 Relic Gauge per second. Periodically deals 480% damage 6 times on up to 7 enemies.
Cooldown: 60 seconds.
- [Level 30]

 Ancient Astra VI (Discharge):
[Master Level: 30]
[Enchant Force]
Materialize arrows from legend to unleash a powerful attack on enemies.
There is a certain chance to create Magic Arrows from the enemies hit that attack nearby enemies. Magic Arrows prioritize tracking the boss monster with the highest max HP.
Required Skill: Level 1 Ancient Astra.- [Level 30]
Consumes 65 Relic Gauge per second. Periodically deals 600% damage 6 times on up to 7 enemies.
For each enemy hit, there is a 30% chance to create 2 Magic Arrows that deal 360% damage 2 times.
While casting this skill, you will take 60% reduced damage (including % HP attacks).
Cooldown: 60 seconds.
- [Level 30]
 Ancient Astra VI (Blast):
[Master Level: 30]
[Enchant Force]
Materialize arrows from legend to unleash a powerful attack on enemies.
You can adjust the firing angle using the ↑,↓ arrow keys. The fired arrows will explode after hitting an enemy or when they reach the end of their attack range.
Required Skill: Level 1 Ancient Astra.- [Level 30]
Consumes 65 Relic Gauge per second. If you hold the key down to use the skill, arrows will be fired at the designated angle periodically.
When an arrow explodes, deal 2160% damage 10 times on up to 12 enemies.
While casting this skill, you will take 60% reduced damage (including % HP attacks).
Cooldown: 60 seconds.
- [Level 30]
 Ancient Astra VI (Transition):
[Master Level: 30]
[Enchant Force]
Materialize arrows from legend to unleash a powerful attack on enemies.
You can use the arrow keys while attacking to move forwards and backwards.
Required Skill: Level 1 Ancient Astra.- [Level 30]
Consumes 65 Relic Gauge per second. Periodically deals 540% damage 6 times on up to 4 enemies.
While casting this skill, you will take 60% reduced damage (including % HP attacks).
Cooldown: 60 seconds.
- [Level 30]
 Combo Assault VI:
[Master Level: 30]
[Enchant Force]
Attack nearby enemies with your bow then shoot arrows that fly through space to attack enemies in a wide range. This skill can be linked with Cardinal Transition.
Discharge Enhancement
The arrows attack enemies in a wider range.
Blast Enhancement
Deal a powerful blow to 1 enemy with the bow.
Transition Enhancement
Inflict multiple stacks of the Ancient Curse debuff to enemies hit by the bow attack.
Required Skill: Level 30 Combo Assault.- [Level 30]
Consumes 50 Relic Gauge.
Bow Attack: Deals 765% damage 7 times on up to 4 enemies. Enemies hit are inflicted with 1 stack of the Ancient Curse debuff.
Arrow Attack: Deals 840% damage 5 times on up to 10 enemies.
Cooldown: 15 seconds.
- [Level 30]

 Combo Assault VI (Discharge):
[Master Level: 30]
[Enchant Force]
Attack nearby enemies with your bow then shoot arrows that fly through space to attack enemies in a wide range.
The arrows attack enemies in a wider range. This skill can be linked with Cardinal Transition.
Required Skill: Level 30 Combo Assault.- [Level 30]
Consumes 50 Relic Gauge.
Bow Attack: Deals 915% damage 7 times on up to 5 enemies. Enemies hit are inflicted with 1 stack of the Ancient Curse debuff.
Arrow Attack: Deals 990% damage 5 times on up to 12 enemies.
Cooldown: 15 seconds.
- [Level 30]

 Combo Assault VI (Blast):
[Master Level: 30]
[Enchant Force]
Attack nearby enemies with your bow then shoot arrows that fly through space to attack enemies in a wide range.
Use more strength in the bow to deal a more powerful blow. This skill can be linked with Cardinal Transition.
Required Skill: Level 30 Combo Assault.- [Level 30]
Consumes 50 Relic Gauge.
Bow Attack: Deals 1854% damage 10 times on up to 4 enemies. Enemies hit are inflicted with 1 stack of the Ancient Curse debuff.
Arrow Attack: Deals 1656% damage 7 times on up to 10 enemies.
Cooldown: 15 seconds.
- [Level 30]
 Combo Assault VI (Transition):
[Master Level: 30]
[Enchant Force]
Attack nearby enemies with your bow then shoot arrows that fly through space to attack enemies in a wide range.
Concentrate the Curse’s power in the bow to transfer more deadly Curses to the enemies hit. This skill can be linked with Cardinal Transition.
Required Skill: Level 30 Combo Assault.- [Level 30]
Consumes 50 Relic Gauge.
Bow Attack: Deals 915% damage 7 times on up to 4 enemies. Enemies hit are inflicted with 5 stacks of the Ancient Curse debuff.
Arrow Attack: Deals 990% damage 5 times on up to 10 enemies.
Cooldown: 15 seconds.
- [Level 30]
 Raven VI:
[Master Level: 30]
Summon the dark elemental Raven for a certain period of time.
If Raven hits an enemy using Damage Reflect, you will not take damage. This skill is affected by summon duration increasing effects.
Required Skill: Level 10 Raven.- [Level 30]
Consumes 76 MP. Summon Raven for 270 seconds.
Raven deals 585% damage on up to 6 enemies.
- [Level 30]

 Relic Materialize:
[Master Level: 30]
Completely control the Curse contained in the Relic and materialize it. Whenever the Relic Gauge is consumed, gain a stack of Controlled Curse. When you attack an enemy, the Curse blooms on the targets to deal damage.- [Level 30]
When you consume 50 Relic Gauge, create 1 Controlled Curse.
You can create up to 50 Controlled Curses.
When your attacks hit an enemy, consume 1 Controlled Curse to activate a Cursed Flame that deals 525% damage 8 times on all enemies hit.
- [Level 30]
Night Lord
3rd Mastery Core: Dark Flare VI/Showdown Challenge VI/Darkness Shuriken
4th Mastery Core: Sudden Raid VI/Four Seasons VI

 Dark Flare VI:
[Master Level: 30]
Summon a giant shuriken that attacks nearby enemies by emitting dark energy for a certain period of time. Dark Flare VI is affected by summon duration increasing effects. If it hits an enemy using Damage Reflect, you will not take damage. Permanently increases Quadruple Throw VI’s damage.
Required Skill: Level 20 Dark Flare.- [Level 30]
Consumes 130 MP. Summon a giant shuriken for 60 seconds.
Periodically deals 815% damage on up to 5 enemies.
Cooldown: 60 seconds.
[Passive Effect: Quadruple Throw VI’s damage is increased by 60%p.]
- [Level 30]
 Showdown Challenge VI:
[Master Level: 30]
Attack up to 6 enemies with shuriken and taunt them into being untouchable.
Taunted enemies will have increased experience and item drop rate. Half of this effect is applied to bosses.
When the scroll explodes, dark shuriken will be created that track and attack nearby enemies. If the dark shuriken hit an enemy using Damage Reflect, you will not take damage.
Required Skill: Level 30 Showdown Challenge.- [Level 30]
Consumes 55 MP and 3 Stars.
Deals 1170% damage 2 times on up to 6 enemies.
Enemies will be taunted for 140 seconds, becoming untouchable, and have 6% additional experience and item drop rate. This effect is halved on boss monsters.
Afterwards, create 6 shuriken that deal 57% damage 6 times.
If a single enemy is hit by multiple shuriken, the second and later shuriken’s final damage will be decreased by 50%. When attacking normal monsters, damage is increased by 200%.
Shuriken recreation cooldown: 5 seconds.
- [Level 30]

 Darkness Shuriken:
[Master Level: 30]
A throwing star with its own will appears from the darkness.
The created star tracks and attacks nearby enemies. If it hits enemies using Damage Reflect, you will not take damage. It will prioritize hitting the boss monster with the highest max HP.- [Level 30]
When your own directly attacking skills hit an enemy, create a Darkness Shuriken for 10 seconds.
The star deals 1700% damage 5 times and can attack up to 30 times.
Every 5 seconds your directly attacking skills hit an enemy, the duration is increased by 7 seconds.
The duration can be increased up to 60 seconds.
Reactivation cooldown: 60 seconds.
- [Level 30]
 Sudden Raid VI:
[Master Level: 30]
Your hidden allies appear to attack enemies. If Sudden Raid hits an enemy using Damage Reflect, you will not take damage.
Permanently increases Mark of Assassin VI’s damage.
Required Skill: Level 30 Sudden Raid.- [Level 30]
Consumes 320 MP and 1 Star. Deals 820% damage 7 times on up to 15 enemies.
Enemies hit will take 355% damage every 1 second for 10 seconds.
Cooldown: 14 seconds.
[Passive Effect: Mark of Assassin VI’s damage is increased by 60%p.]
- [Level 30]


 Four Seasons VI:
[Master Level: 30]
Summon four throwing stars in all directions to form one giant throwing star. When this skill hits enemies a certain number of times, it becomes imbued with dense, dark energy and is enhanced to Four Seasons VI: Rampant.
Required Skill: Level 1 Four Seasons.- [Level 30]
Consumes 330 MP and 1 Star. Deals 1090% damage 7 times on up to 8 enemies.
When this skill hits an enemy 1 time, the next attack will be enhanced to Four Seasons VI: Rampant. Four Seasons VI: Rampant: Deals 160% damage 7 times on up to 8 enemies. Then activate 6 strikes that deal 790% damage 7 times.
Cooldown: 14 seconds.
- [Level 30]
Shadower
3rd Mastery Core: Dark Flare VI/Cruel Stab VI
4th Mastery Core: Sudden Raid VI/Veil of Shadows VI/Covert Shadow
 Dark Flare VI:
[Master Level: 30]
Summon a giant dagger that attacks nearby enemies by emitting dark energy for a certain period of time. Dark Flare VI is affected by summon duration increasing effects. If it hits an enemy using Damage Reflect, you will not take damage.
Required Skill: Level 20 Dark Flare.- [Level 30]
Consumes 120 MP. Summon a giant dagger for 60 seconds.
Periodically deals 580% damage on up to 5 enemies.
Cooldown: 60 seconds.
- [Level 30]

 Cruel Stab VI:
[Master Level: 30]
Attack enemies by piercing through them with your dagger. Pickpocket’s chance to drop coins is halved.
In addition, Assassinate VI and Pulverize VI’s damage is permanently increased.
Required Skill: Level 30 Cruel Stab.- [Level 30]
Consumes 48 MP. Deals 460% damage 6 times on up to 8 enemies.
[Passive Effect: Assassinate VI’s damage is increased by 100%p, Assassinate VI’s final hit’s damage is increased by 100%p, Pulverize VI’s damage is increased by 100%p, Pulverize VI’s final hit’s damage is increased by 100%p.]
- [Level 30]
 Sudden Raid VI:
[Master Level: 30]
Your hidden allies appear to attack enemies. If Sudden Raid hits an enemy using Damage Reflect, you will not take damage.
Required Skill: Level 30 Sudden Raid.- [Level 30]
Consumes 330 MP. Deals 800% damage 7 times on up to 15 enemies. Enemies hit will take 245% damage every 1 second for 10 seconds.
Cooldown: 14 seconds.
- [Level 30]
 Veil of Shadows VI:
[Master Level: 30]
Call your allies of darkness to continuously attack your surroundings. If you are inside Veil of Shadows’ attack range, Advanced Dark Sight’s chance is increased. When used, Dark Sight will not be cancelled.
In addition, when Assassinate hits an enemy, there is a certain chance to charge a usage of Pulverize.
Required Skill: Level 1 Veil of Shadows.- [Level 30]
Consumes 360 MP. For 12 seconds, periodically deals 1280% damage on up to 15 enemies.
Cooldown: 60 seconds.
[Passive Effect: When Assassinate VI hits an enemy, there is a 20% chance to charge 1 usage of Pulverize VI.]
- [Level 30]

 Covert Shadow:
[Master Level: 30]
Deal a stealthy attack from the shadows. When your directly attacking skills hit an enemy, there is a certain chance to activate an additional hit. If you are in Dark Sight for a certain period of time, this skill is enhanced to Shadow Edge.- [Level 30]
When your directly attacking skills hit an enemy, there is a 60% chance to activate an additional hit that deals 150% damage 2 times. If you are in Dark Sight for more than 9 seconds, this skill is enhanced to Shadow Edge.
Shadow Edge: 3 second duration. When your directly attacking skills hit an enemy, there is a 100% chance to activate a deadly strike that deals 160% damage 4 times. If you are inside Smokescreen, when your first directly attacking skill while in Dark Sight hits an enemy, Shadow Edge is instantly applied.
- [Level 30]
Dual Blade
3rd Mastery Core: Hidden Blade VI/All Will Die
4th Mastery Core: Blade Fury VI/Sudden Raid VI
 Hidden Blade VI:
[Master Level: 30]
Summon hidden blades from the Secret Garden’s scrolls that deal powerful additional hits on all of your own attacks. In addition, increases damage.
Required Skill: Level 1 Hidden Blade.
Activation Effect Lock: Right-click.
Can be registered as a Pet Auto Buff skill.- [Level 30]
Consumes 230 MP. 10% damage.
[Final Attack Type Skill] For 90 seconds, your directly attacking skills have a 100% chance to activate an additional hit of 480% damage.
- [Level 30]

 All Must Die:
[Master Level: 30]
The god of the underworld, Yaksha, descends and annihilates all surrounding enemies.
If it hits an enemy using Damage Reflect, you will not take damage.- [Level 30]
Consumes 67 MP. When your own directly attacking skills (other than common skills) hit an enemy 15 times, Yaksha’s daggers activate 4 times dealing 425% damage 6 times on up to 8 enemies.
Reactivation cooldown: 1 seconds.
- [Level 30]


 Blade Fury VI:
[Master Level: 30]
The Secret Garden’s whirlwind technique lets you spin quickly using the blades in both of your hands to cut down enemies around you.
Every few seconds, this skill is enhanced to Furious Jet, which sweeps away nearby enemies. If you use the Custom Command, Furious Jet will only activate if you use the skill with the up arrow key.
In addition, permanently enhances Phantom Blow VI.
Custom Command On/Off: Right-click.- [Level 30]
Consumes 76 MP. Deals 580% damage 5 times on up to 8 enemies.
Every 6 seconds, this skill is enhanced to Furious Jet. Furious Jet: Consumes 84 MP. Deals 590% damage 6 times on up to 12 enemies.
[Passive Effect: Phantom Blow VI’s damage is increased by 42%p.]
- [Level 30]
 Sudden Raid VI:
[Master Level: 30]
Your hidden allies appear to attack enemies. If Sudden Raid hits an enemy using Damage Reflect, you will not take damage.
In addition, permanently enhances All Must Die.
Required Skill: Level 30 Sudden Raid.- [Level 30]
Consumes 340 MP. Deals 1020% damage 7 times on up to 15 enemies. Enemies hit will take 590% damage every 1 second for 10 seconds.
Cooldown: 14 seconds.
[Passive Effect: All Must Die’s damage is increased by 400%p.]
- [Level 30]
Viper
3rd Mastery Core: Serpent Stone VI
4th Mastery Core: Hook Bomber VI
 Serpent Stone VI:
[Master Level: 30]
By using the Sea Serpent’s power, acquire clues about its power and by consuming these clues, you can use the powerful Sea Serpent’s strength.
Assault skills are enhanced to Serpent Assault VI and Serpent Assault Enrage VI.
In addition, Sea Serpent Enrage VI’s damage is increased.
Auto Use Mode On/Off: Right-click.
Required Skill: Level 20 Serpent Assault Enrage.- [Level 30]
Consumes 5 Serpent Stones to be able to activate an Assault skill for 15 seconds.
When a Sea Serpent skill activates, acquire 1 Serpent Stone. You can hold up to 5 Serpent Stones. Serpent Assault VI
Consumes 60 MP. Deals 705% damage 6 times on up to 15 enemies. Serpent Assault Enrage VI
Consumes 60 MP. Summon the Sea Serpent for 5 seconds.
The Sea Serpent periodically deals 905% damage 6 times on up to 6 enemies. If the attack is activated 10 times on a single enemy, it will disappear.
[Passive Effect: Sea Serpent Enrage VI’s damage is increased by 438%p.]
- [Level 30]

 Hook Bomber VI:
[Master Level: 30]
[Fighting Skill]
Attack enemies in front of you with powerful explosive energy created by throwing your fist.
Go beyond your limits to increase Fist Enrage and Super Fist Enrage’s damage.
Required Skill: Level 30 Hook Bomber.- [Level 30]
Consumes 56 MP. Consumes 946% damage 4 times on up to 8 enemies.
[Passive Effect: Fist Enrage VI’s damage is increased by 128%p, Super Fist Enrage’s damage is increased by 75%p, Super Fist Enrage’s shockwave’s damage is increased by 128%p.]
- [Level 30]
Captain
3rd Mastery Core: Head Shot VI/Fusillade VI/Sign of Bombard VI
4th Mastery Core: Summon Crew VI/Siege Bomber VI/Strange Bomb VI/Battleship Nautilus VI
 Head Shot VI:
[Master Level: 30]
Attack a monster’s head to deal lots of damage. Every few seconds, Head Shot is enhanced.
Required Skill: Level 30 Head Shot.- [Level 30]
Consumes 36 MP. Deals 1688% damage 13 times.
60% defense ignore, additional 100% critical rate.
When this skill hits an enemy 2 times, the next Head Shot will activate Death Hail. Death Hail: Consumes 36 MP. Activate 2 shots that deal 1266% damage 13 times on up to 8 enemies.
Cooldown: 5 seconds.
- [Level 30]
 Fusillade VI:
[Master Level: 30]
Fire a barrage of shots in front of you. If Captain uses this skill with the down arrow key, the attack range will be decreased but you cannot be knocked back by any enemy attacks while casting this skill.
Required Skill: Level 30 Fusillade.- [Level 30]
Consumes 65 MP and 4 Bullets. Deals 1080% damage 4 times on up to 8 enemies.
- [Level 30]
 Sign of Bombard VI:
[Master Level: 30]
Install the Captain’s Mark to indicate where Battleship Bomber and Siege Bomber strike. If you use this skill with the down arrow key, the installed Mark will disappear.
In Auto Use Mode, if Continual Aiming hits an enemy, Sign of Bombard will be installed at the location of the enemy hit.
Auto Use Mode On/Off: Right-click.
Required Skill: Level 15 Sign of Bombard, Level 15 Crew Commandership.- [Level 30]
Consumes 48 MP. For 64 seconds, install the Mark. Only 1 can be installed.
Battleship Bomber and Siege Bomber will automatically strike enemies around the Mark. Strikes will prioritize hitting enemies applied with Continual Aiming, and if there are none, then they will prioritize hitting boss monsters.
- [Level 30]


 Summon Crew VI:
[Master Level: 30]
Summon brave crewmembers of the Nautilus. The summoned crew move freely and fire bullets that track enemies. If they hit an enemy using Damage Reflect, you will not take damage. The sailors will prioritize hitting the enemy with the highest max HP within range.
Required Skill: Level 15 Crew Commandership.- [Level 30]
Consumes 48 MP. Summon two brave crewmembers to aid you in battle for 120 seconds.
Dual Pistol Crew: Fire 2 bullets that deal 965% damage 3 times.
Sharpshooter Crew: Fire a bomb that deals 468% damage 4 times on up to 4 enemies.
If you are hit by a status effect, one crewmember will block the status effect. A crewmember that has blocked a status effect cannot block another one until they are resummoned.
Cooldown: 45 seconds.
- [Level 30]


 Siege Bomber VI:
[Master Level: 30]
Install a fixed cannon that indiscriminately fires at nearby enemies for a certain period of time. If it hits an enemy using Damage Reflect, you will not take damage. Siege Bomber will prioritize attacking the enemy with the highest max HP within range.
If Sign of Bombard is installed within a certain area, it will strike at that location.
Required Skill: Level 10 Siege Bomber.- [Level 30]
Consumes 21 MP. Summon a cannon for 60 seconds that deals 615% damage on up to 3 enemies.
When Sign of Bombard is installed, activate a strike that deals 615% damage on up to 3 enemies.
- [Level 30]
 Strange Bomb VI:
[Master Level: 30]
Release a large bomb made with unknown technology and detonate it.
Required Skill: Level 1 Strange Bomb.- [Level 30]
Consumes 590 MP. Deals 600% damage 12 times on up to 15 enemies.
Cooldown: 15 seconds.
- [Level 30]
 Battleship Nautilus VI:
[Master Level: 30]
Issue an attack command to the Battleship Nautilus to attack multiple enemies at the same time. If Battleship Nautilus hits an enemy using Damage Reflect, you will not take damage.
Required Skill: Level 30 Battleship Nautilus.- [Level 30]
Consumes 410 MP. Deals 865% damage 7 times on up to 15 enemies.
Cooldown: 30 seconds.
- [Level 30]
Cannon Shooter
3rd Mastery Core: Rolling Cannon Rainbow VI
4th Mastery Core: Monkey Furious VI/Support Monkey Twins VI

 Rolling Cannon Rainbow VI:
[Master Level: 30]
Issue a command to Cannon Shooter’s reliable allies to summon multiple cannons and concentrate merciless firepower in front of you.
When summoned, consume 1 Communication Network. If you use this skill with the down arrow key, you can consume 2 Communication Networks to summon the more powerful Max Cannon Rainbow. If you use the Custom Command, you can use Max Cannon Rainbow by pressing the skill key without inputting a directional key.
Only 1 Cannon can be summoned. If it hits an enemy using Damage Reflect, you will not take damage.
Permanently enhances Cannon Buster VI.
Custom Command On/Off: Right-click.
Required Skill: Level 1 Rolling Cannon Rainbow.- [Level 30]
Consumes 330 MP. Summon the Cannon for 10 seconds.
The Cannon periodically deals 1800% damage 5 times on up to 10 enemies. Max Cannon Rainbow: Consumes 330 MP. Summon the Cannon for 10 seconds.
The Cannon periodically deals 2000% damage 10 times on up to 10 enemies.
You can prepare 1 Communication Network every 90 seconds, and you can hold up to 2.
[Passive Effect: Cannon Buster VI’s damage is increased by 120%p.]
- [Level 30]


 Support Monkey Twins VI:
[Master Level: 30]
Summon the elite artillery Monkey Twins to aid you in battle.
If they hit an enemy using Damage Reflect, you will not take damage. Support Monkey Twins VI is affected by summon duration increasing effects.
Required Skill: Level 20 Support Monkey Twins.- [Level 30]
Consumes 80 MP. Summon the Monkey Twins for 60 seconds. Each Twin deals 1090% damage.
Cooldown: 10 seconds.
- [Level 30]

 Monkey Furious VI:
[Master Level: 30]
Fire a specially made high-elasticity bomb in front of you, coating all enemies it hits with gunpowder to deal damage over time and greatly enhancing the effects of Cannon Shooter’s attacks. You can use the skill again to instantly detonate the bomb.
Required Skill: Level 20 Monkey Furious.- [Level 30]
Consumes 70 MP. Deals 314% damage 3 times on up to 10 enemies.
Enemies hit will take 336% damage every 1 second for 60 seconds, and take 55% increased damage.
If you re-use the skill, it will instantly explode, dealing 314% damage 3 times on up to 10 enemies.
Cooldown: 10 seconds. If no enemies are hit, the cooldown is decreased by 5 seconds.
- [Level 30]
Mikhail
3rd Mastery Core: Install Shield VI/Deadly Charge VI
4th Mastery Core: Offensive Defense VI/Final Attack VI/Soul Majesty VI
 Install Shield VI:
[Master Level: 30]
Summon a Soul Shield imbued with the power of light. The Soul Shield can be installed in the air. This skill is affected by summon duration increasing effects.
Periodically attacks enemies by emitting light.
Required Skill: Level 30 Install Shield.- [Level 30]
Consumes 99 MP. 61 second duration.
Periodically deals 483% damage 4 times on up to 6 enemies.
When attacking normal monsters, increases damage by 60%.
Cooldown: 10 seconds.
- [Level 30]

 Deadly Charge VI:
[Master Level: 30]
[Soul Light Skill]
Summon a knight of light that can use the power of souls to launch a deadly charge. Periodically, the power of souls is enhanced, and the knight of light attacks enemies with an additional Sword Slash after the charge attack.
Required Skill: Level 1 Deadly Charge.- [Level 30]
Consumes 330 MP. Deals 1700% damage 10 times on up to 15 enemies.
Every 35 seconds, the next attack will be enhanced and activate an additional Sword Slash. Sword Slash: Deals 515% damage 8 times on up to 15 enemies. Enemies can be hit up to 5 times by the Sword Slash.
Enemies hit will be inflicted with a debuff for 60 seconds that increases their damage taken from all party members including yourself by 10%.
When you attack, there is a 50% chance to apply a Blind for 10 seconds that decreases the target’s accuracy by 30%.
Cooldown: 15 seconds.
- [Level 30]


 Offensive Defense VI:
[Master Level: 30]
The power of the shield that protects the Empress makes enemies vulnerable to Mikhail’s Soul Light. Enemies hit by Royal Guard’s counterattack are inflicted with a debuff. When debuffed enemies are hit by a Soul Light skill, an additional Shockwave of Light is activated.
The Shockwave of Light will be activated from the center of the boss monster with the highest max HP that was hit by the Soul Light skill. If there were no boss monsters, it will be activated from the center of the closest monster that was hit.
Required Skill: Level 20 Advanced Offensive Defense.- [Level 30]
When Royal Guard’s counterattack hits an enemy, activate the Offensive Defense debuff for 20 seconds on the enemy.
When Soul Light skills hit a debuffed enemy, activate a Shockwave of Light from the center of the enemy hit. The Offensive Defense debuff will disappear from enemies hit by the Shockwave of Light.
Shockwave of Light: Deals 1365% damage 5 times on up to 6 enemies.
Reactivation cooldown: 10 seconds.
- [Level 30]
 Final Attack VI:
[Master Level: 30]
There is a certain chance for an additional hit to be activated after using your directly attacking skills.
However, it can only be activated while holding a one-handed sword.
Required Skill: Level 30 Advanced Final Attack.- [Level 30]
[Final Attack Type Skill] When your attack hits an enemy, there is a 76% chance to activate a Final Attack that deals 222% damage 4 times.
- [Level 30]
 Soul Majesty VI:
[Master Level: 30]
Forge a firm belief in protecting the Empress and your allies to make your Soul Shield and Soul Light skills more powerful. During this skill, your damage is increased and Advanced Soul Shield’s effects are enhanced.
In addition, Install Shield will inflict Offensive Defense’s debuff and Offensive Defense will be enhanced.
Required Skill: Level 1 Soul Majesty.- [Level 30]
Consumes 230 MP. 25 second duration. 15% damage.
During this skill, when Advanced Soul Shield’s Royal Guard succeeds, the damage reduction effect is increased by 5%, applying additively to the damage reduction from Advanced Soul Shield.
During this skill, Install Shield will apply Offensive Defense’s debuff. Offensive Defense’s Shockwave of Light reactivation cooldown is decreased to 2 seconds.
When Offensive Defense’s Shockwave of Light is activated, activate an additional Wave of Light.
Wave of Light: Deals 1585% damage 6 times on up to 8 enemies.
Cooldown: 180 seconds.
- [Level 30]
Soul Master
3rd Mastery Core: Cosmic Burst VI
4th Mastery Core: Soluna Slash VI/Soluna Power II
 Cosmic Burst VI:
[Master Level: 30]
[Cosmic]
Shoot Cosmic Orbs to attack. When used, consume all Cosmic Orbs. The cooldown is decreased based on the number of Cosmic Orbs consumed. You can use Cosmic Burst with no cast action while using Solar Slash, Lunar Divide, and Cross the Styx. The shot Cosmic Orbs will prioritize tracking the boss monster with the highest max HP. If they hit an enemy using Damage Reflect, you will not take damage. Cosmic Burst is not affected by cooldown reduction or cooldown reset effects.
In Auto Use Mode, when you have the maximum number of Cosmic Orbs and the skill is not on cooldown, Cosmic Burst will be used automatically when Solar Slash, Lunar Divide, or Cross the Styx hits an enemy.
Required Skill: Level 30 Cosmic Burst.
Auto Use Mode On/Off: Right-click.- [Level 30]
Consumes 60 MP. Consumes all Cosmic Orbs to shoot them.
Each Cosmic Orb tracks an enemy and deals 1080% damage 4 times.
If multiple Cosmic Orbs hit a single enemy, the second and later Orbs’ final damage is decreased by 30%.
The cooldown is decreased by 1 second per consumed Cosmic Orb.
Cooldown: 15 seconds.
- [Level 30]

 Soluna Slash VI:
[Master Level: 30]
Charge and slash through enemies. This skill can only be used during Soluna Time. This skill can also be used while using your own skills.
In addition, Cosmic Shower VI and Cosmic Burst VI’s damage is permanently increased.
Required Skill: Level 30 Soluna Slash.- [Level 30]
Consumes 117 MP. Deals 470% damage 6 times on up to 7 enemies.
Cooldown: 5 seconds.
[Passive Effect: Cosmic Shower VI’s damage is increased by 70%p, Cosmic Burst VI’s damage is increased by 105%p.]
- [Level 30]
 Soluna Power II:
[Master Level: 30]
Completely awaken the power of the unified celestial bodies to launch an even more powerful attack. After the sword slashes of dazzling sunlight and freezing moonlight are activated, the sunlight and moonlight become one completely to attack enemies.
If Soluna Power is not on cooldown, it will be activated when Solar Slash, Lunar Divide, or Cross the Styx hits an enemy.
If this skill hits an enemy using Damage Reflect, you will not take damage.
Required Skill: Level 1 Soluna Power.- [Level 30]
After the sword slashes of sunlight and moonlight are activated, activate 12 celestial explosions that deal 870% damage 5 times on up to 8 enemies.
Cooldown: 20 seconds.
- [Level 30]
Flame Wizard
3rd Mastery Core: Orbital Explosion VI/Phoenix Drive VI
4th Mastery Core: Inferno Rise VI
 Orbital Explosion VI:
[Master Level: 30]
Understand and liberate the nature of flames.
When Orbital Flame, Phoenix Drive, Blazing Orbital Flame, Infinity Flame Circle, or Eternity hits an enemy, the next attack will activate an additional hit of fire elemental flame energy.
If the flame energy additional hit hits an enemy using Damage Reflect, you will not take damage.
On/Off Skill.
Required Skill: Level 10 Orbital Explosion.- [Level 30]
Consumes 15 MP.
When Orbital Flame, Phoenix Drive, Blazing Orbital Flame, Infinity Flame Circle, or Eternity hits an enemy 10 times, the next Orbital Flame type skill, Infinity Flame Circle, or Eternity will activate an additional hit that deals 330% damage 3 times.
- [Level 30]

 Phoenix Drive VI:
[Master Level: 30]
As the incarnation of the phoenix, unlock the flow of flames to its limit and enhance Orbital Flame. During this skill, when you use Orbital Flame, the flame’s energy overflows, causing an indiscriminate bombardment of flames.
Different attacks are activated based on the type of incarnation summoned.
Required Skill: Level 1 Phoenix Drive.- [Level 30]
Consumes 330 MP. For 15 seconds, enhance Orbital Flame.
Fire Lion: Fire 3 flames that deal 725% damage 2 times on up to 8 enemies. If a single enemy is hit by multiple flames, the second and later flames’ final damage is decreased by 50%. When attacking normal monsters, increases damage by 40%.
Flame Fox: Fire 4 flames that deal 1035% damage 2 times on up to 8 enemies. If a single enemy is hit by multiple flames, the second and later flames’ final damage is decreased by 50%.
Cooldown: 90 seconds.
- [Level 30]
 Inferno Rise VI: Fire Lion:
[Master Level: 30]
Gather the flow of flames around you into one spot, causing a huge flame to rise up from the ground. If you use this skill with the down arrow key, Inferno Rise Fox Mode will be activated. If you use the Command Lock, Inferno Rise Fox Mode will not be activated even if you use this skill with the down arrow key.
This is a fire element attack. This skill can only be used while the Fire Lion is summoned.
Command Lock: Right-click.
Required Skill: Level 30 Inferno Rise.- [Level 30]
Consumes 130 MP. Deals 500% damage 10 times on up to 15 enemies.
When attacking normal monsters, damage is increased by 110%p.
Cooldown: 12 seconds.
- [Level 30]
 Inferno Rise VI: Flame Fox:
[Master Level: 30]
The Flame Fox transforms into pure flames and sweeps through your surroundings. Enemies with 5 stacks of the Fox’s Mischief will explode into flames to deal additional damage.
Whenever some of Flame Wizard’s directly attacking skills hit an enemy, Inferno Rise Fox Mode’s cooldown is decreased.
If you use this skill with the down arrow key, Inferno Rise Lion Mode will be activated. If you use the Command Lock, Inferno Rise Lion Mode will not be activated even if you use this skill with the down arrow key.
This is a fire element attack. This skill can only be used while the Flame Fox is summoned.
Command Lock: Right-click.
Required Skill: Level 30 Inferno Rise.- [Level 30]
Consumes 26 MP. Deals 1045% damage 8 times on up to 15 enemies.
When an enemy with 5 stacks of the Fox’s Mischief is hit, activate an additional hit that deals 3070% damage 15 times.
Cooldown: 30 seconds.
When your directly attacking skills hit an enemy, the cooldown is decreased by 0.6 seconds.
- [Level 30]
Wind Breaker
3rd Mastery Core: Storm Bringer VI/Fairy Turn VI/Monsoon VI
4th Mastery Core: Storm Whim VI/Anemoi
 Storm Bringer VI:
[Master Level: 30]
Call upon storms and gain the power to punish enemies.
If this skill hits an enemy using Damage Reflect, you will not take damage. Storm Bringer VI is affected by buff duration increasing effects.
Required Skill: Level 15 Storm Bringer.
Can be registered as a Pet Auto Buff skill.- [Level 30]
Consumes 80 MP. For 200 seconds, when you attack, there is a 45% chance to summon a giant arrow that deals 1210% damage.
- [Level 30]

 Fairy Turn VI:
[Master Level: 30]
Swing your bow as if you were dancing with the wind, creating a strong wind that pushes away enemies. Certain monsters will resist being pushed.
Required Skill: Level 30 Fairy Turn.- [Level 30]
Consumes 42 MP. Deals 625% damage 5 times on up to 7 enemies.
- [Level 30]

 Monsoon VI:
[Master Level: 30]
Summon the powerful monsoon winds to envelop the world.
Required Skill: Level 1 Monsoon.- [Level 30]
Consumes 410 MP. Deals 705% damage 12 times on up to 15 enemies. Enemies hit will take 336% damage every 1 second for 30 seconds.
Cooldown: 30 seconds.
- [Level 30]
 Storm Whim VI:
[Master Level: 30]
With blessings bestowed by the wind spirits, you can temporarily control the power of the capricious winds.
If this skill hits an enemy using Damage Reflect, you will not take damage.
Required Skill: Level 1 Storm Whim.- [Level 30]
Consumes 230 MP. For 30 seconds, when you attack, there is a 30% chance for an additional Fierce Spirit Energy to appear, dealing 935% damage.
Cooldown: 120 seconds.
- [Level 30]

 Anemoi:
[Master Level: 30]
The Great Spirit, inspired by the wind spirits, appears and brings the winds of victory. Anemoi attacks periodically by creating strong winds with a light touch.
If Anemoi hits an enemy using Damage Reflect, you will not take damage.
Great Spirit Transparency On/Off: Right-click.- [Level 30]
Consumes 41 MP. Anemoi appears and deals 1733% damage 15 times on up to 12 enemies. Afterwards, for 20 seconds, she attacks periodically dealing 1879% damage 10 times on up to 10 enemies.
Cooldown: 60 seconds.
- [Level 30]
Night Walker
3rd Mastery Core: Darkness Omen VI
4th Mastery Core: Dominion VI/Abyssal Darkness
 Darkness Omen VI:
[Master Level: 30]
Summon a swarm of bats as an omen of darkness to attack enemies for a certain period of time. If Shadow Bats is active when you use this skill, you can summon a weakened bat swarm for a longer period of time.
Shadow Bats and Ravenous Bats will be summoned in proportion to the number of enemies hit by the swarm of bats. If Darkness Omen hits an enemy using Damage Reflect, you will not take damage. This skill is affected by summon duration increasing effects. You cannot be knocked back by any enemy attacks during the cast action. This is a dark element attack.
Required Skill: Level 30 Darkness Omen.- [Level 30]
Consumes 122 MP.
For 7 seconds, deals 820% damage 6 times on up to 6 enemies every 0.3 seconds. While Shadow Bats is applied, summon a weakened bat swarm for 60 seconds that deals 535% damage 2 times on up to 6 enemies every 1.5 seconds.
For every 3 enemies hit, summon 1 Shadow Bat and Ravenous Bat.
Only 1 can be summoned on the map.
Cooldown: 60 seconds.
- [Level 30]
 Dominion VI:
[Master Level: 30]
Maximize the power of darkness to create your own domain. This is a dark element attack.
Gray Screen On/Off: Right-click.
Required Skill: Level 1 Dominion.- [Level 30]
Consumes 410 MP. Deals 2000% damage 10 times on up to 15 enemies. You are invincible during the cast action.
After the attack, when you use skills that throw stars, Mark of Darkness will be stacked to the maximum number, Shadow Bats and Ravenous Bats’ maximum summon limit will be increased by 3, and Bats will be summoned continuously.
During this skill, gain 20% final damage, 100% critical rate, Shadow Momentum’s inertia is maintained at the maximum value and its duration is refreshed after Dominion ends.
Cooldown: 180 seconds.
- [Level 30]
 Abyssal Darkness:
[Master Level: 30]
Master the darkness and strike enemies’ weakspots with a powerful attack. When you hit enemies with the Mark of Darkness with skills that use throwing stars a certain number of times, activate an Abyssal Strike. If Abyssal Darkness hits an enemy using Damage Reflect, you will not take damage. The Abyssal Strike’s damage is increased in proportion to the number of Element: Darkness’ Mark of Darkness stacks.
Required Skill: Level 10 Darkness Adapting III.- [Level 30]
When skills that use throwing stars (except Rapid Throw) hit an enemy 12 times, activate an Abyssal Strike that deals 427% damage 6 times.
The damage is increased in proportion to the number of Element: Darkness’ Mark of Darkness stacks, up to 5 stacks.
- [Level 30]
Striker
3rd Mastery Core: Typhoon VI/Advent of the Sea God VI
4th Mastery Core: Sea Wave VI/Sea God Rigid Body
 Typhoon VI:
[Master Level: 30]
[Link Mastery Skill]
When linking attacks, the accumulated power is pushed to its limit and becomes a powerful typhoon that sweeps everything away. This skill can be linked with all skills except for Thunder and itself. This skill can link to Tidal Crash faster. The cast action cannot be cancelled by linking with Tidal Crash while in the air.
Typhoon VI is affected by buff duration increasing effects.
Required Skill: Level 30 Typhoon.- [Level 30]
Consumes 59 MP. Can be used when you have 2 or more Lightning Charge buffs.
Consume all of the accumulated Lightning Charge buffs to deal 831% damage 5 times on up to 8 enemies. If the skill is used when Lightning Charge buff was stacked to the maximum number, the damage is increased by 250%p.
Receive a buff for 95 seconds that increases your damage by 3% per consumed Lightning Charge buff.
However, this skill cannot activate the Lightning Charge buff.
Cooldown: 12 seconds.
- [Level 30]

 Advent of the Sea God VI:
[Master Level: 30]
The giant sea god rises up and shows its power to all enemies on the ground. This skill can be linked with all skills except for Thunder and itself. This skill can link to Tidal Crash faster. This skill is not affected by cooldown reduction effects.
Required Skill: Level 1 Advent of the Sea God.- [Level 30]
Consumes 410 MP. Deals 1380% damage 7 times on up to 15 enemies. You are invincible during the cast action.
Cooldown: 45 seconds.
- [Level 30]
 Sea Wave VI:
[Master Level: 30]
[Link Mastery Skill]
When you link skills, a Sea Wave is created that flows towards enemies with the power of lightning. When Sea Wave is created, it will flow in the direction that the Striker is facing. It will flow in the direction where there are more enemies that can be attacked within a certain range.
The Sea Wave will attack enemies it collides with. If it hits an enemy using Damage Reflect, you will not take damage.
In addition, Annihilate VI is permanently enhanced.
Sea Wave Activation Lock: Right-click.
Required Skill: Level 15 Sea Wave.- [Level 30]
Consumes 95 MP. When you link skills, if this skill is not on cooldown, a Sea Wave will be created.
The Sea Wave will flow in a certain direction and deal 1010% damage 5 times on up to 5 enemies.
When it moves 2700 range or hits 24 enemies, it will disappear.
A single enemy can only be hit up to 1 time.
Reactivation cooldown: 12 seconds.
[Passive Effect: Annihilate VI’s damage is increased by 47%p.]
- [Level 30]

 Sea God Rigid Body:
[Master Level: 30]
When you link skills, the accumulated power of the sea and lightning creates a shield that instantly enhances your body and weakens enemies’ attacks.- [Level 30]
When a linked skill hits an enemy, create a shield for 2 seconds that blocks damage equal to 4% maximum HP.
The shield can stack up to 15% maximum HP, and 25% + 50 of the current shield will disappear every second.
- [Level 30]
Aran
3rd Mastery Core: Hyper Boost End – Last Stand VI
4th Mastery Core: Final Attack VI/Adrenaline Maximum VI/Frozen Ground VI


 Hyper Boost End – Last Stand VI:
[Master Level: 30]
With the unwavering will of a hero, unleash blows engraved with Maha’s power.
This skill can only be used 1 time in Hyper Awakening Mode.
Required Skill: Level 1 Hyper Boost End – Last Stand.- [Level 30]
Consumes 560 MP. By tapping the skill key, you can attack up to 3 times.
1st Attack: Activate 5 strikes that deal 3360% damage 10 times on up to 12 enemies.
2nd Attack: Activate 5 strikes that deal 3360% damage 10 times on up to 12 enemies.
3rd Attack: Activate 7 strikes that deal 5880% damage 13 times on up to 15 enemies.
Cooldown: 30 seconds.
- [Level 30]
 Frozen Ground VI:
[Master Level: 30]
With Maha’s power, summon a polearm filled with the bitter cold that creates frozen ground for a certain period of time. Frozen Ground is not affected by summon duration increasing effects. If this skill hits an enemy using Damage Reflect, you will not take damage.
[Activation Command: ↓ + Attack key]
Command Lock: Right-click.
Required Skill: Level 20 Frozen Ground.- [Level 30]
Consumes 42 MP. 60 second duration.
Periodically deals 885% damage 4 times on up to 6 enemies.
Cooldown: 30 seconds.
- [Level 30]


 Adrenaline Maximum VI:
[Master Level: 30]
You can fully use the power of Combos and Maha, surpassing Adrenaline Boost’s limits. Due to the maximized cold power, when you are not in Adrenaline Boost Mode, using your directly attacking skills will periodically create an Ice Storm.
In Adrenaline Boost Mode, the dense cold air from Aran’s polearm techniques takes the form of an Ice Wave that attacks nearby enemies quicker. When you hit an enemy with a certain number of attacks, you will enter Hyper Awakening Mode where Maha’s power is fully unleashed.
In Hyper Awakening Mode, you can use Hyper Boost End skills and Maha’s power will become a Golden Flash that additionally attacks enemies.
Adrenaline Boost’s duration is not affected by Hyper Awakening’s duration.
Hyper Awakening Mode is not affected by buff duration increasing effects.
Required Skill: Level 30 Adrenaline Maximum.- [Level 30]
After reaching 1000 Combo, you can use Adrenaline Boost Activate to enter Adrenaline Boost Mode for 15 seconds. Ice Storm: When you use directly attacking skills, deals 1560% damage 14 times on up to 12 enemies every 15 seconds.
 Ice Wave: Periodically deals 897% damage 2 times on up to 7 enemies.
In Adrenaline Boost Mode, when you hit enemies with an attack 10 times, enter Hyper Awakening Mode.
Hyper Awakening: 5 second duration. You can use Hyper Boost End skills. When you use directly attacking skills, activate a Golden Flash every 0.8 seconds. Golden Flash: Deals 1190% damage 10 times on up to 12 enemies.
Reactivation cooldown: 180 seconds. Hyper Awakening’s reactivation cooldown will be displayed as Adrenaline Boost Activate’s border.
- [Level 30]
 Final Attack VI:
[Master Level: 30]
There is a certain chance for an additional hit to be activated after using your directly attacking skills. However, it can only be activated while holding a Polearm.
Required Skill: Level 30 Advanced Final Attack.- [Level 30]
[Final Attack Type Skill] 61% chance to activate a Final Attack that deals 266% damage 3 times.
- [Level 30]
Evan
3rd Mastery Core: Circle of Earth VI/Dragon Dive VI/Dive of Earth VI/Dive of Thunder VI
4th Mastery Core: Circle of Wind VI/Dragon Breath VI/Breath of Earth VI/Breath of Wind VI/Magic Debris VI/Dragon Sparking VI

 Circle of Earth VI:
[Master Level: 30]
Create an irregular magic circle to lift the ground in front of you and strike enemies.
Required Skill: Level 20 Circle of Earth.- [Level 30]
Consumes 68 MP. Deals 730% damage 5 times on up to 8 enemies.
After using a Mir skill, if you use Circle of Earth while using Circle of Mana or while crouching, Circle of Earth will not activate and you can activate a Fusion skill but the MP cost will be tripled.
- [Level 30]
 Dragon Dive VI:
[Master Level: 30]
[Mir Skill] Mir dives in front of Evan and activates a shockwave by flapping his wings. If Dragon Dive hits an enemy using Damage Reflect, you will not take damage.
Mir skills and Fusion skills are not affected by attack speed increases.
Required Skill: Level 20 Dragon Dive.- [Level 30]
Consumes 80 MP. Deals 682% damage 3 times on up to 6 enemies for 3.5 seconds.
Cooldown: 8 seconds.
- [Level 30]

 Dive of Earth VI:
[Master Level: 30]
[Fusion Skill] Mir resonates with Evan’s magic while attacking with Dragon Dive, shattering rocks in front of him to deal damage to the surrounding area. If Dive of Earth hits an enemy using Damage Reflect, you will not take damage.
This skill is activated if Evan uses Circle of Earth while Mir is using Dragon Dive.
Required Skill: Level 20 Dive of Earth.- [Level 30]
Consumes 80 MP. Create rocks and collides 3 times. When attacking, Mir deals 2100% damage 10 times on up to 6 enemies.
When the same enemy is hit multiple times, the collisions’ final damage is decreased by 50%.
- [Level 30]
 Dive of Thunder VI:
[Master Level: 30]
[Fusion Skill] Mir resonates with Evan’s magic while attacking with Dragon Dive, creating powerful electric spheres that flow across the ground from its entire body for a certain period of time. If Dive of Thunder hits an enemy using Damage Reflect, you will not take damage.
This skill is activated if Evan uses Circle of Thunder while Mir is using Dragon Dive.
Required Skill: Level 20 Dive of Thunder.- [Level 30]
Consumes 80 MP. For 4 seconds, periodically crates 4 electric spheres that deal 586% damage.
The electric spheres will disappear after hitting an enemy or after a certain period of time.
- [Level 30]

 Circle of Wind VI:
[Master Level: 30]
Create a gust of wind that blows in front of you, pushing back enemies with a shockwave.
Required Skill: Level 10 Circle of Wind.- [Level 30]
Consumes 46 MP. Deals 730% damage 5 times on up to 6 enemies.
After using a Mir skill, if you use Circle of Wind while using Circle of Mana or while crouching, Circle of Wind will not activate and you can activate a Fusion skill but the MP cost will be tripled.
- [Level 30]

 Dragon Breath VI:
[Master Level: 30]
[Mir Skill] Mir spews blazing flames in front of you to burn all enemies. If Dragon Breath hits an enemy using Damage Reflect, you will not take damage.
Mir skills and Fusion skills are not affected by attack speed increases.
Required Skill: Level 30 Dragon Breath.- [Level 30]
Consumes 90 MP. Deals 505% damage 5 times on up to 8 enemies for 3 seconds.
Cooldown: 10 seconds.
- [Level 30]

 Breath of Earth VI:
[Master Level: 30]
[Fusion Skill] Mir resonates with Evan’s magic while attacking with Dragon Breath, firing a flame breath that tracks multiple enemies. If Breath of Earth hits an enemy using Damage Reflect, you will not take damage.
This skill is activated if Evan uses Circle of Earth while Mir is using Dragon Breath.
Required Skill: Level 30 Breath of Earth.- [Level 30]
Consumes 90 MP. Deals 477% damage 6 times on up to 4 enemies.
- [Level 30]
 Breath of Wind VI:
[Master Level: 30]
[Fusion Skill] Mir resonates with Evan’s magic while attacking with Dragon Breath, firing a powerful flame gust that takes enemies’ breath away. If Breath of Wind hits an enemy using Damage Reflect, you will not take damage.
This skill is activated if Evan uses Circle of Wind while Mir is using Dragon Breath.
Required Skill: Level 30 Breath of Wind.- [Level 30]
Consumes 90 MP. Deals 583% damage 6 times on up to 8 enemies for 3.5 seconds.
When attacking enemies with less than 30% HP, damage is increased by 65%p.
- [Level 30]

 Magic Debris VI:
[Master Level: 30]
Create dense magical debris around enemies hit by Fusion skills. The created debris can be activated to deal damage to enemies around Evan, and the damage is increased based on the number of Magic Debris activated at the same time.
In Auto Use Mode, when a certain number of Magic Debris are created, it will automatically activate.
Auto Use Mode On/Off: Right-click.
Required Skill: Level 20 Enhanced Magic Debris.- [Level 30]
Create 1 dense Magic Debris around enemies hit by Fusion skills. Recreation cooldown: 0.4 seconds. Maximum creation limit of 15. When activated, consumes 166 MP.
The Magic Debris is fired at up to 15 enemies, dealing 427% damage. The damage is increased by 353%p per 5 Magic Debris. If the created Magic Debris is not used for a certain period of time, it will disappear.
- [Level 30]
 Dragon Sparking VI:
[Master Level: 30]
There is a certain chance for Mir to launch an additional hit after using Evan’s directly attacking skills.- [Level 30]
[Final Attack Type Skill] 100% chance to activate Dragon Sparking that deals 555% damage.
- [Level 30]
Luminous
3rd Mastery Core: Apocalypse VI/Eternal Lightness
4th Mastery Core: Twilight Nova VI
 Apocalypse VI:
[Master Level: 30]
[Dark Magic]
Open a rift of darkness to summon hellfire that burns enemies to damage them.
Required Skill: Level 30 Apocalypse.- [Level 30]
Consumes 118 MP. Deals 768% damage 7 times on up to 8 enemies.
- [Level 30]
 Eternal Lightness:
[Master Level: 30]
Obliterate enemies with endless bright light together with darkness. When you use Light magic or Equilibrium magic while in Sunfire or Equilibrium mode, this skill will be activated. This skill shares a cooldown with Endless Darkness.- [Level 30]
Consumes 80 MP. Deals 1355% damage 7 times on up to 6 enemies.
Reactivation cooldown: 2 seconds.
- [Level 30]

 Twilight Nova VI:
[Master Level: 30]
Create an explosion with the power of light and darkness. This skill is not affected by Equilibrium’s effect of not applying cooldowns.
Required Skill: Level 30 Twilight Nova.- [Level 30]
Consumes 91 MP. Attacks up to 8 enemies. Sunfire: Activate 3 explosions that deal 1630% damage 7 times. Eclipse: Activate 3 explosions that deal 1630% damage 7 times.
 Equilibrium: Activate 4 explosions that deal 1125% damage 7 times.
Cooldown: 15 seconds.
- [Level 30]
Mercedes
3rd Mastery Core: Unicorn Spike VI/Gust Dive VI/Strike Dualshot VI
4th Mastery Core: Elemental Knights VI/Final Attack VI


 Unicorn Spike VI:
[Master Level: 30]
Summon holy unicorns to attack multiple enemies in front of you and weaken them for a certain period of time. Weakened targets will take additional damage from all attacks. This skill can be linked with Charge Drive, Strike Dualshot, Legendary Spear, Lightning Edge, and Wrath of Enlil. When you use a linked skill, the cooldown is decreased by 1 second.
Required Skill: Level 20 Unicorn Spike.- [Level 30]
Consumes 70 MP. Deals 938% damage 6 times on up to 8 enemies with 100% critical rate. Enemies hit will be inflicted with a debuff for 60 seconds that increases their damage taken by 30%.
Cooldown: 9 seconds.
When you use a linked skill, the cooldown is decreased by 1 second.
- [Level 30]
 Gust Dive VI:
[Master Level: 30]
Quickly descend from the air with the power of the wind and attack multiple enemies within range. You need 120 or higher jump to use this skill. You cannot be knocked back by any enemy attacks while using this skill. This skill can be linked with Charge Drive, Strike Dualshot, Leap Tornado, Unicorn Spike, Legendary Spear, Lightning Edge, and Wrath of Enlil.
Required Skill: Level 20 Gust Dive.- [Level 30]
Consumes 51 MP. Deals 775% damage 4 times on up to 6 enemies.
- [Level 30]

 Strike Dualshot VI:
[Master Level: 30]
Fire multiple arrows at a very high speed at multiple enemies in front of you. You can also use this skill while in the air. This skill can be linked with Charge Drive, Unicorn Spike, Legendary Spear, Lightning Edge, and Wrath of Enlil.
Required Skill: Level 20 Strike Dualshot, Level 10 Advanced Strike Dualshot.- [Level 30]
Consumes 45 MP. Deals 890% damage 4 times on up to 8 enemies.
[Passive Effect: Ishtar’s Ring VI’s damage is increased by 20%p.]
- [Level 30]


 Elemental Knights VI:
[Master Level: 30]
Randomly summon 1 of the Ice Spirit, Fire Spirit, or Dark Spirit to aid you in battle. While Elemental Knights is activated, when your attacks hit an enemy, a Spirit will be summoned. If Elemental Knights hits an enemy using Damage Reflect, you will not take damage.
This skill is affected by summon duration increasing effects.
On/Off Skill.
Required Skill: Level 20 Elemental Knights.- [Level 30]


 When your attack hits an enemy, consumes 60 MP to summon 1 Spirit for 210 seconds. Up to 3 can be summoned.
The summoned Spirits deal 325% damage 2 times every 2 seconds.
Re-summon cooldown: 10 seconds.
- [Level 30]

 Final Attack VI:
[Master Level: 30]
There is a certain chance for an additional hit to be activated after using a directly attacking skills. However, it can only be activated while holding Dual Bowguns.
Required Skill: Level 30 Advanced Final Attack.- [Level 30]
[Final Attack Type Skill] 76% chance to activate a Final Attack that deals 345% damage 2 times.
- [Level 30]
Phantom
3rd Mastery Core: Noire Carte VI
4th Mastery Core: Rose Carte Finale VI/La Morte Carte


 Noire Carte VI:
[Master Level: 30]
Every time Phantom’s attacks are a critical hit (except for summon or install skills), there is a certain chance that a Card will be thrown from Phantom to attack enemies automatically. At this time, the Card Stack is increased by 1.
Periodically, Reverse Cards are prepared. When Phantom’s directly attacking skills or Talent of Phantom Thief’s attacking skills hit an enemy, they will additionally attack enemies. The Reverse Cards do not increase the Card Stack. If this skill hits an enemy using Damage Reflect, you will not take damage.
Required Skill: Level 20 Noire Carte.- [Level 30]
When Phantom’s attacks are a critical hit, there is a 100% chance to create a Card that deals 340% damage. The Card Stack is increased by 1. Reverse Card: Create 5 Reverse Cards that deal 1470% damage. Reactivation cooldown: 5 seconds.
When Cards attack normal monsters, the damage is increased by 150%.
- [Level 30]


 Rose Carte Finale:
[Master Level: 30]
Scatter Rose Cards into the air then plant them into the ground to attack enemies. Cards planted into the ground will deal damage continuously. If this skill hits an enemy using Damage Reflect, you will not take damage.
Required Skill: Level 1 Rose Carte Finale.- [Level 30]
Consumes 220 MP.
Activate 4 Card Springs that deal 410% damage 6 times on up to 15 enemies.
Afterwards, the planted Cards periodically deal 460% damage 2 times on up to 15 enemies for 8 seconds.
Cooldown: 30 seconds.
- [Level 30]

 La Morte Carte:
[Master Level: 30]
Replace Noire Carte with Death Cards that test fate. A certain number of Noire Cartes will be replaced with La Morte Carte. While using Joker, the damage and number of cards are increased. If La Morte Carte hits an enemy using Damage Reflect, you will not take damage.
Permanently increases Noire Carte VI’s damage.- [Level 30]
Consumes 300 MP. For 40 seconds, charge 80 La Morte Cartes.
La Morte Cartes deal 1350% damage.
During Joker’s keydown or your own Joker buff, when you use this skill, charge 160 La Morte Cartes and the damage is increased by 450%p.
Cooldown: 60 seconds.
[Passive Effect: Noire Carte VI’s damage is increased by 30%p.]
- [Level 30]
Eunwol
3rd Mastery Core: Bomb Punch VI/Death Mark VI/Spirit Night Punch
4th Mastery Core: Spirit Frenzy VI
 Bomb Punch VI:
[Master Level: 30]
Summon an Earth Spirit to attack multiple enemies in front of you.
You can use up to 3 consecutive attacks.
Required Skill: Level 30 Bomb Punch.- [Level 30]
Consumes 30 MP per attack.
1st Attack: Deals 401% damage 4 times on up to 8 enemies.
2nd Attack: Deals 401% damage 4 times on up to 8 enemies.
3rd Attack: Deals 401% damage 4 times on up to 8 enemies. Enemies hit will be stunned for 3 seconds.
When attacking normal monsters, all attacks’ damage is increased by 360%p.
- [Level 30]
 Death Mark VI:
[Master Level: 30]
Summon a Death Spirit to attack multiple enemies in front of you and inflict the Death Mark.
Enemies inflicted with the Death Mark will take damage continuously. Recover HP equal to a certain percentage of the damage dealt by the Death Mark. If Death Mark hits an enemy using Damage Reflect, you will not take damage. In addition, permanently increases Soul Splitter’s damage.
Required Skill: Level 20 Death Mark.- [Level 30]
Consumes 150 MP. Deals 1228% damage 8 times on up to 10 enemies with 100% critical rate.
Death Mark: Deals 484% damage every 1 second for 15 seconds.
Recover HP equal to 1% of the damage dealt by the DoT.
Cooldown: 54 seconds.
[Passive Effect: Soul Splitter’s damage is increased by 662%p.]
- [Level 30]
 Spirit Night Punch:
[Master Level: 30]
Release spirit energy with 3 consecutive Spirit Punches.- [Level 30]
Consumes 30 MP per attack. By tapping the skill key, you can attack up to 3 times.
1st Attack: Deals 2415% damage 10 times on up to 12 enemies.
2nd Attack: Deals 2415% damage 10 times on up to 12 enemies.
3rd Attack: Active 8 Spirit Punches that deal 605% damage 11 times on up to 15 enemies. Enemies hit will be stunned for 3 seconds.
Cooldown: 20 seconds.
- [Level 30]

 Spirit Frenzy VI:
[Master Level: 30]
Create a veil that opens a passage for spirits to pass through.
Spirit Frenzy VI is affected by summon duration increasing effects. If this skill hits an enemy using Damage Reflect, you will not take damage.
In addition, permanently increases Spirit Incarnation and Spirit Claw VI’s damage.
Required Skill: Level 20 Deep Communication.- [Level 30]
Consumes 30 MP. Summon Spirit Frenzy for 60 seconds. Spirit Frenzy periodically deals 557% damage 8 times on up to 10 enemies.
Cooldown: 30 seconds.
[Passive Effect: Spirit Incarnation’s damage is increased by 90%p, Spirit Claw VI’s damage is increased by 104%p.]
- [Level 30]
Blaster
3rd Mastery Core: Revolving Cannon Mastery VI/Hammer Smash VI/Shockwave Punch VI
4th Mastery Core: Revolving Cannon VI/Hurricane Mixer VI
 Revolving Cannon Mastery VI:
[Master Level: 30]
Enemies hit by direct attacks from the Gauntlet Revolver will take an additional hit from the heat.
Required Skill: Level 20 Revolving Cannon Upgrade III.- [Level 30]
[Final Attack Type Skill] When a directly attacking skill using the Gauntlet Revolver hits an enemy, activate an additional hit that deals 700% damage on up to 6 enemies.
- [Level 30]
 Hammer Smash VI:
[Master Level: 30]
Slam the ground, damaging nearby enemies and launching them into the air. Enemies hit will have their weakspots revealed for a certian period of time, increasing the final damage of Blaster’s attacks against them.
This skill can be linked with Magnum Punch and Burning Breaker.
You can charge this skill by holding the key down. When activated after charging, you can cancel this skill even while using your other skills and Hammer Smash will be activated, you cannot be knocked back by any enemy attacks while using this skill.
You can charge even while using other skills except Hammer Smash, and you can charge up to 2 skills at the same time.
In addition, permanently increases Magnum Punch VI and Double Fang VI’s damage.
Required Skill: Level 20 Hammer Smash.- [Level 30]
Consumes 30 MP. Deals 477% damage 6 times on up to 8 enemies.
Enemies hit will have their weakspots revealed for 60 seconds, increasing Blaster’s attacks’ final damage by 10%.
[Passive Effect: Magnum Punch VI’s damage is increased by 85%p, Double Fang VI’s damage is increased by 70%p.]
- [Level 30]

 Shock Wave Punch VI:
[Master Level: 30]
Strike enemies with a screw blow. This skill can be linked with Ducking, Sway, and Burning Breaker.
Required Skill: Level 30 Shock Wave Punch.- [Level 30]
Consumes 81 MP. Deals 315% damage 6 times on up to 6 enemies.
When attacking normal monsters, the damage is increased by 380%.
- [Level 30]
 Revolving Cannon VI:
[Master Level: 30]
Create additional explosions using the cannon built into the Gauntlet Revolver. This skill cannot be used separately. It will be activated automatically when you use certain attack skills or it can be used manually when using certain attack skills.
By holding the skill key down to charge, you can manually reload your Bullets. You can charge even while using other skills, and you can charge up to 2 skills at the same time.
Revolving Cannon Automatic Activation Skills: Magnum Punch, Double Fang.
Revolving Cannon Manual Usage Skills: Revolving Bunker.
Required Skill: Level 20 Revolving Cannon Upgrade III.- [Level 30]
Consumes 1 Bullet. When you hold the key down, reload Bullets.
When you use Magnum Punch and Double Fang, Revolving Cannon is automatically activated and deals 675% damage 4 times on up to 6 enemies.
- [Level 30]
 Hurricane Mixer VI:
[Master Level: 30]
By utilizing Weaving, Ducking, and Sway, create a storm that sweeps away enemies in a wide range. When the attack hits, stack Combination Training to the maximum number of stacks.
Required Skill: Level 30 Hurricane Mixer.- [Level 30]
Consumes 71 MP. Deals 2520% damage 5 times on up to 12 enemies.
When the attack hits an enemy, stack Combination Training to the maximum number of stacks with a 12 second duration.
Cooldown: 10 seconds.
- [Level 30]
Battle Mage
3rd Mastery Core: Dark Lightning VI
4th Mastery Core: Dark Genesis VI


 Dark Lightning VI:
[Master Level: 30]
When you use Teleport, attack with black lightning between your starting and ending points, inflicting enemies hit with the Black Mark.
Using Dark Chain or Battle Spurt will also inflict the Black Mark. Skills that inflict the Mark and summons will not activate the Mark. When you activate the Marks a certain number of times, activate an additional Dark Pentacle.
On/Off Skill.
Required Skill: Level 20 Dark Lightning.- [Level 30]
When you use Teleport, consumes an additional 17 MP.
Deals 200% damage 4 times on up to 8 enemies between your Teleport’s starting and ending points.
When attacking normal monsters, the damage is increased by 170%p.
Enemies hit will be inflicted with the Black mark for 30 seconds.
When you attack enemies inflicted with the Black Mark, it will activate and deal 540% damage 4 times. When you activate the Mark 15 times, activate an additional Dark Pentacle.
Dark Pentacle: Deals 900% damage 6 times.
When the Black Mark and Dark Pentacle attack a boss monster, the damage is increased by 20%.
When the Mark attacks 30 times, it will be consumed.
- [Level 30]

 Dark Genesis VI:
[Master Level: 30]
Attack multiple enemies with deadly lightning and stun them for a certain period of time. Every few seconds, the Reaper’s power is concentrated and enhanced into Dark Genesis VI: Death Whip. Dark Genesis VI: Death Whip is not affected by Dark Genesis – Cooltime Reduce’s effects. If this skill hits an enemy using Damage Reflect, you will not take damage. In addition, when your directly attacking skills hit an enemy, there is a certain chance that they will be struck by lightning, dealing damage.
In addition, permanently enhances Dark Lightning VI’s Black Mark damage.
Required Skill: Level 30 Dark Genesis.- [Level 30]
Consumes 220 MP. Deals 890% damge 8 times on up to 15 enemies.
Normal monsters will be stunned for 4 seconds.
Every 30 seconds, this skill is enhanced into Dark Genesis VI: Death Whip. Dark Genesis VI: Death Whip: Activate 6 Reaper’s strikes that deal 250% damage 10 times on up to 15 enemies. Normal monsters will be stunned for 4 seconds.
Cooldown: 30 seconds.
[Passive Effect: [Final Attack Type Skill] When your directly attacking skills hit an enemy, there is an 80% chance for lightning to strike, dealing 430% damage. Dark Lightning VI’s Black Mark damage is increased by 30%p.]
- [Level 30]
Wild Hunter
3rd Mastery Core: Summon Jaguar VI
4th Mastery Core: Assistant Hunting Unit VI/Drill Container VI/Final Attack VI


 Summon Jaguar VI:
[Master Level: 30]
Summon a Jaguar to fight with you. The Jaguar will prioritize attacking enemies that your character is attacking. You can instruct the Jaguar to use [Jaguar Skills]. Jaguar skills will prioritize attacking the boss monster with the highest max HP within range. If there are no boss monsters, they will attack in the direction the character is facing.
While the Jaguar is summoned, you can re-use the skill with the down arrow key to instruct the main Jaguar to stay at its current location to fight.
The stationary Jaguar will prioritize attacking the boss monster with the highest max HP within range. If it is a certain distance away from the character, it will move back to the character’s location.
You can use Jaguar Riding to ride the Jaguar.
Required Skill: Level 1 Summon Jaguar.- [Level 30]
Consumes 24 MP. Summon a Jaguar that deals 670% damage on up to 6 enemies.
When the Jaguar attacks, there is a 15% chance to inflict the Another Bite debuff for 20 seconds, up to 3 stacks.
Another Bite: [Final Attack Type Skill] When your attacking skills that use a crossbow hit a debuffed enemy, activate an additional attack per stack that deals 320% damage.
Cooldown: 1 second.
- [Level 30]
 Assistant Hunting Unit VI:
[Master Level: 30]
Fire an auxiliary unit forwards that borrows the Resistance’s technology to help with hunting.
If Assistant Hunting Unit hits an enemy using Damage Reflect, you will not take damage.
Required Skill: Level 20 Assistant Hunting Unit.- [Level 30]
Consumes 75 MP. Install a unit for 60 seconds. After attacking for 5 seconds, it will reload for 2 seconds.
Every attack deals 252% damage 3 times on up to 8 enemies.
Cooldown: 8 seconds.
- [Level 30]

 Drill Container VI:
[Master Level: 30]
Install a unit that borrows the Resistance’s technology to fire giant drills.
If Drill Container hits an enemy using Damage Reflect, you will not take damage.
Required Skill: Level 30 Drill Container.- [Level 30]
Consumes 75 MP. Install Drill Container for 60 seconds.
The Drill Container periodically deals 739% damage on up to 10 enemies.
Cooldown: 30 seconds.
- [Level 30]

 Final Attack VI:
[Master Level: 30]
There is a certain chance for an additional hit to be activated after using a directly attacking skills. However, it can only be activated while holding a Crossbow.
Required Skill: Level 30 Advanced Final Attack.- [Level 30]
[Final Attack Type Skill] 71% chance to activate a Final Attack that deals 650% damage.
- [Level 30]
Xenon
3rd Mastery Core: Rocket System VI/Meltdown Explosion VI
4th Mastery Core: Blade Dancing VI

 Rocket System VI:
[Master Level: 30]
When your own attacking skills hit an enemy, fire rockets at enemies within range.
When activated, there is a short fire preparation time required. When this skill activates a certain number of times, it will be enhanced into Aegis System. If this skill hits an enemy using Damage Reflect, you will not take damage. In addition, permanently increases Fuzzy Lop Masquerade VI’s damage.
On/Off skill.
Required Skill: Level 10 Rocket System Final Enhancement.- [Level 30]
When your own directly attacking skills hit an enemy, fire 4 rockets that deal 568% damage 2 times. When attacking normal monsters, the damage is increased by 450%p.
When this skill activates 3 times, the next Rocket System VI is enhanced to Aegis System. [Aegis System]: Fire 7 enhanced rockets that deal 585% damage 2 times.
Reactivation cooldown: 2 seconds.
[Passive Effect: Fuzzy Lop Masquerade: Snipe’s damage is increased by 46%p, Fuzzy Lop Masquerade: Execute’s damage is increased by 30%p.]
- [Level 30]


 Meltdown Explosion VI:
[Master Level: 30]
Fire a powerful laser barrage from space that burns everything on the ground. After using this skill, increases damage for a certain period of time. This skill is not affected by cooldown reduction effects.
Required Skill: Level 1 Meltdown Explosion.- [Level 30]
Consumes 300 MP. Deals 2571% damage 7 times on up to 15 enemies.
Enemies hit will have their defense decreased by 30% for 10 seconds.
After this skill is used, increases damage by 10% for 25 seconds. You are invincible during the cast action.
Cooldown: 50 seconds.
- [Level 30]

 Blade Dancing VI:
[Master Level: 30]
Extend the Energy Sword and swing it around like a dance, dealing damage to multiple enemies around you. In addition, every few seconds, a robot that projects illusions based on Xenon’s battle memories is summoned.
Required Skill: Level 30 Blade Dancing.- [Level 30]
Consumes 15 MP per attack. Deals 464% damage on up to 8 enemies.
When you use an attacking skill, summon a Projection Robot for 10 seconds.
The Robot periodically does a Memory Dancing projection 3 times. Memory Dancing: Activate 6 strikes that deal 210% damage 7 times on up to 15 enemies.
Memory Dancing reactivation cooldown: 10 seconds.
- [Level 30]
Mechanic
3rd Mastery Core: Distortion Field VI
4th Mastery Core: Robot Launcher: RM7 VI/Magnetic Field VI/Robot Factory: RM1 VI


 Distortion Field VI:
[Master Level: 30]
Fire a special bullet made with Resistance vision technology to distort space. Every few seconds, this skill is enhanced to Intense Distortion Field that completely distorts the surrounding area.
If Distortion Field hits an enemy using Damage Reflect, you will not take damage.
Required Skill: Level 1 Distortion Field.- [Level 30]
Consumes 280 MP. For 4 seconds, periodically deals 720% damage 2 times on up to 8 enemies.
Cooldown: 8 seconds.
Every 30 seconds, this skill is enhanced to Intense Distortion Field. Intense Distortion Field: Consumes 300 MP. For 2 seconds, periodically deals 1240% damage 3 times on up to 8 enemies, then explodes to deal 1990% damage 15 times on up to 8 enemies.
- [Level 30]
 Robot Launcher: RM7 VI:
[Master Level: 30]
Install a straight-line fixed cannon <RM7>. RM7 fires a series of shots in front of it. When RM7’s duration ends, it will self-destruct.
This skill is affected by summon duration increasing effects.
If Robot Launcher: RM7 hits an enemy using Damage Reflect, you will not take damage.
Required Skill: Level 15 Robot Launcher: RM7.- [Level 30]
Consumes 54 MP. Install Robot Launcher for 98 seconds.
Periodically deals 605% damage 3 times on up to 2 enemies. When the duration ends, it self-destructs to deal 825% damage 3 times on up to 6 enemies.
- [Level 30]
 Magnetic Field VI:
[Master Level: 30]
Install 3 magnetic coils to create a <Magnetic Field> that continuously attacks enemies. When the magnetic coils’ durations end, they will self-destruct.
If you don’t have any magnetic coils installed and there is enough space to install 3 at once, you can use this skill with the down arrow key to install 3 magnetic coils at once.
When the Magnetic Field is created and you install a new magnetic coil, all 3 existing magnetic coils will be removed and then it will be installed.
In addition, permanently enhances Massive Fire: IRON-B VI’s 2nd explosion attack.
This skill is affected by summon duration increasing effects.
Required Skill: Level 10 Magnetic Field.- [Level 30]
Consumes 90 MP. When 3 magnetic coils are installed, create a Magnetic Field for 98 seconds.
Peroidically deals 1095% damage on up to 10 enemies within range. When the attack hits, enemies are stunned. When the duration ends, they will self-destruct to deal 1006% damage 3 times on up to 6 enemies.
[Passive Effect: Massive Fire: IRON-B VI’s 2nd explosion’s damage is increased by 160%p.]
- [Level 30]


 Robot Factory: RM1 VI:
[Master Level: 30]
Install the Robot Factory <RM1> that periodically summons toy robots. The summoned toy robots will self-destruct when they find enemies around RM1 or after a certain amount of time to deal damage. The Robot Factory will also self-destruct when its duration ends.
This skill is affected by summon duration increasing effects.
If Robot Factory: RM1 hits an enemy using Damage Reflect, you will not take damage.
Required Skill: Level 30 Robot Factory: RM1.- [Level 30]
Consumes 125 MP. Install Robot Factory for 98 seconds.
Every 3 seconds, summon 3 toy robots that self-destruct to deal 825% damage 3 times on up to 4 enemies. When the Robot Factory’s duration ends, it will self-destruct to deal 930% damage 5 times on up to 6 enemies.
- [Level 30]
Demon Slayer
3rd Mastery Core: Devil Cry VI/Metamorphosis VI
4th Mastery Core: Cerberus VI/Demonic Descent

 Devil Cry VI:
[Master Level: 30]
Instantly release your latent power to threaten multiple enemies in all directions and deal damage. Targets are blinded, decreasing their defense, attack, and accuracy while increasing experience acquired and item drop rate. In addition, Demon Impact VI: Demon Chain is permanently enhanced.
Required Skill: Level 30 Devil Cry.- [Level 30]
Consumes 400 HP and 30 Force.
Deals 865% damage 7 times on up to 15 enemies.
Targets are debuffed for 60 seconds, decreasing their attack and accuracy by 20%, defenses by 15%, and increasing experience acquired and item drop rate by 20%.
Cooldown: 6 seconds.
[Passive Effect: Demon Impact VI: Demon Chain’s damage is increased by 550%p.]
- [Level 30]


 Metamorphosis VI:
[Master Level: 30]
For a certain period of time, unlock your Demon energy to the maximum, engraving the Demon’s Mark on enemies within a certain range. When your own directly attacking skills hit an enemy with the Demon’s Mark, strong Demonic Power will activate as an additional attack. In addition, Demon Impact VI is permanently enhanced.
Metamorphosis VI’s Demonic Power attack is not affected by Blue Blood’s effects.
This skill is affected by buff duration increasing effects. If this skill hits an enemy using Damage Reflect, you will not take damage.
Required Skill: Level 30 Metamorphosis.
Can be registered as a Pet Auto Buff skill.- [Level 30]
Consumes 300 HP and 40 Force. You will be invincible during the cast action.
For 184 seconds, increases damage by 45%.
During this skill, engrave the Demon’s Mark on up to 10 enemies within a certain range.
When your own directly attacking skills hit an enemy with the Demon’s Mark, Demonic Power is activated that deals 1090% damage 4 times.
Demonic Power reactivation cooldown: 1 second. Cooldown: 92 seconds.
[Passive Effect: Demon Impact VI’s damage is increased by 15%p.]
- [Level 30]

 Cerberus VI:
[Master Level: 30]
With the power of the guardian of the underworld, damage enemies in front of you and steal their souls. Every few seconds, the guardian will fully awaken and transform into Cerberus VI: Tartarian Cerberus to devour everything nearby.
During Demon Awakening, Cerberus VI will not change. The automatically activated Cerberus will be changed into Cerberus VI: Tartarian Cerberus.
Required Skill: Level 1 Cerberus.- [Level 30]
Consumes 300 HP. Deals 756% damage 6 times on up to 8 enemies.
When attacking boss monsters, damage is increased by 50%, with an additional 50% defense ignore. When you attack, recover an additional 50 Force.
Cooldown: 5 seconds.
Every 15 seconds, this skill is enhanced to Cerberus VI: Tartarian Cerberus. During Demon Awakening, it is not enhanced. Cerberus VI: Tartarian Cerberus: Consumes 300 HP. Activate 4 Watcher’s Rages that deal 410% damage 7 times on up to 10 enemies.
- [Level 30]
 Demonic Descent:
[Master Level: 30]
The pure bloodline’s power takes form and deals a powerful blow to nearby enemies. When you attack multiple enemies, it prioritizes searching for the boss monster with the highest max HP.
When you cast Nightmare, the reactivation cooldown is reset 1 time. During Nightmare, the reactivation cooldown is decreased.
If this skill hits an enemy using Damage Reflect, you will not take damage.- [Level 30]
When your own directly attacking skills (except common skills) hit an enemy, activate 4 Demonic Roars that deal 1990% damage 7 times on up to 8 enemies.
Reactivation cooldown: 20 seconds.
When you cast Nightmare, the reactivation cooldown is reset 1 time. During Nightmare, the reactivation cooldown is fixed to 5 seconds.
- [Level 30]
Demon Avenger
3rd Mastery Core: Exceed: Moonlight Slash VI/Overmaximizing Exceed
4th Mastery Core: Thousand Swords VI/Enhanced Exceed VI


 Exceed: Moonlight Slash VI:
[Master Level: 30]
Swing your weapon in a circle to cut enemies around you.
Exceed: The attack speed and HP consumption gradually increase.
Exceed: Moonlight Slash VI’s Exceed Overload is not reset until Release Overload is used.
Required Skill: Level 20 Exceed: Moonlight Slash.- [Level 30]
Consumes 3% max HP. Deals 1143% damage 3 times on up to 10 enemies.
- [Level 30]
 Overmaximizing Exceed:
[Master Level: 30]
You can materialize your overflowing rage in the form of Desperados.
When an Exceed skill hits an enemy, a Desperado attacks enemies.
As your rage deepens, the power increases and periodically, the reactivation cooldown decreases.- [Level 30]
When an Exceed skill hits an enemy, create Desperados that deal 2400% damage 7 times on all enemies hit.
When your current HP is 10% max HP or higher and below 61% max HP, the reactivation cooldown is decreased by 0.3 seconds. When your current HP is lower than 10%, the reactivation cooldown is decreased by 4 seconds.
The reactivation cooldown will not be decreased below 1 second.
Reactivation cooldown: 6 seconds.
- [Level 30]
 Thousand Swords VI:
[Master Level: 30]
Darken your surroundings then move at incredible speeds with flashes of blue swords to cut down enemies. The quick movements strain your body and increase Exceed Overload. In addition, permanently increases Execution VI’s damage.
Required Skill: Level 1 Thousand Swords.- [Level 30]
Consumes 15% max HP. Increases Exceed Overload by 5.
Deals 900% damage 8 times on up to 14 enemies.
Cooldown: 8 seconds.
[Passive Effect: Exceed: Execution VI’s damage is increased by 295%p.]
- [Level 30]
 Enhanced Exceed VI:
[Master Level: 30]
After an Exceed attack, there is a certain chance to activate a powerful additional attack.
Required Skill: Level 15 Enhanced Exceed.- [Level 30]
[Final Attack Type Skill] When an Exceed attack hits an enemy, activate an additional attack that deals 405% damage 2 times on up to 2 enemies.
- [Level 30]
Kaiser
3rd Mastery Core: Infernal Breath VI
4th Mastery Core: Wing Beat VI/Petrified VI
 Infernal Breath VI:
[Master Level: 30]
Call an ancient dragon to spew flames. When you use this skill a certain number of times, completely resonate with the ancient dragon to perform a more powerful attack.
Required Skill: Level 20 Infernal Breath.- [Level 30]
Consumes 82 MP. Deals 3180% damage 14 times on up to 15 enemies.
When you use Infernal Breath 2 times, the next attack will be enhanced. Ultimate Infernal Breath: Activate 4 breaths that deal 2060% damage 8 times on up to 15 enemies.
Cooldown: 19 seconds.
- [Level 30]

 Wing Beat VI:
[Master Level: 30]
Create a whirlwind that hits monsters a certain number of times until they die. If it moves more than a certain distance or lasts a certain amount of time, it will disappear. If Wing Beat hits an enemy using Damage Reflect, you will not take damage. Up to 2 can exist.
In addition, Giga Slasher VI and Draco Slasher’s damage is permanently increased.
Command Skill: While attacking + Jump key + Command.
Required Skill: Level 20 Wing Beat.- [Level 30]
Consumes 42 MP. Deals 394% damage on up to 8 enemies for 15 seconds, can attack up to 40 times.
Non-boss monsters have a 40% chance to be slowed for 5 seconds.
[Passive Effect: Giga Slasher VI’s damage is increased by 75%p, Draco Slasher’s damage is increased by 110%p.]
- [Level 30]
 Petrified VI:
[Master Level: 30]
Summon a dragon incarnation to pull in monsters from the left and right, slowing them and dealing damage. If Petrified hits an enemy using Damage Reflect, you will not take damage. This skill is affected by summon duration increasing effects.
Required Skill: Level 15 Petrified.- [Level 30]
Consumes 42 MP. Summon a dragon incarnation for 60 seconds that periodically deals 730% damage 3 times on up to 8 enemies.
Non-boss monsters have a 75% chance to be slowed for 3 seconds.
When attacking normal monsters, damage is increased by 50%.
- [Level 30]
Kain
3rd Mastery Core: Dragon Fang VI/Shaft Break VI/[Possess] Shaft Break VI/[Execute] Phantom Blade VI/Remain Incense VI
4th Mastery Core: Death Blessing VI/Chasing Shot VI/Sneaky Sniping VI/[Possess/Execute] Sneaky Sniping VI


 Dragon Fang VI:
[Master Level: 30]
Drawn by the scent of death, the Devil Dragon’s remnants materialize into fangs which spread more death. Dragon Fang is summoned when Kain’s directly attacking skills hit enemies a certain number of times. If Dragon Fang hits an enemy using Damage Reflect, you will not take damage. It will prioritize attacking the enemy with the highest maximum HP.
If Kain moves away from them, they will move closer. If you change maps, they will disappear and based on the remaining duration, the number of hits required to create them will be decreased.
On/Off Skill.
Required Skill: Level 20 Dragon Fang.- [Level 30]
Summon for 60 seconds.
When Kain’s directly attacking skills hit an enemy, enter Attack Mode and activate a Dragon Bite which tracks an enemy and deals 100% damage 4 times. After Attack Mode is activated, up to 7 Dragon Bites will be cast and then return.
When attacking normal monsters, the damage is increased by 80%.
Up to 3 can be summoned.
Attack Mode activation cooldown: 3 seconds.
- [Level 30]

 Shaft Break VI:
[Master Level: 30]
Fire an arrow that pierces through enemies then collapses and explodes. Before it collapses, the arrow pulls in enemies. It collapses after it pierces through a certain number of enemies, attacks a boss monster, or reaches the end of its range. If the explosion hits an enemy using Damage Reflect, you will not take damage.
Required Skill: Level 20 Shaft Break.- [Level 30]
Consumes 77 MP. Deals 435% damage 3 times on up to 3 enemies.
When it collapses, it pulls in up to 7 enemies then explodes, dealing 385% damage 10 times on up to 10 enemies.
Prepare 1 Shaft Break Cartridge every 8 seconds. You can hold up to 3 Cartridges at a time.
- [Level 30]
 [Possess] Shaft Break:
[Master Level: 30]
[Possess Skill]
After the arrow explodes, malice remains like a tornado to torment enemies. Only the explosion will inflict Death Blessing on enemies. If the explosion or tornado hit an enemy using Damage Reflect, you will not take damage.
Required Skill: Level 20 Shaft Break.- [Level 30]
Consumes 77 MP. Deals 782% damage 3 times on up to 3 enemies.
When it collapses, it pulls in up to 7 enemies then explodes, dealing 870% damage 10 times on up to 10 enemies.
The tornado deals 151% damage 3 times on up to 10 enemies continuously.
Re-possess cooldown: 11 seconds.
- [Level 30]
 [Execute] Phantom Blade VI:
[Master Level: 30]
[Execute Skill]
Quickly cut enemies in front of you using a blade hidden inside the Breath Shooter.
Required Skill: Level 20 Phantom Blade.- [Level 30]
Consumes 36 MP. Deals 745% damage 6 times on up to 4 enemies.
- [Level 30]

- Remain Incense VI:
[Master Level: 30]
Gather and crystallize the manifested malice. When Kain’s directly attacking skills hit an enemy near a created crystal, it will activate and attack nearby enemies. If Remain Incense hits an enemy using Damage Reflect, you will not take damage.
On/Off Skill.
Required Skill: Level 15 Remain Incense.- [Level 30]
When a Possess skill or Thanatos Descent’s Area of Death is activated, create crystals for 10 seconds. The number created changes depending on the used skill.
When activated, each crystal will deal 420% damage 4 times on 1 enemy. When attacking normal monsters, damage is increased by 160%.
Recreation cooldown: 0.3 seconds.
- [Level 30]
 Death Blessing VI:
[Master Level: 30]
Grant the blessing of death to enemies exposed to malice. When specific Possess skills and Thanatos Descent’s Area of Death hit an enemy, they receive the blessing. When they are hit by an Execute skill, the blessing is materialized and they are destroyed from the inside. When the blessing is materialized, you receive Merit which enhances Death Blessing and Execute skills, and Shadow Step’s cooldown is reset.
Death Blessing deals damage to enemies using Damage Ignore and Damage Reflect. [Possess/Execute] Sneaky Sniping does not receive the effects of the Merit buff.
In addition, while Annihilation’s Malice Domain is activated, Death Blessing’s damage is permanently increased.
Required Skill: Level 10 Advanced Death Blessing.- [Level 30]
When you defeat 50 enemies, recover 5% max HP.
When Death Blessing is materialized on a boss monster, recover 3% max HP.
90 second duration, can stack up to 15 times.
Materialized Blessing: Consume 1 Death Blessing stack to deal 630% damage 10 times and acquire the Merit buff.
Merit Buff: For 5 seconds, Death Blessing/Execute skills’ final damage is increased by 28% and create 12 Malice when an Execute skill hits an enemy and materializes the blessing.
[Passive Effect: While Annihilation’s Malice Domain is activated, Death Blessing’s damage is increased by 250%p.]
- [Level 30]
 Chasing Shot VI:
[Master Level: 30]
Fire arrows that track and attack enemies. This skill is not affected by attack speed increasing buff effects. This skill cannot be used if there is no enemy to track.
Required Skill: Level 1 Chasing Shot.- [Level 30]
Consumes 330 MP. Fire 3 arrows that deal 676% damage 6 times on up to 8 enemies. When attacking normal monsters, the damage is increased by 30%.
Cooldown: 15 seconds.
- [Level 30]

 Sneaky Sniping VI:
[Master Level: 30]
Focus your mind to stealthily aim at enemies and snipe them. The more you hold the key down and aim, the attack range will change. When the key is released, an invisible shockwave is activated. This skill is not affected by attack speed increasing buff effects. 100% Stance is applied while using this skill.
Required Skill: Level 1 Sneaky Sniping.- [Level 30]
Consumes 410 MP. Maximum key down duration of 1.4 seconds. Activate 5 shockwaves that deal 385% damage 10 times on up to 12 enemies.
Prepare 1 Sneaky Sniping Cartridge every 40 seconds. You can hold up to 1 Cartridge at a time.
- [Level 30]

 [Possess/Execute] Sneaky Sniping VI:
[Master Level: 30]
[Possess/Execute Skill]
Snipe enemies using an arrow of condensed malice. The more you hold the key down and aim, the attack range will increase. When the key is released, a giant arrow pierces through enemies, dealing deadly damage. If [Possess/Execute] Sneaky Sniping kills an enemy, Shadow Step’s cooldown is reset.
Required Skill: Level 1 Sneaky Sniping.- [Level 30]
Consumes 410 MP. Maximum key down duration of 1.6 seconds. Activate 5 shockwaves that deal 548% damage 12 times on up to 12 enemies.
Re-possess cooldown: 60 seconds.
- [Level 30]
Cadena
3rd Mastery Core: Summon Cutting Scimitar VI/Summon Scratching Claw VI/Summon Throwing Wing Dagger VI/Summon Beating Needle Bat VI/Chain Arts: Crush VI
4th Mastery Core: Summon Shooting Shotgun VI/Summon Slashing Knife VI/Summon Releasing Bomb VI/Summon Striking Brick VI/Chain Arts: Takedown VI/Professional Agent VI

 Summon Cutting Scimitar VI:
[Master Level: 30]
Summon a scimitar, hold it upside down, and instantly cut enemies horizontally. You cannot be knocked back by any attacks during the cast action. This skill can be used in the air and can also be used while using your own skills.
Required Skill: Level 20 Summon Cutting Scimitar.- [Level 30]
Consumes 20 MP. Deals 849% damage 5 times on up to 6 enemies.
Cooldown: 4 seconds.
- [Level 30]
 Summon Scratching Claw VI:
[Master Level: 30]
Summon a claw, attach it to your hand, and quickly swipe downwards diagonally in front of you. You cannot be knocked back by any attacks during the cast action. This skill can only be used in the air and can also be used while using your own skills.
Required Skill: Level 20 Summon Scratching Claw.- [Level 30]
Consumes 25 MP. Deals 880% damage 4 times on up to 10 enemies.
Cooldown: 3 seconds.
- [Level 30]


 Summon Throwing Wing Dagger VI:
[Master Level: 30]
Summon a shuriken that explodes after a certain period of time and throw it low to the ground. The shuriken pushes away enemies it hits. If it hits an enemy using Damage Reflect, you will not take damage. Certain monsters will resist being pushed. When you use this skill and when it explodes, Dark Sight will not be cancelled.
Required Skill: Level 19 Summon Throwing Wing Dagger.- [Level 30]
Consumes 28 MP. Summon a shuriken for 7 seconds, periodically dealing 849% damage on 1 enemy.
After 7 seconds have passed, it will automatically explode. You can re-input the skill key to manually explode it.
When it explodes, deals 1293% damage 3 times on up to 8 enemies.
Cooldown: 10 seconds.
- [Level 30]


 Summon Beating Needle Bat VI:
[Master Level: 30]
Summon a spiky bat and mercilessly slam it down over your head. This skill can be used 3 times consecutively and can be used together with the arrow keys to move forward at the same time. If you use any other attacking skill while using this skill, you will not be able to use the next hit. Enemies hit by the Needle Bat will be Confused for a certain period of time. You cannot be knocked back by any attacks during the cast action.
Required Skill: Level 30 Summon Beating Needle Bat.- [Level 30]
Consumes 47 MP.
1st Attack: Deals 568% damage 12 times on up to 8 enemies.
2nd Attack: Deals 783% damage 13 times on up to 8 enemies.
3rd Attack: Deals 1160% damage 14 times on up to 10 enemies.
When you attack, enemies hit will be Confused for 30 seconds, decreasing their attack by 20%.
Cooldown: 12 seconds.
- [Level 30]

 Chain Arts: Crush VI:
[Master Level: 30]
Multiple chains explode from the air to the ground all at once to crush enemies. When the attack hits an enemy, Weapon Variety is stacked to the maximum number.
Required Skill: Level 1 Chain Arts: Crush.- [Level 30]
Consumes 330 MP. Deals 967% damage 15 times on up to 15 enemies.
When the attack hits an enemy, Weapon Variety is stacked to the maximum number with a 15 second duration.
Cooldown: 30 seconds.
- [Level 30]

 Summon Shooting Shotgun VI:
[Master Level: 30]
Summon a shotgun and fire a volley of shells in a fan-shaped area at enemies in front of you. The closer the enemy, the higher the damage. Using the reverse momentum of the shot, you will jump backwards. You cannot be knocked back by any attacks during the cast action.
Required Skill: Level 20 Summon Shooting Shotgun.- [Level 30]
Consumes 35 MP.
Close Range: Deals 940% damage 7 times on up to 6 enemies.
Mid Range: Deals 837% damage 7 times on up to 6 enemies.
Long Range: Deals 758% damage 7 times on up to 6 enemies.
Cooldown: 5 seconds.
- [Level 30]

 Summon Slashing Knife VI:
[Master Level: 30]
Summon 2 daggers to instantly slash in front and behind you. If this skill is used in the air, you will float for the duration of the slash. Enemies hit by the daggers will be Feared for a certain period of time.
Required Skill: Level 20 Summon Slashing Knife.- [Level 30]
Consumes 40 MP. Deals 802% damage 8 times on up to 4 enemies. Enemies hit will be Feared for 30 seconds, decreasing their defenses by 30%.
Cooldown: 10 seconds.
- [Level 30]


 Summon Releasing Bomb VI:
[Master Level: 30]
Summon bombs, install them, then escape backwards. When used in the air, the bombs will be dropped at that location. The bombs explode after a certain period of time. If this skill hits an enemy using Damage Reflect, you will not take damage. When you use this skill and when it explodes, Dark Sight will not be cancelled. You cannot be knocked back by any attacks during the cast action.
Required Skill: Level 20 Summon Releasing Bomb.- [Level 30]
Consumes 45 MP. Install bombs that explode after 1 second. Deals 1000% damage 6 times on up to 8 enemies.
Cooldown: 8 seconds.
- [Level 30]

 Summon Striking Brick VI:
[Master Level: 30]
Summon a giant brick and use your chain to jump forward and slam it down. If you use this skill with the up arrow key, you will jump further. You cannot be knocked back by any attacks during the cast action.
Required Skill: Level 30 Summon Striking Brick.- [Level 30]
Consumes 52 MP. Deals 915% damage 7 times on up to 7 enemies.
Cooldown: 8 seconds.
- [Level 30]


 Chain Arts: Takedown VI:
[Master Level: 30]
Instantly throw a chain and swing it to bind enemies within range. Chain Arts: Takedown will prioritize binding the enemy with the highest max HP.
After a certain amount of time of being bound, the enemy will be struck so quickly that it leaves an afterimage. The strike’s power is based on the number of Weapon Variety’s additional hits activated. During the strike, Weapon Variety’s stacks will be maintained at the maximum.
This skill is not affected by cooldown reset effects. Enemies hit will resist binds from Chain Arts: Takedown and other skills for 90 seconds.
Required Skill: Level 30 Chain Arts: Takedown.- [Level 30]
Consumes 282 MP. Deals 508% damage 2 times on up to 8 enemies.
Enemies hit will be bound for 10 seconds.
The bind duration will be increased by up to 100% based on the damage that Takedown: Chain Arts does.
5 seconds after being cast, a strike based on the number of Weapon Variety additional hit activations will be activated. If you do not reach the number of activations within the time limit, the minimum stage strike will be activated. If you reach the maximum number of activations with the time limit, the strike will be activated instantly.
Strike: If the number of Weapon Variety activations is 0/3/5, deals 1322%/1500%/1710% damage 15 times on up to 10 enemies then activate a final strike that deals 420%/588%/840% damage 10 times on up to 10 enemies.
During the consecutive attack, activate a shockwave that deals 1015% damage 4 times on up to 10 enemies. All attacks have an additional 80% defense ignore.
Cooldown: 118 seconds.
- [Level 30]


 Professional Agent VI:
[Master Level: 30]
Show the appearance of a true professional that can handle a variety of weapons. Weapon Variety’s effects are increased and after using attacking skills, activate an additional hit.
This skill is not affected by cooldown resets.
Required Skill: Level 1 Professional Agent.- [Level 30]
Consumes 590 MP. For 30 seconds, Weapon Variety’s final damage boost is doubled.
When an attack hits an enemy, create an explosion that deals 425% damage 3 times on up to 6 enemies.
Cooldown: 180 seconds.
- [Level 30]
Angelic Buster
3rd Mastery Core: Super Nova VI
4th Mastery Core: Primal Roar VI/Da Capo Fettuccia
 Super Nova VI:
[Master Level: 30]
Install an energy orb that radiates Eskada’s power in all directions. If this skill hits an enemy using Damage Reflect, you will not take damage.
In addition, Trinity VI’s damage is increased.
Required Skill: Level 1 Super Nova.- [Level 30]
Consumes 115 MP. Summon an energy orb for 30 seconds.
The energy orb periodically deals 1114% damage 4 times on up to 15 enemies. When the attack is activated on a single enemy 18 times, it will disappear.
Cooldown: 60 seconds.
[Passive Effect: Trinity VI’s damage is increased by 146%p.]
- [Level 30]
 Primal Roar VI:
[Master Level: 30]
Fire a wave forwards that shakes enemies to their souls.
Required Skill: Level 30 Primal Roar.- [Level 30]
Consumes 25 MP. Deals 993% damage 4 times on up to 8 enemies.
There is a 93% chance to stun enemies hit for 3 seconds.
- [Level 30]

 Da Capo Fettuccia:
[Master Level: 30]
When your directly attacking skills hit an enemy, deal a powerful additional hit using ribbons filled with the power of love and justice. This skill will not be activated by Soul Seeker and certain common skills. This skill will prioritize being created on the boss monster with the highest max HP.- [Level 30]
Consumes 25 MP. When your directly attacking skills hit an enemy, there is an 80% chance to deal 560% damage 4 times on up to 6 enemies.
- [Level 30]
Zero
3rd Mastery Core: Flash Assaulter VI/Spin Cutter VI/Front Slash VI/Throwing Weapon VI
4th Mastery Core: Moon Strike VI/Pierce Thrust VI/Shadow Strike VI/Upper Slash VI/Power Stomp VI/Shadow Rain VI/Infinite Resonance

 Flash Assaulter VI:
[Master Level: 30]
Instantly move forwards a certain distance and attack enemies along your path.
Required Skill: Level 20 Advanced Spin Cutter.- [Level 30]
Consumes 9 Time Force. Deals 267% damage 8 times on up to 8 enemies.
Cooldown: 5 seconds.
[Combination Skill] Spin Cutter VI.
[Assist Skill] Front Slash VI.
- [Level 30]

 Spin Cutter VI:
[Master Level: 30]
Quickly spin and attack enemies around you, activating sword slashes that pierce through both sides of you as an additional attack. If the sword slashes hit an enemy using Damage Reflect, you will not take damage.
Required Skill: Level 20 Advanced Spin Cutter.
[Activation Command]: After using Flash Assaulter, Flash Assaulter.- [Level 30]
Consumes 11 Time Force. Deals 435% damage 10 times on up to 8 enemies.
[Sword Slash]: Deals 233% damage 4 times on up to 8 enemies. When attacking normal monsters, the damage is increased by 132%p.
[Assist Skill] Throwing Weapon VI.
- [Level 30]

 Front Slash VI:
[Master Level: 30]
Swing your Great Sword with all of your might to attack multiple enemies in front of you.
Required Skill: Level 20 Advanced Throwing Weapon.- [Level 30]
Consumes 7 Time Force. Deals 346% damage 6 times on up to 6 enemies.
Cooldown: 5 seconds.
[Combination Skill] Throwing Weapon VI.
[Assist Skill] Flash Assaulter VI.
- [Level 30]


 Throwing Weapon VI:
[Master Level: 30]
Throw the Great Sword forwards with all of your might, attacking all enemies in its path. If Throwing Weapon hits an enemy using Damage Reflect, you will not take damage.
Required Skill: Level 20 Advanced Throwing Weapon.
[Activation Command]: After using Front Slash, Front Slash.- [Level 30]
Consumes 9 Time Force. Deals 870% damage 4 times on up to 6 enemies. The shockwave can only be activated up to 5 times on a single enemy.
[Assist Skill] Spin Cutter VI.
- [Level 30]

 Moon Strike VI:
[Master Level: 30]
Attack enemies and pull them in front of you slightly. Certain monsters will resist being pulled.
Gain proficiency in transcendence, increasing Wind Cutter, Wind Strike, and Storm Break’s damage.
Required Skill: Level 10 Shadow Strike.- [Level 30]
Consumes 3 Time Force. Deals 191% damage 6 times on up to 8 enemies.
[Passive Effect: Wind Cutter VI’s damage is increased by 30%p, Wind Cutter VI’s vortex damage is increased by 30%p, Wind Strike VI’s damage is increased by 30%p, Storm Break VI’s damage is increased by 60%p, Storm Break VI’s vortex damage is increased by 60%p, Storm Break VI’s electric area damage is increased by 60%p.]
[Combination Skill] Pierce Thrust VI.
[Assist Skill] Upper Slash VI.
- [Level 30]

 Pierce Thrust VI:
[Master Level: 30]
Stab enemies in front of you with the Long Sword and push them back. Certain monsters will resist being pushed.
Required Skill: Level 10 Shadow Strike.
[Activation Command]: After using Moon Strike, Moon Strike.- [Level 30]
Consumes 5 Time Force. Deals 275% damage 6 times on up to 8 enemies.
[Combination Skill] Shadow Strike VI.
[Assist Skill] Power Stomp VI.
- [Level 30]


 Shadow Strike VI:
[Master Level: 30]
Slash enemies in front of you. If you use this skill with the left and right arrow keys, you can quickly move to the closest enemy’s location and attack.
When you attack, activate a piercing sword slash as an additional attack. If the sword slash hits an enemy using Damage Reflect, you will not take damage.
Required Skill: Level 10 Shadow Strike.
[Activation Command]: After using Pierce Thrust, Moon Strike.- [Level 30]
Consumes 7 Time Force. Deals 331% damage 8 times on up to 8 enemies.
[Sword Slash]: Deals 514% damage 1 time on up to 8 enemies.
[Assist Skill] Upper Slash VI.
- [Level 30]

 Upper Slash VI:
[Master Level: 30]
Attack enemies in front of you and launch them into the air. Certain monsters will resist being launched.
Your jumps become stronger, increasing Giga Crash, Jumping Crash, and Earth Break’s damage.
Required Skill: Level 20 Advanced Power Stomp.- [Level 30]
Consumes 3 Time Force. Deals 307% damage 6 times on up to 6 enemies.
[Passive Effect: Giga Crash VI’s damage is increased by 60%p, Jumping Crash VI’s damage is increased by 60%p, Jumping Crash VI’s shockwave’s damage is increased by 30%p, Earth Break VI’s damage is increased by 60%p, Earth Break VI’s shockwave’s damage is increased by 30%p, Earth Break VI’s electric area’s damage is increased by 60%p.]
[Combination Skill] Power Stomp VI.
[Assist Skill] Moon Strike VI.
- [Level 30]

 Power Stomp VI:
[Master Level: 30]
Attack enemies in front of you. This skill can knock enemies floating in the air down to the ground. Activate a shockwave behind the sword slash to attack in a wider range. If the shockwave hits an enemy using Damage Reflect, you will not take damage.
Required Skill: Level 20 Advanced Power Stomp.
[Activation Command]: After using Upper Slash, Upper Slash.- [Level 30]
Consumes 5 Time Force. Deals 432% damage 9 times on up to 6 enemies.
[Shockwave]: Deals 432% damage 9 times on up to 6 enemies. Enemies hit will be stunned for 3 seconds.
[Assist Skill] Pierce Thrust VI.
- [Level 30]

 Shadow Rain VI:
[Master Level: 30]
Alpha and Beta’s combined ultimate attack. Beta rains down Great Swords to stop all enemies’ movements, then the fallen Great Swords turn into Alpha’s shadows, dealing fatal damage to all enemies.
Required Skill: Level 1 Shadow Rain.- [Level 30]
Consumes 50 Time Force.
[Beta]: Deals 1625% damage 14 times on up to 15 enemies.
[Alpha]: Deals 1625% damage 14 times on up to 15 enemies.
Cooldown: 300 seconds.
- [Level 30]
 Infinite Resonance:
[Master Level: 30]
The power of Transcendents shared by Alpha and Beta resonates. Every time a skill hits an enemy, they draw inspiration from each other, increasing their attack. Certain common skills will not apply this skill.- [Level 30]
When your own directly attacking skills hit an enemy, increases attack by 45 for 30 seconds.
Stacks up to 3 times.
- [Level 30]
Kinesis
3rd Mastery Core: Ultimate – Train VI/Ultimate – B.P.M VI
4th Mastery Core: Telekinesis VI
 Ultimate – Train VI:
[Master Level: 30]
Lift an empty train and crash it in front of you at high speed. If Ultimate – Train hits an enemy using Damage Reflect, you will not take damage.
Required Skill: Level 10 Ultimate – Train.- [Level 30]
Consumes 13 Psychic Points.
For 9 seconds, deals 370% damage 6 times on up to 5 enemies. Each time the attack continues, Ultimate – Train’s damage is decreased by 5%.
- [Level 30]

 Ultimate – B.P.M VI:
[Master Level: 30]
Release compressed psychokinetic power in front of you faster than time. When your Psychic Points are completely consumed, it will lose its power. When your Psychic Points go over a certain amount, it will start being released again. If Ultimate – B.P.M hits an enemy using Damage Reflect, you will not take damage.
On/Off Skill.
Required Skill: Level 20 Ultimate – B.P.M.- [Level 30]
Deals 310% damage 7 times on up to 3 enemies.
Consumes 1 Psychic Point per activation.
When your Psychic Points are depleted, the attack will stop. When you recover Psychic Points to 3 or higher, the attack will resume.
Cooldown: 0.5 seconds.
- [Level 30]

 Telekinesis VI:
[Master Level: 30]
When Kinesis’ attacks hit an enemy, there is a certain chance to create an otherworldly object. The object will prioritize tracking the boss monster with the highest max HP that was attacked.
This skill does not activate when using Psychic Force, Psychic Drain, Psychic Shot, Ever Psychic, or Ultimate – B.P.M.
Required Skill: Level 10 Telekinesis.- [Level 30]
When an attack hits an enemy, there is a 70% chance to create an otherworldly object that deals 620% damage.
- [Level 30]
Adele
3rd Mastery Core: Impale VI/Resonance VI/Gathering VI/Blossom VI
4th Mastery Core: Creation VI/Territory VI/Marker VI

 Impale VI:
[Master Level: 30]
Create an Aether Sword and shoot it forwards. You can use this skill with the arrow keys to shoot it in one of 8 directions.
When it reaches the end of its range, it will disappear and leave behind an Aether Crystal. If the crystal created by Impale is in the same place as another crystal, the older one will disappear and the recreation cooldown time will be ignored.
You can link this skill with Resonance but if you do so, an Aether Crystal will not be created.
Required Skill: Level 10 Impale.- [Level 30]
Consumes 50 MP and 15 Aether.
Deals 748% damage 6 times on up to 6 enemies.
Cooldown: 7 seconds.
- [Level 30]
 Resonance VI:
[Master Level: 30]
Create a magical great sword and resonate with an Aether Crystal to rush towards it. You can use this skill with the arrow keys to move in one of 8 directions, and you will be moved to the nearest Crystal in your desired direction.
You can only use this skill if there is an Ether Crystal in range or if you link it with Impale.
If you link this skill with Impale, the great sword’s creation time will be shortened and you will rush in the direction that the Aether Sword is shot.
In addition, permanently increases Divide VI’s damage.
Required Skill: Level 10 Resonance.- [Level 30]
The Aether Crystal targeted by Resonance will disappear.
Deals 783% damage 6 times on up to 6 enemies.
If this skill hits an enemy, activate a buff for 30 seconds that gives 10% final damage and 10% defense ignore.
[Passive Effect: Divide VI’s damage is increased by 40%p.]
- [Level 30]
 Gathering VI:
[Master Level: 30]
Call back all of the Aether Swords commanded by Order. The Aether Swords will return in a straight line to the location where this skill was used, attacking enemies in their path then stay in place for a short period of time. You can only use this skill if there are Aether Swords targeting enemies from Order. During Gathering, the Aether Swords’ durations will not go down. If this skill hits an enemy using Damage Reflect, you will not take damage. This skill is not affected by cooldown resets.
Required Skill: Level 20 Gathering.- [Level 30]
Consumes 57 MP. Deals 970% damage 4 times on up to 10 enemies. Enemies hit will have their defenses decreased by 10% for Adele’s attacks for 30 seconds.
If this skill hits an enemy, there is a 40% chance to create an Ether Crystal.
Cooldown: 12 seconds.
- [Level 30]
 Blossom VI:
[Master Level: 30]
All of the Aether Swords commanded by Order will spin, making their magic bloom. You can only use this skill if there are Aether Swords targeting enemies from Order.
During Blossom, the Aether Swords’ durations will not end, and Aether Swords being called back by Gathering will not bloom.
If this skill hits an enemy using Damage Reflect, you will not take damage. This skill is not affected by cooldown resets.
Required Skill: Level 30 Blossom.- [Level 30]
Consumes 91 MP. Each Aether Sword deals 1100% damage 8 times on up to 8 enemies. If a single enemy is hit by multiple Blossom swords, Blossom’s final damage on that enemy will be decreased by 25%.
If this skill hits an enemy, there is a 50% chance to create an Aether Crystal.
Cooldown: 20 seconds.
- [Level 30]

 Creation VI:
[Master Level: 30]
Use your current Aether to create Aether Swords around your body. As your Aether increases or decreases, the number of Aether Swords will be adjusted automatically.
The created Aether Swords will attack nearby enemies, and if they hit enemies using Damage Reflect, you will not take damage.
On/Off Skill.
Required Skill: Level 10 Creation.- [Level 30]
When a Trigger skill hits an enemy, every 1.5 seconds, each Aether Sword deals 1020% damage on up to 10 enemies.
When this attack hits an enemy, there is a 30% chance to create an ether Crystal.
Cooldown: 0.5 seconds.
- [Level 30]
 Territory VI:
[Master Level: 30]
Create your own territory with multiple swords. If this skill hits an enemy using Damage Reflect, you will not take damage.
Required Skill: Level 20 Territory.- [Level 30]
Consumes 135 MP. Create a territory for 7 seconds, periodically dealing 700% damage 4 times on up to 8 enemies.
Cooldown: 30 seconds.
- [Level 30]

 Marker VI:
[Master Level: 30]
Embed your magic into small fragments in the air that grow and shatter.
Magic is concentrated at the locations where they shatter, creating Aether Crystals which ignore the recreation cooldown.
Required Skill: Level 1 Marker.- [Level 30]
Consumes 280 MP. Creates fragments at the locations of up to 7 enemies.
When a fragment is created or explodes, they each deal 2900% damage 6 times on up to 7 enemies. If the number of enemies that can be attacked is less than the maximum number of enemies hit, up to 7 fragments will be created at random locations.
On enemies inflicted with Grave, half the fragments will be created and they will deal 3625% damage 6 times on up to 7 enemies.
When the fragments shatter, up to 7 Aether Crystals will be created
Cooldown: 60 seconds.
- [Level 30]
Illium
3rd Mastery Core: Rio VI/Machina VI/Crystal Skill: Deus VI
4th Mastery Core: Longinus VI/Curse Mark Complete VI/Longinus Zone VI
 Rio VI:
[Master Level: 30]
Summon your sturdy mechanical friend Rio. Rio continuously attacks a single enemy for a certain period of time.
If Rio attacks an enemy using Damage Reflect, you will not take damage. This skill is affected by summon duration increasing effects.
Required Skill: Level 20 Rio.- [Level 30]
Consumes 105 MP. Summon Rio for 270 seconds. It will move to the attack target and continuously deal 504% damage.
If it attacks 40 times, the attack will end.
- [Level 30]


 Machina VI:
[Master Level: 30]
Summon your mechanical friend Machina.
Machina is summoned near the Crystal and defends it while dragging enemies. If the Crystal moves, Machina will move with it and attack enemies along its path.
If Machina attacks an enemy using Damage Reflect, you will not take damage. This skill is affected by summon duration increasing effects.
Required Skill: Level 20 Machina.- [Level 30]
Consumes 105 MP. Summon Machina for 270 seconds.
Deals 735% damage 4 times on up to 5 enemies.
When the Crystal moves, it will attack enemies along its path 1 time.
- [Level 30]


 Crystal Skill: Deus VI:
[Master Level: 30]
Combine Rio and Machina’s strength to call Deus. Deus summons satellites to track and attack nearby enemies.
If Deus attacks an enemy using Damage Reflect, you will not take damage. This skill is affected by summon duration increasing effects.
Required Crystal Charge: 90 or more.
※ After being used, can only be reused after the Crystal Charge has been reset.
Required Skill: Level 30 Crystal Skill: Deus.- [Level 30]
Consumes 345 MP. Summon Deus for 30 seconds.
Deus deals 1460% damage 5 times on up to 10 enemies.
Satellite: Summon up to 5. Up to 3 satellites can be summoned on a single enemy. A satellite deals 232% damage continuously. Each satellite can attack up to 40 times.
- [Level 30]

 Craft: Longinus VI:
[Master Level: 30]
Throw the godly spear Longinus. Longinus flies towards the Crystal and deals massive damage to all enemies in its path. However, if there is no Crystal, it will fly in a straight line.
Required Skill: Level 30 Craft: Longinus.- [Level 30]
Consumes 180 MP.
Deals 1790% damage 12 times on up to 10 enemies.
When this skill hits an enemy or the Crystal, acquire 2 Crystal Fragments for Craft: Javelin VI and 3 Glory Crystal Fragments for Glory Wings: Javelin VI.
When attacking boss monsters, the damage is increased by 20% with an additional 100% critical rate.
During Crystal Skill: Glory Wings, when attacking boss monsters, the damage is increased by an additional 20%.
Cooldown: 15 seconds.
- [Level 30]

 Curse Mark Complete VI:
[Master Level: 30]
Deal an additional hit to enemies inflicted with Curse Marks. In addition, Craft: Javelin VI is permanently enhanced.
Required Skill: Level 10 Curse Mark Complete.- [Level 30]
When you attack an enemy with Curse Marks, activate an additional hit that deals 800% regardless of the number of Curse Mark stacks.
[Passive Effect: Craft: Javelin VI and Craft: Enchant Javelin’s damage is increased by 30%p.]
- [Level 30]
 Longinus Zone VI:
[Master Level: 30]
Summon 6 of the godly spear Longinus and attack a wide area.
Required Skill: Level 1 Longinus Zone.- [Level 30]
Consumes 245 MP. Activate 4 explosions that deal 1530% 5 times on up to 12 enemies.
You will be invincible during the cast action.
Cooldown: 120 seconds.
- [Level 30]
Khali
3rd Mastery Core: Hex: Chakram Sweep VI/Hex: Chakram Fury VI/Death Blossom VI
4th Mastery Core: Resonate VI/Deceiving Blade VI

 Hex: Chakram Sweep VI:
[Master Level: 30]
[Hex]
Throw a giant Chakram forwards and jump backwards from the recoil.
Required Skill: Level 20 Hex: Chakram Sweep.- [Level 30]
Consumes 52 MP. Throw a giant chakram that deals 1326% damage 7 times on up to 8 enemies.
Cooldown: 6 seconds.
- [Level 30]
 Hex: Chakram Fury VI:
[Master Level: 30]
[Hex]
Unleash an area of pain that rips nearby enemies to shreds. You will float while using this skill.
Required Skill: Level 30 Hex: Chakram Fury.- [Level 30]
Consumes 81 MP. Peroidically deals 1076% damage 10 times on up to 10 enemies.
Cooldown: 12 seconds.
- [Level 30]
 Death Blossom VI:
[Master Level: 30]
The rose of despair made from sand blooms. The Death Blossom attacks nearby enemies for a certain period of time, and there is a certain chance to create Summon Chakri at the attack’s location. If the number of enemies being attacked is less than the maximum number of enemies hit, additional Summon Chakri will be created. If Death Blossom hits an enemy using Damage Reflect, you will not take damage. This skill is affected by summon duration increasing effects.
Required Skill: Level 1 Death Blossom.- [Level 30]
Consumes 330 MP. Summon Death Blossom for 30 seconds, periodically dealing 1321% damage 6 times on up to 10 enemies.
There is a 100% chance to create Summon Chakri at the attack locations.
If the number of enemies being attacked is less than the maximum number of enemies hit, additional Summon Chakri equal to the difference will be created at random locations.
Up to 2 additional Summon Chakris can be created. They cannot be created near where another Chakri already exists.
Cooldown: 90 seconds.
- [Level 30]

 Resonate VI:
[Master Level: 30]
With powerful magic, activate the summoned Chakri, allowing them to move freely. When you use Hex skills, Chakri within a certain range will manifest as Resonate. The manifested Resonate will track and attack nearby enemies from the location it was activated. When Chakri have been manifested a certain number of times, multiple Resonates will be created around you. If Resonate hits an enemy using Damage Reflect, you will not take damage.
Required Skill: Level 15 Resonate, Level 25 Resonate: Ultimatum.- [Level 30]
When you use a Hex skill, the summoned Chakri within a certain range will manifest as Resonate.
The manifested Resonate deals 550% damage 3 times, and can bounce up to 4 times before disappearing.
When Chakri are manifested 15 times, create 10 additional Resonates around you.
When a single enemy is hit multiple times, the final damage is decreased by 45%.
- [Level 30]
 Deceiving Blade VI:
[Master Level: 30]
Absorb the enemy’s shadow to make it into your own power. When a Void skill hits an enemy, if a directly used skill other than Void skills hits an enemy within a certain period of time, activate an additional attack. If Deceiving Blade hits an enemy using Damage Reflect, you will not take damage. This skill is not affected by buff duration increasing effects.
Required Skill: Level 20 Deceiving Blade.- [Level 30]
When a Void skill hits an enemy, activate a buff for 20 seconds.
When a directly used skill hits an enemy during the buff, activate an additional attack that deals 610% damage 2 times.
Additional attack reactivation cooldown: 0.5 seconds.
- [Level 30]
Ark
3rd Mastery Core: Vengeful Hate VI/Blissful Restraint VI/Endless Agony VI
4th Mastery Core: Endless Nightmare VI/Endless Dream VI


 Vengeful Hate VI:
[Master Level: 30]
Abyssal Energy is embodied into blades that cut down enemies.
Impending Death leaves Abyssal Marks at locations where it hits enemies and when this skill is used, it will attack everything between the activated Marks and the location where you used it.
This skill can only be used in Specter mode. If this skill hits an enemy using Damage Reflect, you will not take damage. This skill is not affected by cooldown resets.
In Auto Use Mode, if the skill is not on cooldown, Vengeful Hate will be used automatically.
Auto Use Mode On/Off: Right-click.
Required Skill: Level 20 Vengeful Hate.- [Level 30]
When Impending Death hits an enemy, there is a 20% chance to leave an Abyssal Mark. When you use the skill within a certain range, the Marks will activate and deal 935% damage 8 times on up to 8 enemies.
Up to 12 Marks can be created, maximum duration of 20 seconds.
When you use Auto Use Mode, up to 8 marks can be activated.
Cooldown: 12 seconds.
- [Level 30]

 Blissful Restraint VI:
[Master Level: 30]
Rush forwards and create an abyssal prison that binds enemies. When you use this skill, you will enter Specter mode. This skill cannot be used if your Willpower is exhausted. This skill is not affected by cooldown resets.
Brilliant Restraint prioritizes attacking the enemy with the highest max HP within range. If it hits an enemy using Damage Reflect, you will not take damage. Impending Death will not be activated.
Enemies hit will resist binds from Blissful Restraint and other skills for 90 seconds.
While casting this skill, you will not take touch damage from monsters.
Required Skill: Level 30 Blissful Restraint.- [Level 30]
Consumes 1250 HP. Deals 1200% damage 6 times on 1 enemy and binds them for 10 seconds. The bind duration will be increased by up to 100% based on the damage that this attack does.
Afterwards, for 8.1 seconds, periodically deals 900% damage 3 times on up to 12 enemies.
When the skill ends, activate 7 explosions that deal 375% damage 8 times on up to 12 enemies.
Cooldown: 120 seconds.
- [Level 30]
 Endless Agony VI:
[Master Level: 30]
Open a passage to the abyss, striking in front of you for a short time then summon an Abyssal Guard to deal a finishing blow. When you use this skill, you will enter Specter mode. You will not consume Willpower while using this skill but it cannot be used if your Willpower is exhausted. This skill is not affected by cooldown resets.
If Endless Agony hits an enemy using Damage Reflect, you will not take damage. The Abyssal Guard’s attack can deal damage to enemies using Damage Ignore and Damage Reflect.
You can link to all skills from the finishing blow, and the linked skill will be used without moving. However, even if you link a skill with Endless Agony, you can use it with an arrow key to move.
Required Skill: Level 1 Endless Agony.- [Level 30]
You can hold the key down for up to 3 seconds.
Periodically deals 576% damage 3 times on up to 5 enemies. When the keydown ends or you reach the maximum keydown duration, activate the Abyssal Guard.
Abyssal Guard: Activate 10 strikes that deal 336% damage 12 times on up to 12 enemies. When the attack hits an enemy, recover 20% max HP.
Cooldown: 60 seconds.
- [Level 30]
 Endless Nightmare VI:
[Master Level: 30]
Slash enemies with your hand imbued with the Specter’s power. While in Specter mode, this skill is enhanced to Endless Dream.
Required Skill: Level 30 Endless Nightmare.- [Level 30]
Consumes 85 HP. Deals 710% damage 7 times on up to 6 enemies.
Cooldown: 2 seconds.
[Passive Effect: Impending Death’s damage is increased by 60%p.]
- [Level 30]

 Endless Dream VI:
[Master Level: 30]
Slash enemies with your hand imbued with the Specter’s power. While in Lef mode, this skill is changed to Endless Nightmare.
This skill can be linked to all skills. Skills linked from Endless Dream will be used without moving. However, even if you link a skill, you can use it with an arrow key to move.
Required Skill: Level 30 Endless Dream.- [Level 30]
Deals 720% damage 7 times on up to 6 enemies.
When the attack hits an enemy, recover 1% max HP.
- [Level 30]
Lara
3rd Mastery Core: Dragon Vein Absorption VI/Absorption: River Puddle Douse VI/Absorption: Fierce Wind VI/Absorption: Sunlit Grain VI
4th Mastery Core: Wakeup Call VI


 Dragon Vein Absorption VI:
[Master Level: 30]
[Dragon Vein Skill]
Consume a nearby Dragon Vein to absorb its latent power. Based on the element of the Dragon Vein absorbed by Lara, the corresponding Land Spirits will appear and help Lara attack when Essence Sprinkle or Wakeup Call hits an enemy. During an Absorption skill, if you activate another Eruption skill with the same element, the Absorption skill will end. This skill will prioritize Free Dragon Veins. If there are none, it will prioritize the closest Dragon Vein. If an Absorption skill attacks an enemy using Damage Reflect, you will not take damage. During the cast action, you will have 100% Stance.
In addition, permanently increases Eruption VI skills’ final damage.
Required Skill: Level 30 Absorption: River Puddle Douse, Absorption: Fierce Wind, Absorption: Sunlit Grain.- [Level 30]
Consumes 45 MP. Activate the Absorption skill matching the Dragon Vein’s element.
Cooldown: 0.3 seconds.
[Passive Effect: Eruption VI skills’ final damage is increased by 20%.]
- [Level 30]


 Absorption: River Puddle Douse VI:
[Dragon Vein Skill] [Absorption Skill]
When Essence Sprinkle hits an enemy, the mischievous River Spirits appear with a river puddle and douse enemies to attack them. Absorption: River Puddle Douse VI is affected by buff duration increasing effects.
Required Skill: Level 30 Absorption: River Puddle Douse.- [Level 30]
For 95 seconds, when Essence Sprinkle hits an enemy, River Spirits appear that deal 717% damage 10 times on up to 6 enemies.
Reactivation cooldown: 2.5 seconds.
- [Level 30]

 Absorption: Fierce Wind VI:
[Dragon Vein Skill] [Absorption Skill]
When Essence Sprinkle hits an enemy, the Wind Spirits appear quietly and create a fierce wind that continuously attacks enemies. Absorption: Fierce Wind VI is affected by buff duration increasing effects.
Required Skill: Level 30 Absorption: Fierce Wind.- [Level 30]
For 95 seconds, when Essence Sprinkle hits an enemy, activate Fierce Wind at one of their locations. The wind deals 360% damage 3 times on up to 6 enemies continuously.
Reactivation cooldown: 2.5 seconds.
- [Level 30]


 Absorption: Sunlit Grain VI:
[Dragon Vein Skill] [Absorption Skill]
When Essence Sprinkle hits an enemy, the Sun Spirits gather and emit fireballs of condensed hot sunlight to track and attack enemies. The fireballs will prioritize tracking boss monsters in range. If there are multiple boss monsters, they will prioritize the monster with the highest max HP. Absorption: Sunlit Grain VI is affected by buff duration increasing effects.
Required Skill: Level 30 Absorption: Sunlit Grain.- [Level 30]
For 95 seconds, when Essence Sprinkle hits an enemy, the Sun Spirits will appear and emit 5 fireballs. The fireballs track nearby enemies and deal 380% damage 6 times.
If a single enemy is hit by multiple fireballs, the second and later fireballs’ final damage will be decreased by 40%.
Reactivation cooldown: 2.5 seconds.
- [Level 30]


 Wakeup Call VI:
[Master Level: 30]
[Dragon Vein Skill]
When a slumbering Dragon Vein’s powers are awakened in an unrefined way, it is turned into intangible energy and tracks nearby enemies. This skill will prioritize consuming nearby Dragon Veins over Free Dragon Veins. If Wakeup Call attacks an enemy using Damage Reflect, you will not take damage. During the cast action, you will have 100% Stance. When this skill is used, Free Dragon Veins will be created at the location of awakened Dragon Veins. In addition, permanently increases Eruption and Absorption skills’ final damage.
Required Skill: Level 20 Wakeup Call, Level 1 Free Dragon Vein.- [Level 30]
Consumes 45 MP. Intangible energy is created based on the number of enemies in range, with a minimum of 7 to a maximum of 12. Each energy deals 1150% damage 4 times.
If a single enemy is hit by multiple energies, the second and later energies will have their final damage decreased by 40%.
Cooldown: 15 seconds.
[Passive Effect: Eruption and Absorption skills’ final damage is increased by 15%.]
- [Level 30]
Hoyoung
3rd Mastery Core: Talisman: Clone VI/Talisman: Seeking Ghost Flame VI
4th Mastery Core: Scroll: Star Vortex VI/Scroll: Butterfly Dream VI

 Talisman: Clone VI:
[Master Level: 30]
[Talisman Skill] Disguise a Talisman as clones to trick your enemies and unleash sneak attacks. When you attack enemies for a certain period of time, clones will appear and attack nearby enemies.
Attacks from installed skills or summons will not create clones. If Talisman: Clone hits an enemy using Damage Reflect, you will not take damage. This skill will prioritize tracking the boss monster with the highest max HP.
This skill is affected by buff duration increasing effects.
Required Skill: Level 20 Talisman: Clone.- [Level 30]
Consumes 100 Talisman Power. For 200 seconds, when you attack, create 3 clones.
Each clone deals 386% damage 4 times. When attacking normal monsters, the damage is increased by 20%.
However, after clones are created, they cannot be recreated for the next 1.5 seconds.
- [Level 30]
 Talisman: Seeking Ghost Flame VI:
[Master Level: 30]
[Talisman Skill] Transform a Talisman into a spirit flame that tracks and attacks enemies. After it attacks, it will pause for a short period of time, then track another enemy to attack.
If Talisman: Seeking Ghost Flame hits an enemy using Damage Reflect, you will not take damage. This skill prioritizes tracking the boss monster with the highest max HP. If there is no boss monster in range, it will attack different enemies. This skill is affected by summon duration increasing effects.
Required Skill: Level 20 Talisman: Seeking Ghost Flame.- [Level 30]
Consumes 100 Talisman Power. Summon 2 spirit flames for 90 seconds. Every 1.8 seconds, they will track an enemy and deal 369% damage 5 times on up to 5 enemies.
- [Level 30]

 Scroll: Star Vortex VI:
[Master Level: 30]
[Scroll Skill] Unfold a scroll that calls a powerful vortex which absorbs enemies’ essences. If you reuse the skill, the vortex will disappear and you will heal your party members’ HP and MP based on the number of essences you collected.
If Scroll: Star Vortex hits an enemy using Damage Reflect, you will not take damage. This skill is affected by summon duration increasing effects.
Required Skill: Level 30 Scroll: Star Vortex.- [Level 30]
Consumes 900 Scroll Power. Create a vortex for 40 seconds that deals 465% damage 6 times on up to 6 enemies.
When it hits an enemy 4 times, absorb 1 essence. You can absorb up to 9 essences.
When boss monsters are hit, absorb 3x the essence.
If you reuse the skill, the vortex will disappear and you will heal your party members’ HP and MP by 5% per essence.
- [Level 30]


 Scroll: Butterfly Dream VI:
[Master Level: 30]
[Scroll Skill] Unfold a scroll that calls 5 beautiful yet deadly coloured butterflies. When you attack for a certain period of time, butterflies that track enemies will be summoned.
If Scroll: Butterfly Dream hits an enemy using Damage Reflect, you will not take damage. This skill will prioritize tracking the boss monster with the highest max HP.
This skill is affected by buff duration increasing effects.
Required Skill: Level 30 Scroll: Butterfly Dream.- [Level 30]
Consumes 900 Scroll Power. For 200 seconds, increases final damage by 10% and when you attack, summon 5 butterflies that deal 585% damage.
However, after butterflies are created, they cannot be recreated for the next 1 second.
- [Level 30]
Events
Dawn Star Banquet

Dawn Star Banquet Dinner Party

Preparing the dinner that is essential for a banquet! Prepare the Daily Dinner Party and Special Dinner Party to receive rewards!
Event Participation Requirements:
- A level 101 or higher character (or a Zero character that has completed story quest Chapter 2) that has completed the ‘Gob’s Call’ quest.
Event Period:
- December 19, 2024 after the maintenance ~ February 19, 2025 at 11:59 PM.
You can select the ‘Dawn Star Banquet Dinner Party’ event in the Event List and click the ‘Participate’ button or talk to the Attendant NPC in <Hanging Gardens> to start the ‘[Dawn Star] Preparing the Perfect Dinner Party’ quest.

Through the Event List, you can check your Dawn Star Banquet Dinner Party progress and perform Daily Dinner Party Preparations and Special Dinner Party Preparations.
※ The <Dawn Star Banquet Dinner Party> progress records are shared between all characters within the Maple ID.
Daily Dinner Party Preparation
Once per day, you can click the ‘Daily Dinner Party Preparation’ in the Dawn Star Banquet Dinner Party UI to accumulate the following rewards.
- 3 3x Experience Coupons (30 Minutes)
- 5 Dawn Starlight Points
- 5 Starlight Points
You can claim your desired amount of accumulated 3x Experience Coupons through the ‘Receive’ button in the Dawn Star Banquet Dinner Party UI.
You can use the accumulated Dawn Starlight Points and Starlight Points in the [Dawn Starlight Gathering] event.
You can complete the Daily Dinner Party Preparation up to 5 times per week. You can complete it up to 40 times over the event period.
You can click the <Use> button at the top right corner of the Dawn Star Banquet Dinner Party UI to use 3,000 Maple Points to complete 1 Daily Dinner Party Preparation that you did not complete previously. The <Daily Dinner Party Pass> can be used up to the number of times you did not complete the Daily Dinner Party Preparations as of the previous week.
You can acquire the following rewards each time you complete a Daily Dinner Preparation. You can also choose to receive Commemoration Coins instead of the corresponding reward.
If you complete all 40 Daily Dinner Party Preparations, you can acquire a Transcendent Growth Potion.
| Number of Daily Dinner Party Preparations | Reward | Quantity | Alternative Commemoration Coins |
|---|---|---|---|
| 1 | Prepared Spirit Pendant Voucher (30 Days) | 1 | 500 |
| 2 | Special Medal of Honour | 150 | 300 |
| 3 | Banquet’s Jewel Flower Riding (Permanent) Voucher | 1 | 50 |
| 4 | VIP Sauna Entry Ticket | 1 | 50 |
| 5 | Sol Erda | 1 | 500 |
| 6 | VIP Sauna Entry Ticket | 1 | 50 |
| 7 | Core Gemstone | 300 | 300 |
| 8 | Soft/Blush Petal Skin VOucher | 1 | 300 |
| 9 | Selective 3 Event Rings Voucher | 1 | 500 |
| 10 | Maximum Growth Potion | 1 | 500 |
| 11 | Selective Symbol Voucher (500 Arcane Symbols or 100 Authentic Symbols) | 1 | 300 |
| 12 | Experience Core Gemstone | 30 | 300 |
| 13 | Banquet’s Jewel Damage Skin (Unit) | 1 | 50 |
| 14 | VIP Sauna Entry Ticket | 1 | 50 |
| 15 | Sol Erda | 1 | 500 |
| 16 | VIP Sauna Entry Ticket | 1 | 50 |
| 17 | Karma Black Rebirth Flame | 300 | 500 |
| 18 | Dawn Star Banquet Hanging Gardens Chair | 1 | 50 |
| 19 | Karma 17 Star Force Enhancement Scroll | 1 | 500 |
| 20 | Maximum Growth Potion | 1 | 500 |
| 21 | Selective Symbol Voucher (500 Arcane Symbols or 100 Authentic Symbols) | 1 | 300 |
| 22 | Advanced EXP Voucher | 1000 | 500 |
| 23 | Broomyroid Voucher | 1 | 300 |
| 24 | VIP Sauna Entry Ticket | 1 | 50 |
| 25 | Sol Erda | 1 | 500 |
| 26 | VIP Sauna Entry Ticket | 1 | 50 |
| 27 | Advanced EXP Voucher | 1000 | 500 |
| 28 | Selective Mannequin/Slot Expansion Voucher | 1 | 300 |
| 29 | Karma Black Cube | 20 | 500 |
| 30 | Spiegella’s Golden Tomato Punch King Entry Ticket | 1 | 500 |
| 31 | Selective Symbol Voucher (500 Arcane Symbols or 100 Authentic Symbols) | 2 | 500 |
| 32 | Advanced EXP Voucher | 1000 | 500 |
| 33 | Dawn Star Banquet Set Voucher | 1 | 300 |
| 34 | VIP Sauna Entry Ticket | 1 | 50 |
| 35 | Sol Erda | 1 | 500 |
| 36 | VIP Sauna Entry Ticket | 1 | 50 |
| 37 | Advanced EXP Voucher | 1000 | 500 |
| 38 | Dawn Star Banquet Custom Background Voucher | 1 | 50 |
| 39 | Karma White Additional Cube | 20 | 500 |
| 40 | Spiegella’s Golden Tomato Punch King Entry Ticket | 1 | 500 |
| Transcendent Growth Potion | 1 | – |
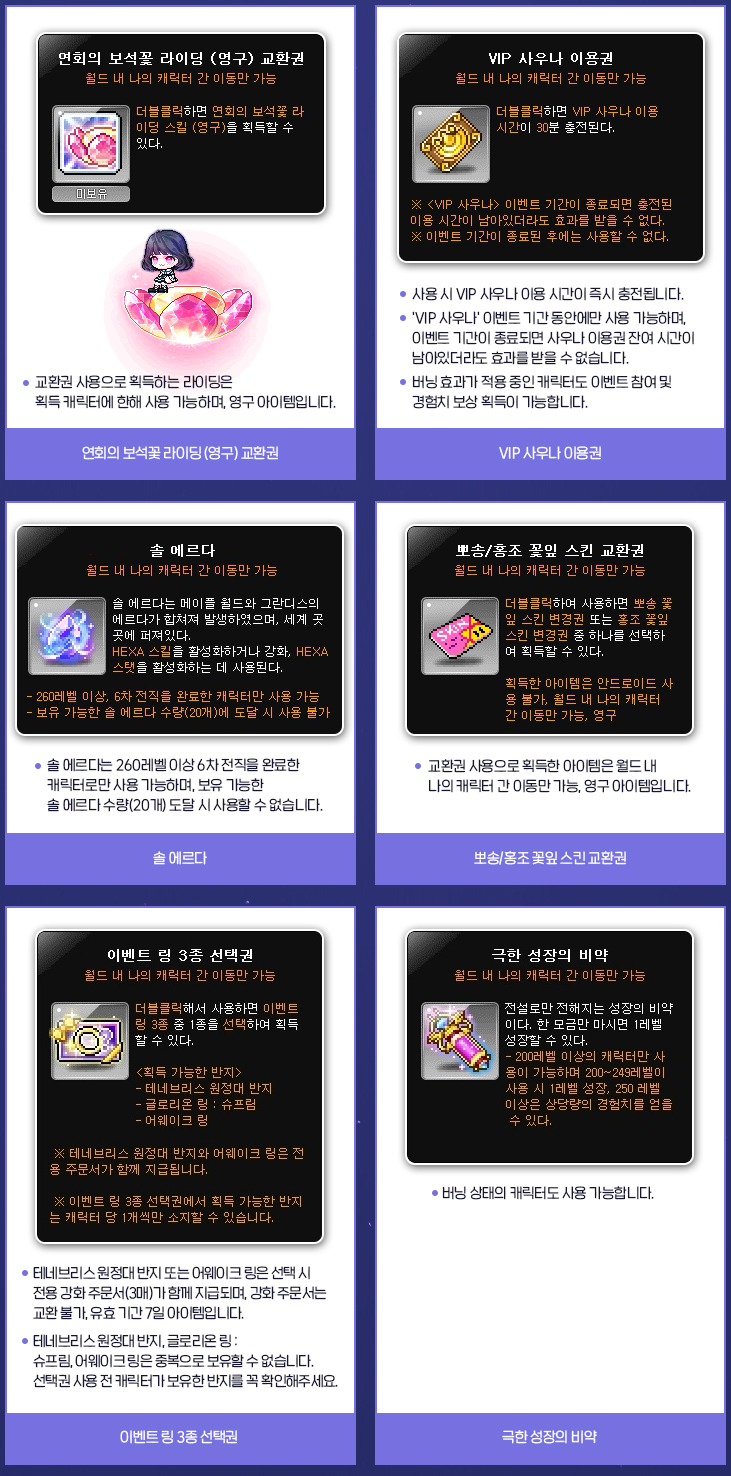
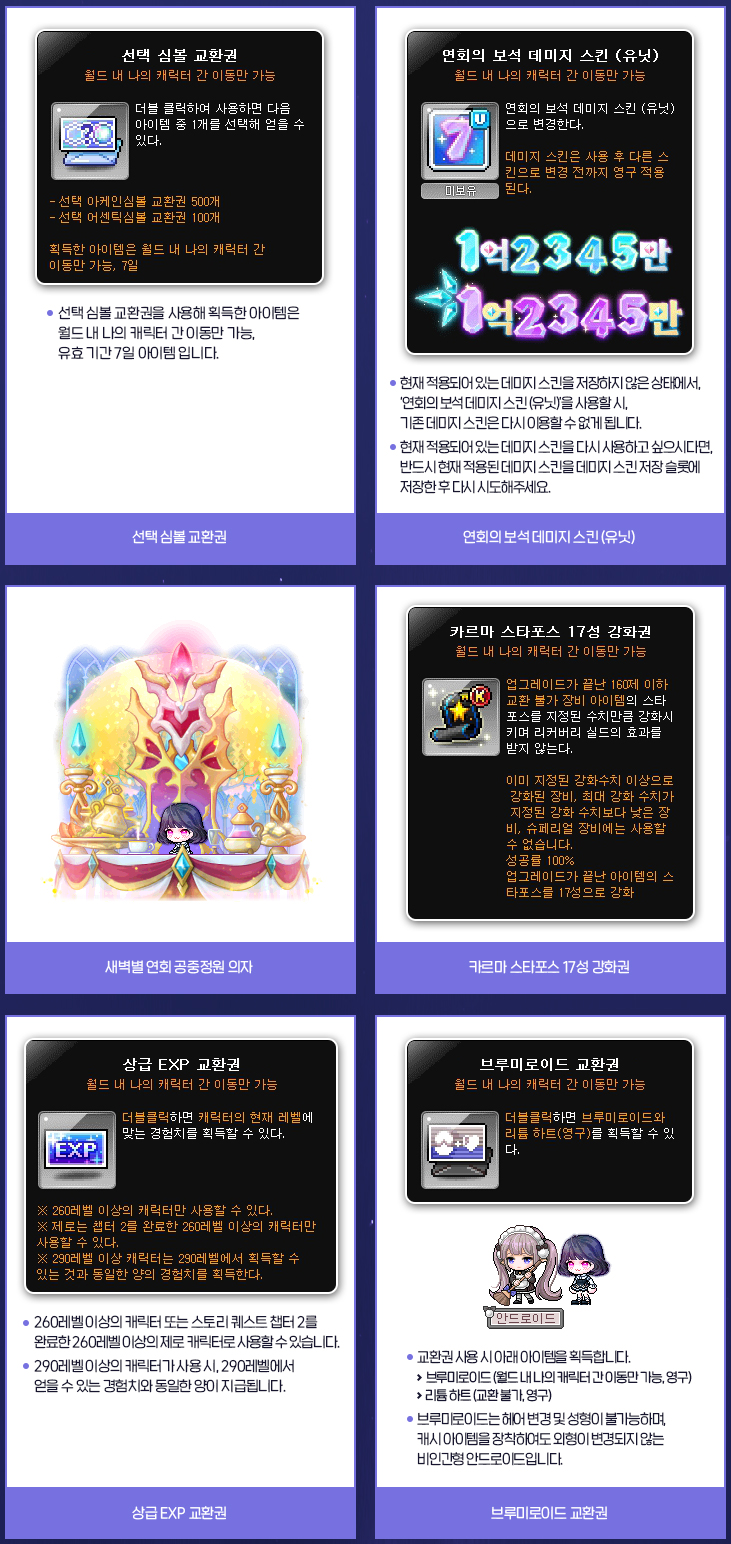
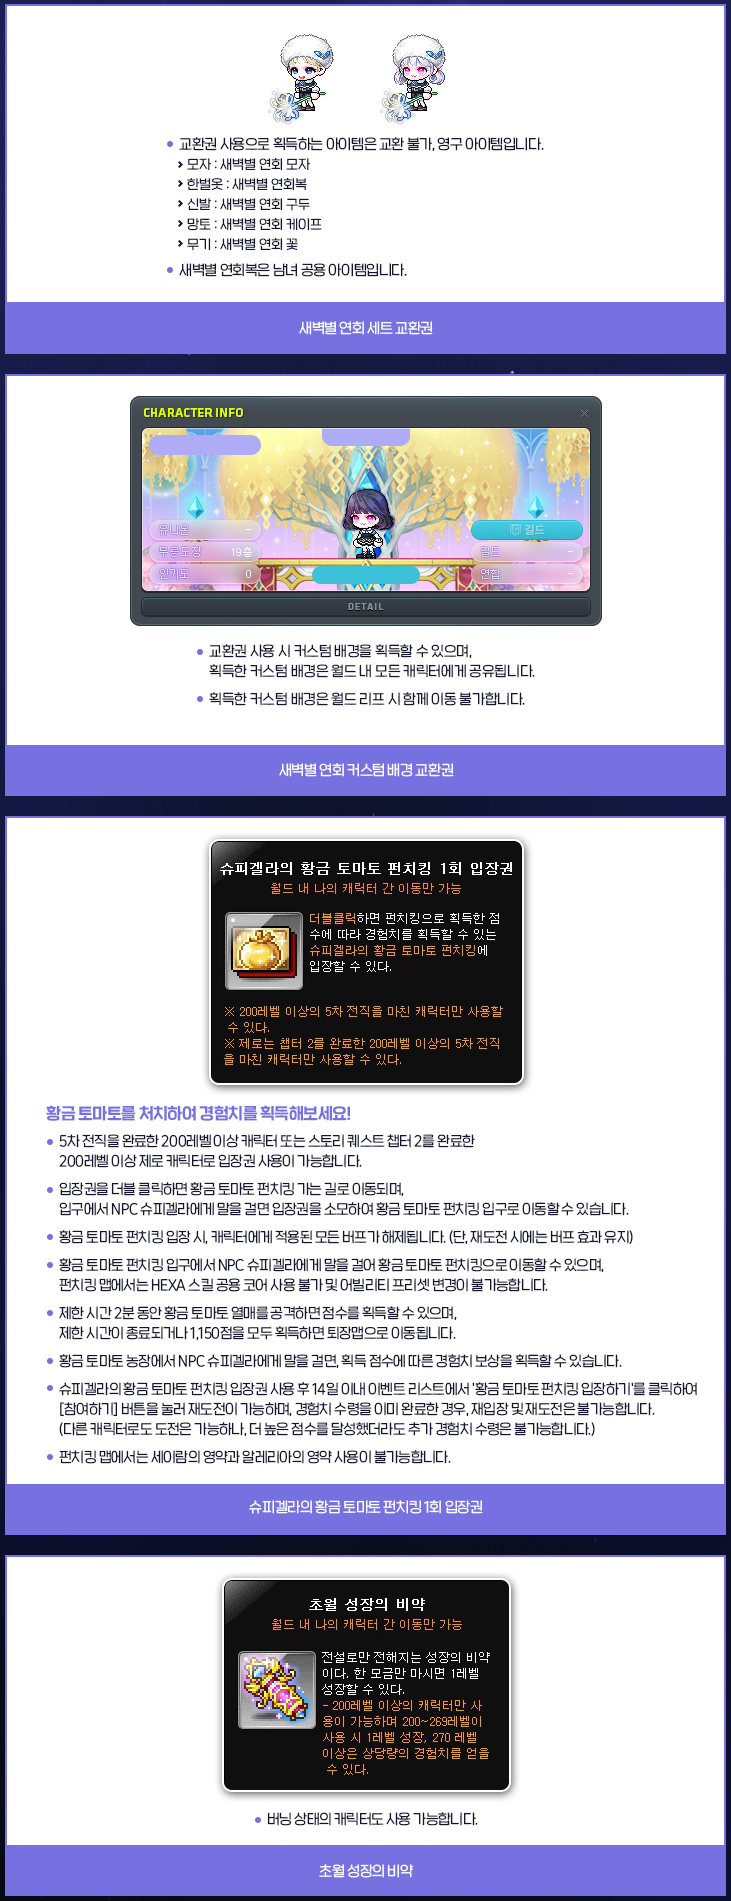
※ All reward items can only be put into storage.
※ The Commemoration Coin Exchange can be used until February 19, 2025 at 11:59 PM.
※ All reward items can be received until February 19, 2025 at 11:59 PM. They will expire on February 20, 2025 at 2:00 AM.
※ The Android acquired from the Broomyroid Voucher can only be put into storage. However, the Lidium Heart provided at the same time is untradable.
※ The Sol Erda can only by used by characters level 260 or higher that have completed the 6th job advancement. It cannot be used if you hold 20 Sol Erda.
※ The Daily Dinner Party Preparation progress record is shared between all characters within the Maple ID.
※ The Daily Dinner Party Preparation rewards can only be claimed 1 time per Maple ID.
Special Dinner Party Preparation
You can complete the Special Dinner Party Preparation up to 3 times per week by defeating monsters within your level range. You can complete it up to 24 times over the event period.
After defeating 2,000 monsters within your level range, you can press the ‘Special Dinner Party Preparation’ button at the bottom left corner of the Dawn Star Banquet Dinner Party to receive 1,000 Commemoration Coins. The Commemoration Coins can be used in the ‘Commemoration Coin Exchange’.
You can click the <Use> button at the bottom right corner of the Dawn Star Banquet Dinner Party UI to use 3,000 Maple Points to complete 1 Special Dinner Party Preparation that you did not complete previously. The <Special Dinner Party Design Pass> can be used up to the number of times you did not complete the Special Dinner Party Preparations as of the previous week.
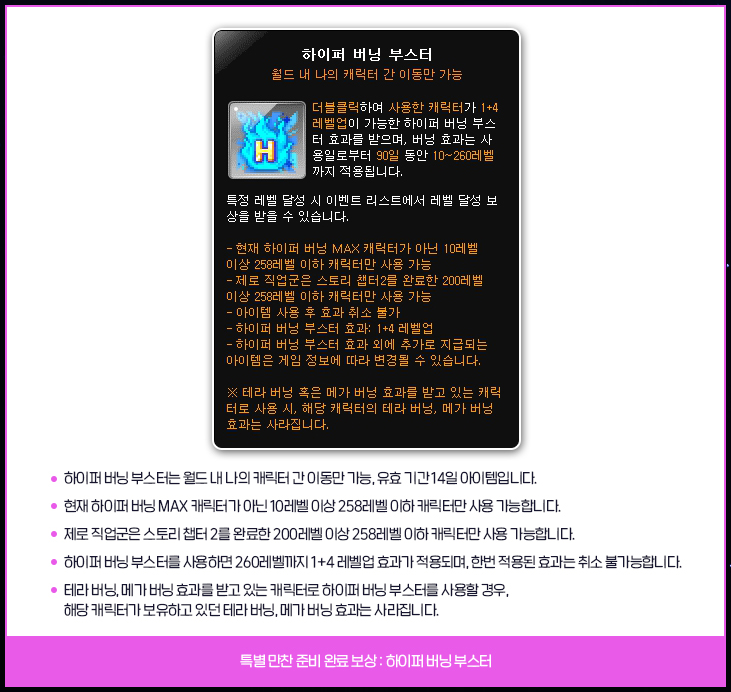
If you complete all 24 Special Dinner Party Preparations, you can acquire a Hyper Burning Booster.
※ The Hyper Burning Booster will expire 14 days after claiming it.
※ A character that uses the Hyper Burning Booster will receive the 1+4 level up effect. This Burning effect will be applied from level 10~260 for 90 days from the time of use.
※ After using the Hyper Burning Booster, when you reach certain levels, you can receive level achievement rewards through the Event List.
※ The Hyper Burning Booster can only be used on characters level 10~258 or Zero characters level 200~258 that have completed Chapter 2, that are not currently Hyper Burning MAX characters.
※ If the Hyper Burning Booster is used on a character that has the Tera Burning or Mega Burning effects, that character’s Tera Burning/Mega Burning effects will disappear.
※ The Special Dinner Party Preparation progress record is shared between all characters within the Maple ID.
※ The Special Dinner Party will only progress if you defeat monsters within your level range while you are in a party of 1 or are not in a party.
※ The Special Dinner Party Preparation rewards can only be claimed 1 time per Maple ID.
Dawn Starlight Gathering

A technician from Primacy, Angelo, has infiltrated the banquet with you! He says you can enhance the Illusion Device using the banquet hall’s magic infused light? Gather Dawn Light and Starlight to enhance the Illusion Device, and acquire various powerful skills!
Event Participation Requirements:
- A level 101 or higher character (or a Zero character that has completed story quest Chapter 2) that has participated in the ‘Dawn Star Banquet Dinner Party’ event.
Event Period:
- December 19, 2024 after the maintenance ~ February 19, 2025 at 11:59 PM.
You can select the ‘Dawn Starlight Gathering’ event in the Event List and click the ‘Participate’ button or talk to the Angelo in <Hanging Gardens> to start the ‘[Dawn Starlight Gathering] Angelo’s Request’ quest.
Dawn Light and Starlight
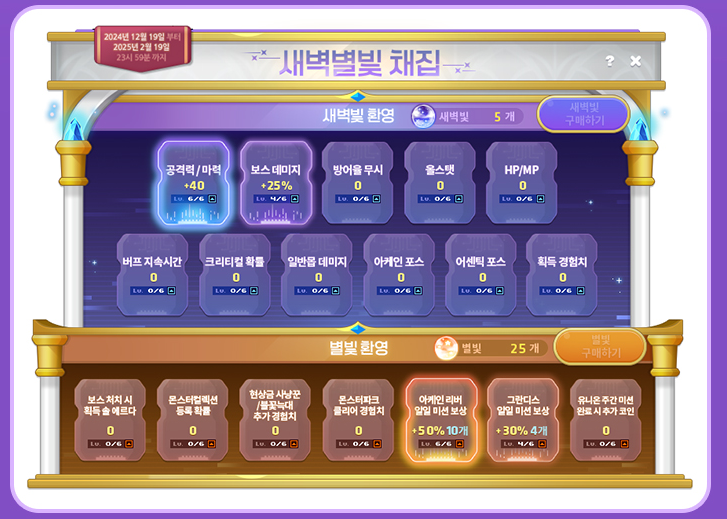
You can enhance the Dawn Light Illusion and Starlight Illusion using Dawn Light and Starlight. You can acquire 5 Dawn Light Points and 5 Starlight Points by completing the ‘Daily Dinner Party Preparation’ 1 time, or by using the Daily Dinner Party Pass 1 time.

In the Dawn Starlight Gathering UI, you can purchase your desired quantity of Dawn Light or Starlight by clicking the [Purchase Dawn Light] or [Purchase Starlight] buttons and entering the desired quantity from the available quantity. by paying 1,000 Maple Points each Point.
※ When the event first starts, you can purchase 10 ‘Dawn Light’ and 10 ‘Starlight’ each. Each available quantity is increased by 10 every Thursday at 12:00 AM.
※ The available quantity to purchase is accumulated over the event period.
Dawn Light Illusion and Starlight Illusion
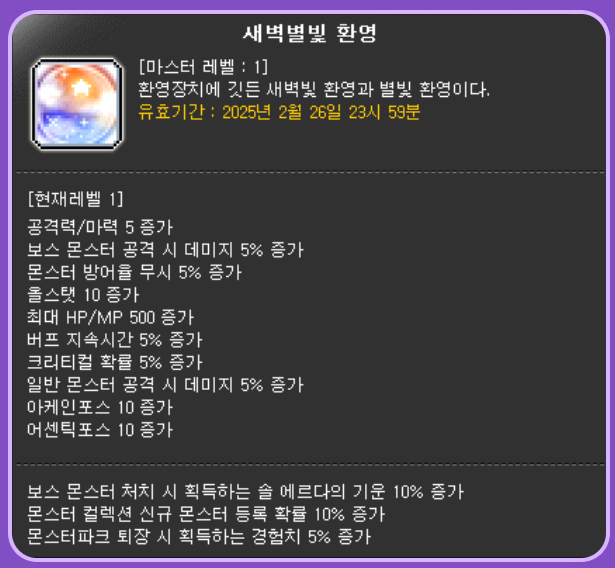
The Dawn Light Illusion is a skill that enhances your character’s stats, while the Starlight Illusion is a skill that enhances the rewards from participating in content. You can consume a set amount of Dawn Light or Starlight per skill level to enhance the skills.
※ The acquired skills will expire on February 26, 2025 at 11:59 PM.
※ However, the skills cannot be enhanced after February 19, 2025 at 11:59 PM.
Dawn Light Illusion
| Stat Type | Level 1 | Level 2 | Level 3 | Level 4 | Level 5 | Level 6 |
|---|---|---|---|---|---|---|
| Attack/Magic Attack | +5 | +10 | +15 | +20 | +30 | +40 |
| Boss Damage | +5% | +10% | +20% | +25% | +35% | +40% |
| Defense Ignore | +5% | +10% | +20% | +25% | +35% | +40% |
| All Stats | +10 | +20 | +30 | +40 | +60 | +80 |
| HP/MP | +500 | +1000 | +1500 | +2000 | +3000 | +4000 |
| Buff Duration | +5% | +10% | +15% | +20% | +25% | +30% |
| Critical Rate | +5% | +10% | +15% | +20% | +25% | +30% |
| Normal Monster Damage | +5% | +10% | +20% | +25% | +35% | +40% |
| Arcane Force | +10 | +20 | +30 | +40 | +50 | +60 |
| Experience Acquired | +2.5% | +5% | +7.5% | +10% | +12.5% | +15% |
| Authentic Force | +10 | +20 | +30 | +40 | +50 | +60 |
Starlight Illusion
| Type | Benefits | Level 1 | Level 2 | Level 3 | Level 4 | Level 5 | Level 6 |
|---|---|---|---|---|---|---|---|
| Sol Erda acquired from bosses | When you defeat a boss monster, increases the Sol Erda Energy acquired. | +10% | +20% | +40% | +60% | +80% | +100% |
| Monster Collection registration rate | Increases Monster Colection registraation rate. | +10% | +20% | +40% | +60% | +80% | +100% |
| Bounty Hunting/Flame Wolf additional experience | Increases experience acquired from Polo/Fritto/Especia’s Bounty Hunting and Flame Wolf. | +10% | +20% | +40% | +60% | +80% | +100% |
| Monster Park Clear Experience | Increases experience acquired from Monster Park and Monster Park Extreme. | +5% | +10% | +20% | +30% | 40% | +50% |
| Arcane River Daily Mission Rewards | Increases experience acquired from completing Arcane River area daily quests. | +5% | +10% | +20% | +30% | 40% | +50% |
| Increases Arcane Symbols acquired from completing Arcane River area daily quests. | +1 | +2 | +4 | +6 | +8 | +10 | |
| Grandis Daily Mission Rewards | Increases experience acquired from completing Grandis area daily quests. | +5% | +10% | +20% | +30% | 40% | +50% |
| Increases Arcane Symbols acquired from completing Grandis area daily quests. | +1 | +2 | +3 | +4 | +5 | +6 | |
| Union Weekly Mission Additional Coins | Increases the number of Union Coins acquired from completing the [Maple Union] Weekly Dragon Hunting quest. | +100 | +150 | +200 | +250 | +300 | +400 |
Dawn Light/Starlight Consumed Per Level
| Illusion | Consumed Material | Amount Consumed Per Level | |||||
| Level 1 | Level 2 | Level 3 | Level 4 | Level 5 | Level 6 | ||
| Dawn Light Illusion | Dawn Light | 1 | 3 | 8 | 13 | 20 | 25 |
| Starlight Illusion | Starlight | 1 | 3 | 8 | 13 | 20 | 25 |
※ ‘Sol Erda Energy’ will drop when you defeat the reward map’s reward monster if you survived after defeating boss monsters of Suu (Hard) or higher.
※ The ‘increased Monster Collection registration rate’ and ‘additional coins from the Union Weekly Mission’ benefits cannot be activated in Challengers World.
※ The ‘Arcane River Daily Mission Reward’ and ‘Grandis Daily Mission Reward’ skill effects are each applied only 1 time per world. They are applied when you first complete a daily quest. (However, if you do not wish to apply them, you can click the ‘Reject’ button and receive them when completing them on another character in the world or completing another daily quest.)
※ The ‘Arcane River Daily Mission Reward’ and ‘Grandis Daily Mission Reward’ skill effects’ experience acquisition benefit and additional Symbols benefit can be applied to different characters or daily quests. You can choose to apply the benefits when completing a daily quest.
※ When completing Tenebris area daily quests, only the experience acquisition benefit of the ‘Arcane River Daily Mission Rewards’ skill effect will be applied.
※ The ‘Grandis Daily Mission Reward’ skill effects will only apply to daily quests in Cernium, Hotel Arcs, Odium, Shangri-La, Arteria, Carcion, and Tallahart.
※ You cannot receive additional rewards for dauly quests that you already completed before activating the skill effect.
※ The ‘additional coins from the Union Weekly Mission’ benefit does not apply to the ‘[Maple Union] PC Room Weekly Dragon Hunting’ mission.
※ The additional Union Coins acquired from the ‘additional coins from the Union Weekly Mission’ benefit are not reflected in related achievements.
Commemoration Coin Exchange
An exchange filled with enhancement and growth items! Acquire Commemoration Coins and trade them for various items!
Event Participation Requirements:
- A level 101 or higher character (or a Zero character that has completed story quest Chapter 2) that has participated in the ‘Dawn Star Banquet Dinner Party’ event.
Event Period:
- December 19, 2024 after the maintenance ~ February 19, 2025 at 11:59 PM.
You can select the ‘Dawn Star Banquet Dinner Party’ event in the Event List and click the ‘Participate’ button or talk to the Attendant NPC in <Hanging Gardens> to start the ‘[Dawn Star] Preparing the Perfect Dinner Party’ quest and acquire Commemoration Coins.

Afterwards, you can use the Commemoration Coin Exchange by talking to Tia in <Royal Villa: Hanging Gardens> or through the Dawn Star Banquet Dinner Party UI.
※ <Commemoration Coins> are shared by all characters within the Maple ID.
Enhancement
- Strange Additional Cube (50 coins) [limit of 200]
- 100% Epic Potential Scroll (300 coins) [limit of 5]
- 100% Special Additional Potential Scroll (300 coins) [limit of 5]
- 100% Gold Hammer (60 coins) [limit of 20]
- 100% Innocent Scroll (100 coins) [limit of 20]
- Gold Potential Stamp (20 coins) [limit of 20]
- Special Additional Potential Stamp (30 coins) [limit of 20]
- Selective Pet Equipment Scroll Voucher (500 coins) [limit of 20]
- 100% Clean Slate Scroll (200 coins) [limit of 10]
- Selective 3 Event Rings Voucher (3000 coins) [limit of 3]
- Event Ring Only Legendary Potential Scroll (4000 coins) [limit of 3]
- Fairy Heart Voucher (12000 coins) [limit of 1]
- Karma Unique Potential Scroll (3000 coins) [limit of 4]
- Karma Epic Additional Potential Scroll (3000 coins) [limit of 4]
- Selective Karma Special Heart Scroll Voucher (2000 coins) [limit of 10]
Growth
- Mystery Monster Egg (300 coins) [limit of 3 per week]
- Trait Growth Potion (300 coins) [limit of 20]
- Selective 8 Slot Expansion Coupons (100 coins) [limit of 15]
- AP Reset Scroll (50 coins) [limit of 3]
- SP Reset Scroll (50 coins) [limit of 3]
- Infinite Fatigue Potion (10 coins) [limit of 5 per day]
- Character Slot Expansion Coupon (200 coins) [limit of 5]
- 40 Slot Soul Bag (1000 coins) [limit of 3]
- 40 Slot Chair Bag (1500 coins) [limit of 3]
- 40 Slot Recipe Bag (1000 coins) [limit of 3]
- 20 Slot Crafting Material Bag (1000 coins) [limit of 3]
- 40 Slot Scroll Bag (1000 coins) [limit of 3]
- Chaos Circulator (800 coins) [limit of 20]
- Black Circulator (1500 coins) [limit of 10]
- Legendary Circulator (2000 coins) [limit of 3]
- Core Gemstone (50 coins) [limit of 500]
- Experience Core Gemstone (650 coins) [limit of 30]
- Spiegella’s Golden Strawberry Farm Entry Ticket (200 coins) [limit of 5 per week]
- Extreme Growth Potion (70 coins) [limit of 200]
- Maximum Growth Potion (10000 coins) [limit of 2]
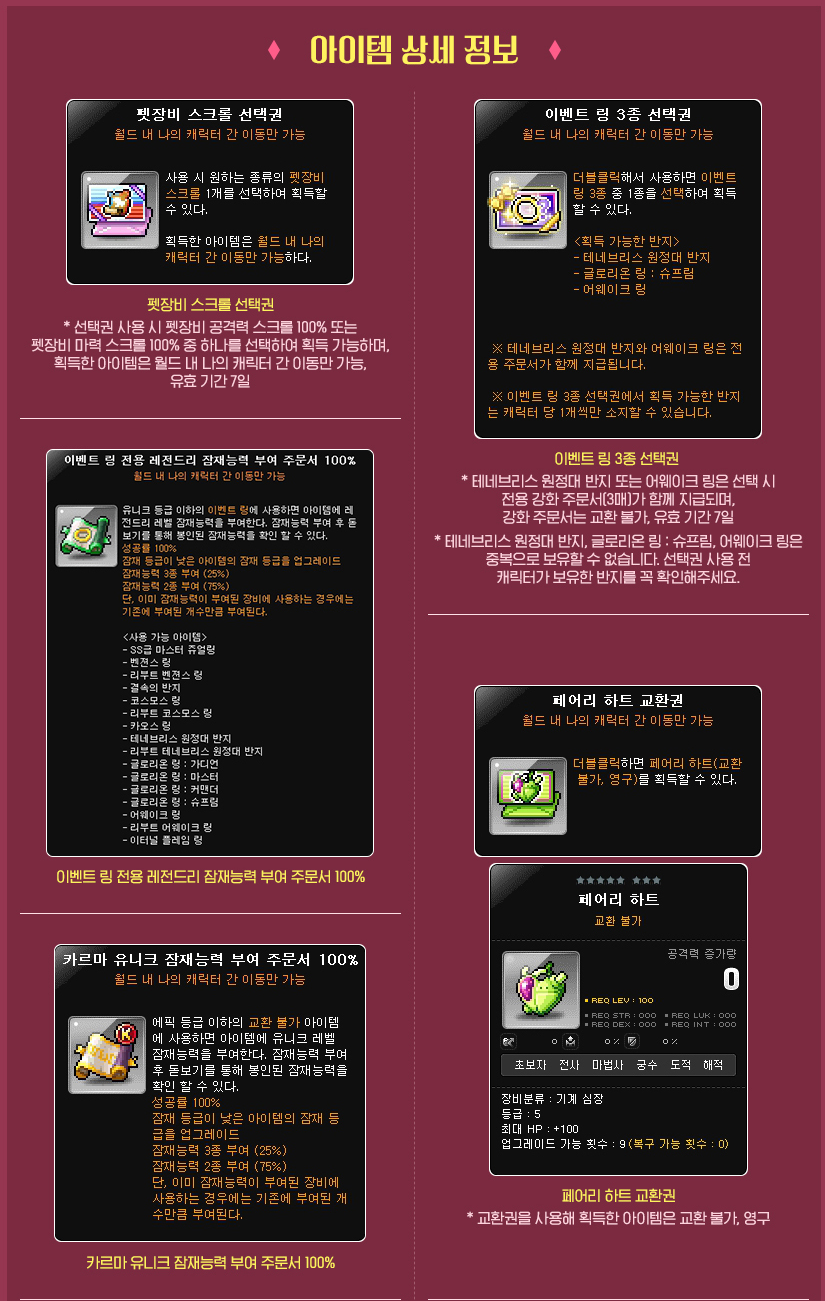
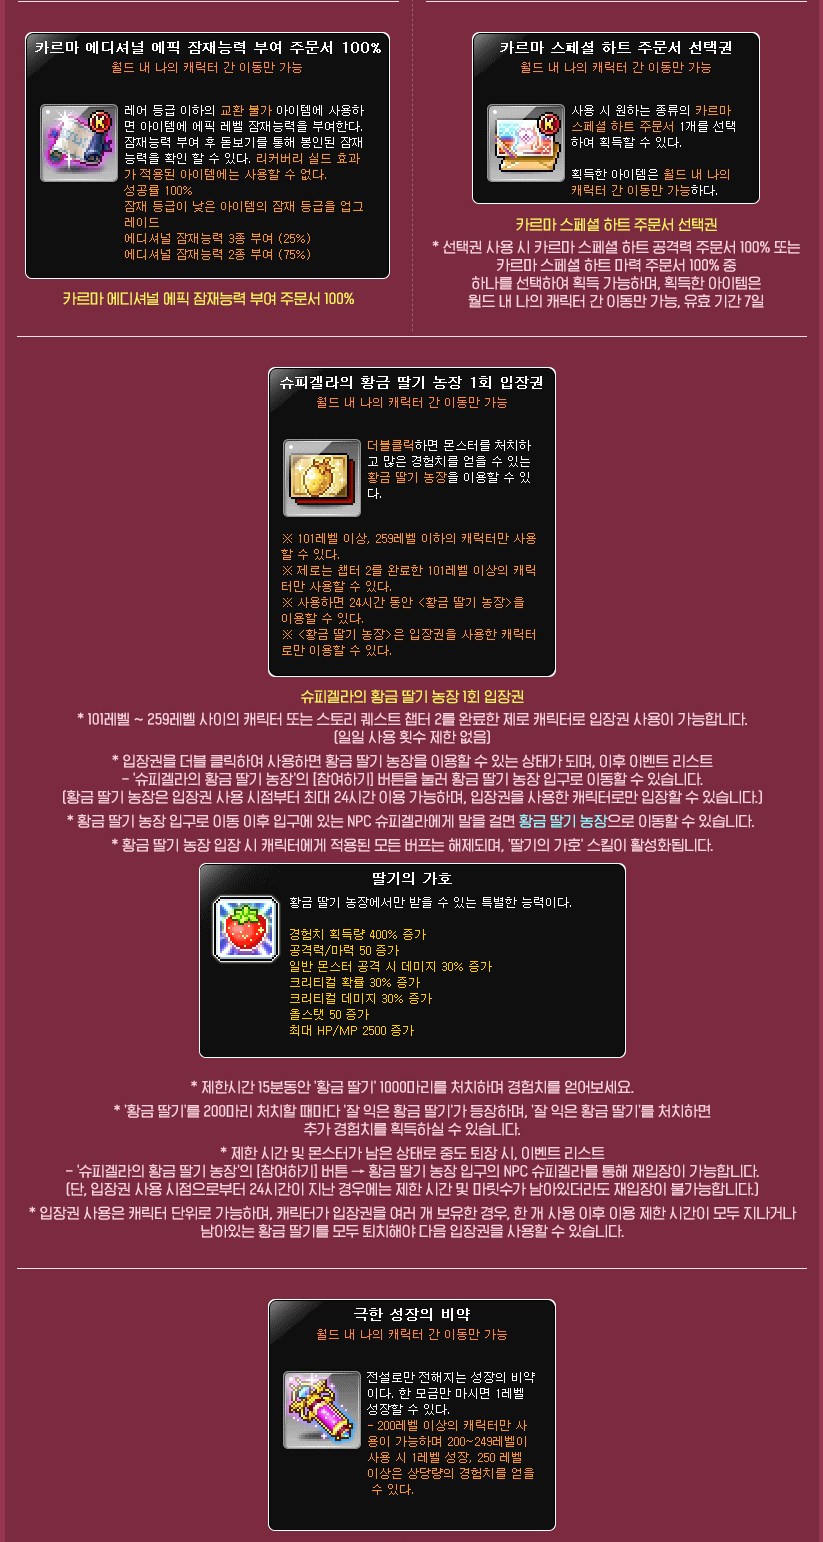
※ All items are limited per Maple ID and can only be put into storage. All items (except for the Mysterious Monster Egg) will expire on February 20, 2025 at 2:00 AM.
※ If you use the Selective Pet Equipment Scroll Voucher, you can choose between the 100% Pet Equipment Attack Scroll and 100% Pet Equipment Magic Attack Scroll.
※ The selected Pet Equipment Scroll can only be put into storage, and will expire after 7 days.
※ If you use the Selective Karma Special Heart Scroll Voucher, you can choose between the 100% Karma Special Heart Attack Scroll and 100% Karma Special Heart Magic Attack Scroll.
※ The selected Karma Heart Scroll can only be put into storage, and will expire after 7 days.
※ Spiegella’s Golden Strawberry Farm Entry Ticket
- Can only be used by characters level 101~259, or Zero characters level 259 or lower that have completed the story quest Chapter 2.
- Characters that have used the Entry Ticket can select the Spiegella’s Golden Strawberry Farm event in the Event List and press the Participate button to move to <Spiegella’s Golden Strawberry Farm: Golden Strawberry Farm Entrance>. (When you enter, all buffs applied to the character will be removed.)
- In <Spiegella’s Golden Strawberry Farm: Golden Strawberry Farm>, you will have 15 minutes to defeat 1000 Golden Strawberries and acquire experience.
- You will have up to 24 hours to enter the Farm starting from the time you use the Entry Ticket.
- You can only use the next Entry Ticket when the Farm usage time limit has ended or all remaining Golden Strawberry monsters have been defeated.
Commemoration Badge Exchange
Defeat powerful boss monsters and trade the Commemoration Badges and Advanced Commemoration Badges you acquire for various items!
Event Participation Requirements:
- A level 101 or higher character (or a Zero character that has completed story quest Chapter 2) that has completed the ‘Gob’s Call’ quest.
Event Period:
- December 19, 2024 after the maintenance ~ February 19, 2025 at 11:59 PM.
You can select the ‘Gob’s Call’ event in the Event List and click the ‘Participate’ button.

Afterwards, you can use the Commemoration Badge Exchange by talking to Melon in <Royal Villa: Hanging Gardens> or through the Event List.
Acquiring Commemoration Badges and Advanced Commemoration Badges
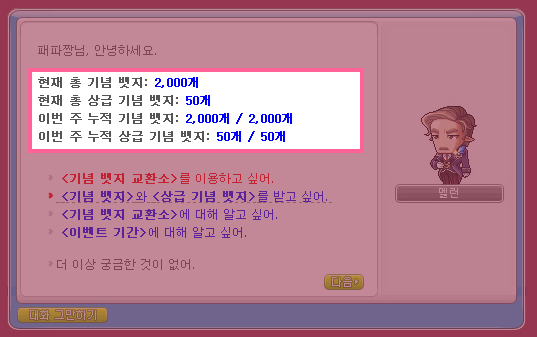
You can acquire Commemoration Badges and Advanced Commemoration Badges by soloing weekly bosses.
If you have already received Badges for the week, and you defeat a boss that gives a higher number of Badges than the previously defeated boss, you will only receive Badges equal to the difference between them.
You can acquire up to 2,000 Commemoration Badges and 50 Advanced Commemoration Badges per week per Maple ID. They can only be used in the world that you acquired them in.
※ Daily and monthly bosses are not included.
※ The weekly boss defeat records are reset every Thursday at 12:00 AM.
Boss Defeat Criteria
Your boss defeat will only be recognized if you solo the boss. It will be recognized even if you succeed in Practice Mode.
If you defeat a higher difficulty boss, all lower difficulty bosses will be recognized as having been defeated.
Certain boss monsters have reward monsters that require you to defeat them to acquire Commemoration Badges and Advanced Commemoration Badges.
※ You must defeat the reward monsters even in Practice Mode.
- Pierre: Defeat Chaos Pierre’s Treasure Box.
- Bloody Queen: Defeat Chaos Bloody Queen’s Treasure Box.
- Suu: Defeat the Lose Control Haven Core.
- Lucid: Defeat the Last Music Box.
- Guardian Angel Slime: Defeat Slime’s Treasure Box.
- Seren: Defeat Chosen Seren’s Treasure Box.
- Kalos: Defeat Watcher Kalos’ Treasure Box.
- Kaling: Defeat the Peace Blooms Again.
- Limbo: Defeat the Paradoxical Truth.
※ For other bosses, the boss will be recognized as being cleared when the final phase’s boss monster is defeated. You can then acquire Commemoration Badges and Advanced Commemoration Badges.
The amount of Commemoration Badges acquired from defeating boss monsters is as follows.
- Cygnus (Easy): 10
- Hilla (Hard): 50
- Pink Bean (Chaos): 50
- Cygnus (Normal): 50
- Zakum (Chaos): 200
- Pierre (Chaos): 200
- Von Bon (Chaos): 200
- Bloody Queen (Chaos): 200
- Vellum (Chaos): 300
- Magnus (Hard): 300
- Papulatus (Chaos): 400
- Suu (Normal): 600
- Damien (Normal): 600
- Guardian Angel Slime (Normal): 700
- Lucid (Easy): 900
- Will (Easy): 900
- Lucid (Normal): 1,100
- Will (Normal): 1,100
- Dusk (Normal): 1,300
- Dunkel (Normal): 1,300
- Suu (Hard): 1,600
- Damien (Hard): 1,600
- Lucid (Hard): 1,650
- Will (Hard): 1,650
- Jin Hilla (Normal): 1,650
- Guardian Angel Slime (Chaos): 1,700
- Dusk (Chaos): 1,700
- Dunkel (Hard): 1,750
- Jin Hilla (Hard): 1,800
- Chosen Seren (Normal): 1,850
- Watcher Kalos (Easy): 1,900
- Kaling (Easy): 1,950
- Chosen Seren (Hard): 2,000
- Watcher Kalos (Hard): 2,000
- Suu (Extreme): 2,000
- Kaling (Normal): 2,000
- Limbo (Normal): 2,000
- Watcher Kalos (Chaos): 2,000
- Kaling (Hard): 2,000
- Limbo (Hard): 2,000
- Chosen Seren (Extreme): 2,000
- Watcher Kalos (Extreme): 2,000
- Kaling (Extreme): 2,000
The amount of Advanced Commemoration Badges acquired from defeating boss monsters is as follows.
- Watcher Kalos (Normal): 10
- Suu (Extreme): 50
- Kaling (Normal): 50
- Limbo (Normal): 50
- Watcher Kalos (Chaos): 50
- Kaling (Hard): 50
- Limbo (Hard): 50
- Chosen Seren (Extreme): 50
- Watcher Kalos (Extreme): 50
- Kaling (Extreme): 50
Commemoration Badge Exchange
- Commemoration Badge
- Selective VIP Buff Voucher (5 coins) [unlimited]
- 3x Experience Coupon (15 Minutes) (15 coins) [limit of 2 per day]
- Karma Black Cube (30 coins) [limit of 4 per week]
- Karma White Additional Cube (40 coins) [limit of 4 per week]
- 100% Karma Incredible Chaos Scroll of Goodness (20 coins) [limit of 80]
- 100% Ark Innocent Scroll (20 coins) [limit of 20]
- Karma Powerful Rebirth Flame (5 coins) [limit of 100]
- Karma Eternal Rebirth Flame (10 coins) [limit of 200]
- Karma Black Rebirth Flame (20 coins) [limit of 500]
- Selective Karma Premium Pet Equipment Scroll Voucher (400 coins) [limit of 30]
- Special Medal of Honour (10 coins) [limit of 300]
- Chaos Circulator (80 coins) [limit of 30]
- Black Circulator (150 coins) [limit of 30]
- Selective Karma Premium Accessory Scroll Voucher (400 coins) [limit of 30]
- Selective Symbol Voucher (20 coins) [limit of 500]
- Advanced Commemoration Badge
- Karma Abyss Rebirth Flame (1 coin) [limit of 350]
- Sol Erda (10 coins) [limit of 10]
- Mu Gong’s Soul Shard (10 coins) [limit of 20]

※ All items in this shop are limited per Maple ID. All items can only be put into storage.
※ If you use the Selective VIP Buff Voucher, you can choose between the VIP Buff (Stats) and VIP Buff (Experience).
※ The selected VIP Buff can only be put into storage, and will expire after 1 day.
※ The Sol Erda can only by used by characters level 260 or higher that have completed the 6th job advancement. It cannot be used if you hold 20 Sol Erda.
※ If you use the Selective Karma Premium Pet Equipment Scroll Voucher, you can choose between the 100% Karma Premium Pet Equipment Attack Scroll and 100% Karma Premium Pet Equipment Magic Attack Scroll.
※ The selected Karma Premium Pet Equipment Scroll can only be put into storage, and will expire after 7 days.
※ If you use the Selective Karma Premium Accessory Scroll Voucher, you can choose between the 100% Karma Premium Accessory Attack Scroll and 100% Karma Premium Accessory Magic Attack Scroll.
※ The selected Karma Premium Accessory Scroll can only be put into storage, and will expire after 7 days.
※ If you use the Selective Symbol Voucher, you can choose between 5 Selective Arcane Symbol Vouchers or 1 Selective Authentic Symbol Voucher. The items can only be put into storage and will expire after 14 days.
Meso Shop
Find special items that can purchase with mesos!
Event Participation Requirements:
- A level 101 or higher character (or a Zero character that has completed story quest Chapter 2) that has participated in the ‘Dawn Star Banquet Dinner Party’ event.
Event Period:
- December 19, 2024 after the maintenance ~ February 19, 2025 at 11:59 PM.

You can use the Meso Shop by talking to Nia in <Royal Villa: Hanging Gardens>.
- Karma 100% Incredible Chaos Scroll of Goodness (45m mesos) [limit of 50]
- Pet Equipment Stat Transfer Scroll (100m mesos) [limit of 5]
- Selective Marble Skin Care Coupon Voucher (500m mesos) [limit of 5]
- Soft Petal Skin Android Change Coupon (800m mesos) [limit of 1]
- Blush Petal Skin Android Change Coupon (800m mesos) [limit of 1]
- Android Ear Sensor Clip (600m mesos) [limit of 1]
- Damage Skin Extractor (100m mesos) [limit of 1]
- White Gold Throwing Stars Voucher (3b mesos) [limit of 1]
- White Gold Bullets Voucher (3b mesos) [limit of 1]
- Selective Cyclops Eye Voucher (1b mesos) [limit of 3]
- Dragon Ice Headband Voucher (2b mesos) [limit of 1]
- Spirit Ninetails Voucher (1.5b mesos) [limit of 1]
- Alliance Commander Outfit Set Voucher (1.5b mesos) [limit of 1]
- Selective Knight Outfit Set Voucher (1b mesos) [limit of 6]
- Chuunibyou Chair (100m mesos) [limit of 1]
- Shark Flume Ride Chair (100m mesos) [limit of 1]
- Tangerine Snail Riding (Permanent) Voucher (100m mesos) [limit of 1]
- Super Hero Riding (Permanent) Voucher (100m mesos) [limit of 1]
- Aurora Bambini Riding (Permanent) Voucher (100m mesos) [limit of 1]
- Best Friends Sky Bicycle Riding (Permanent) Voucher (100m mesos) [limit of 1]
- Petite Monster Transformation Potion Box (10m mesos) [limit of 100]
- Petite Hero Transformation Potion Box (10m mesos) [limit of 100]
- Wood Display Case Chair (210k mesos) [limit of 1]
- Gold Display Case Chair (100m mesos) [limit of 1]
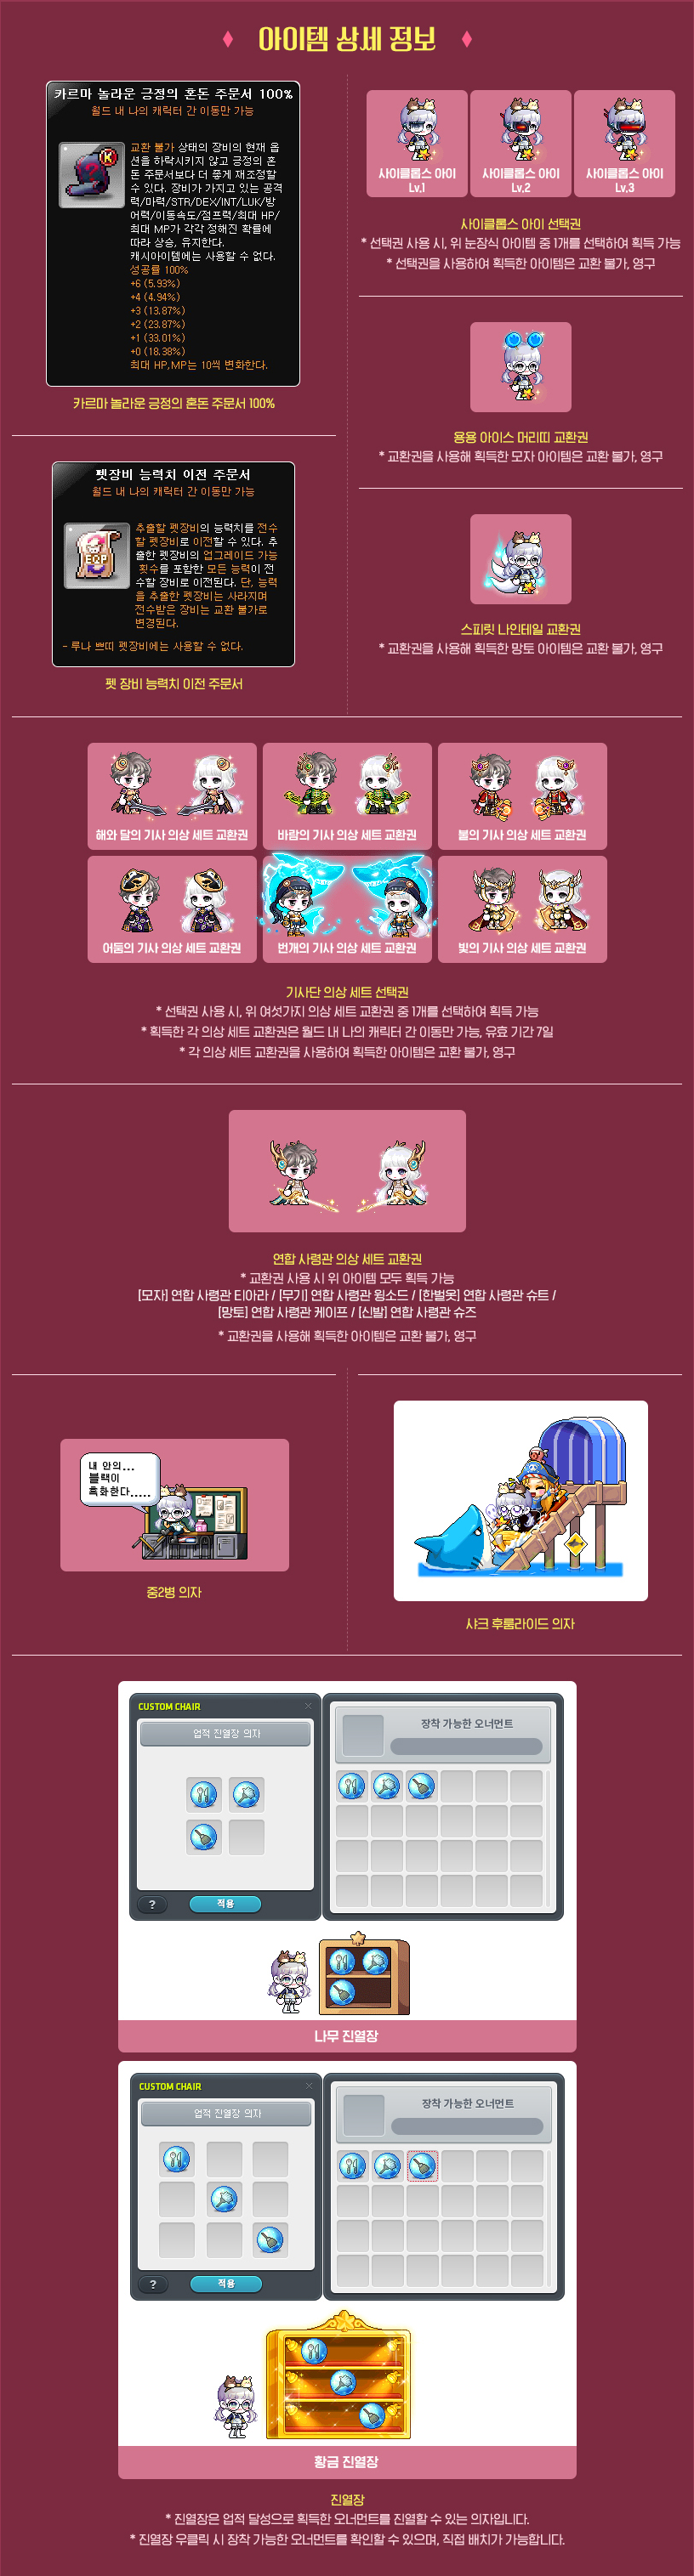
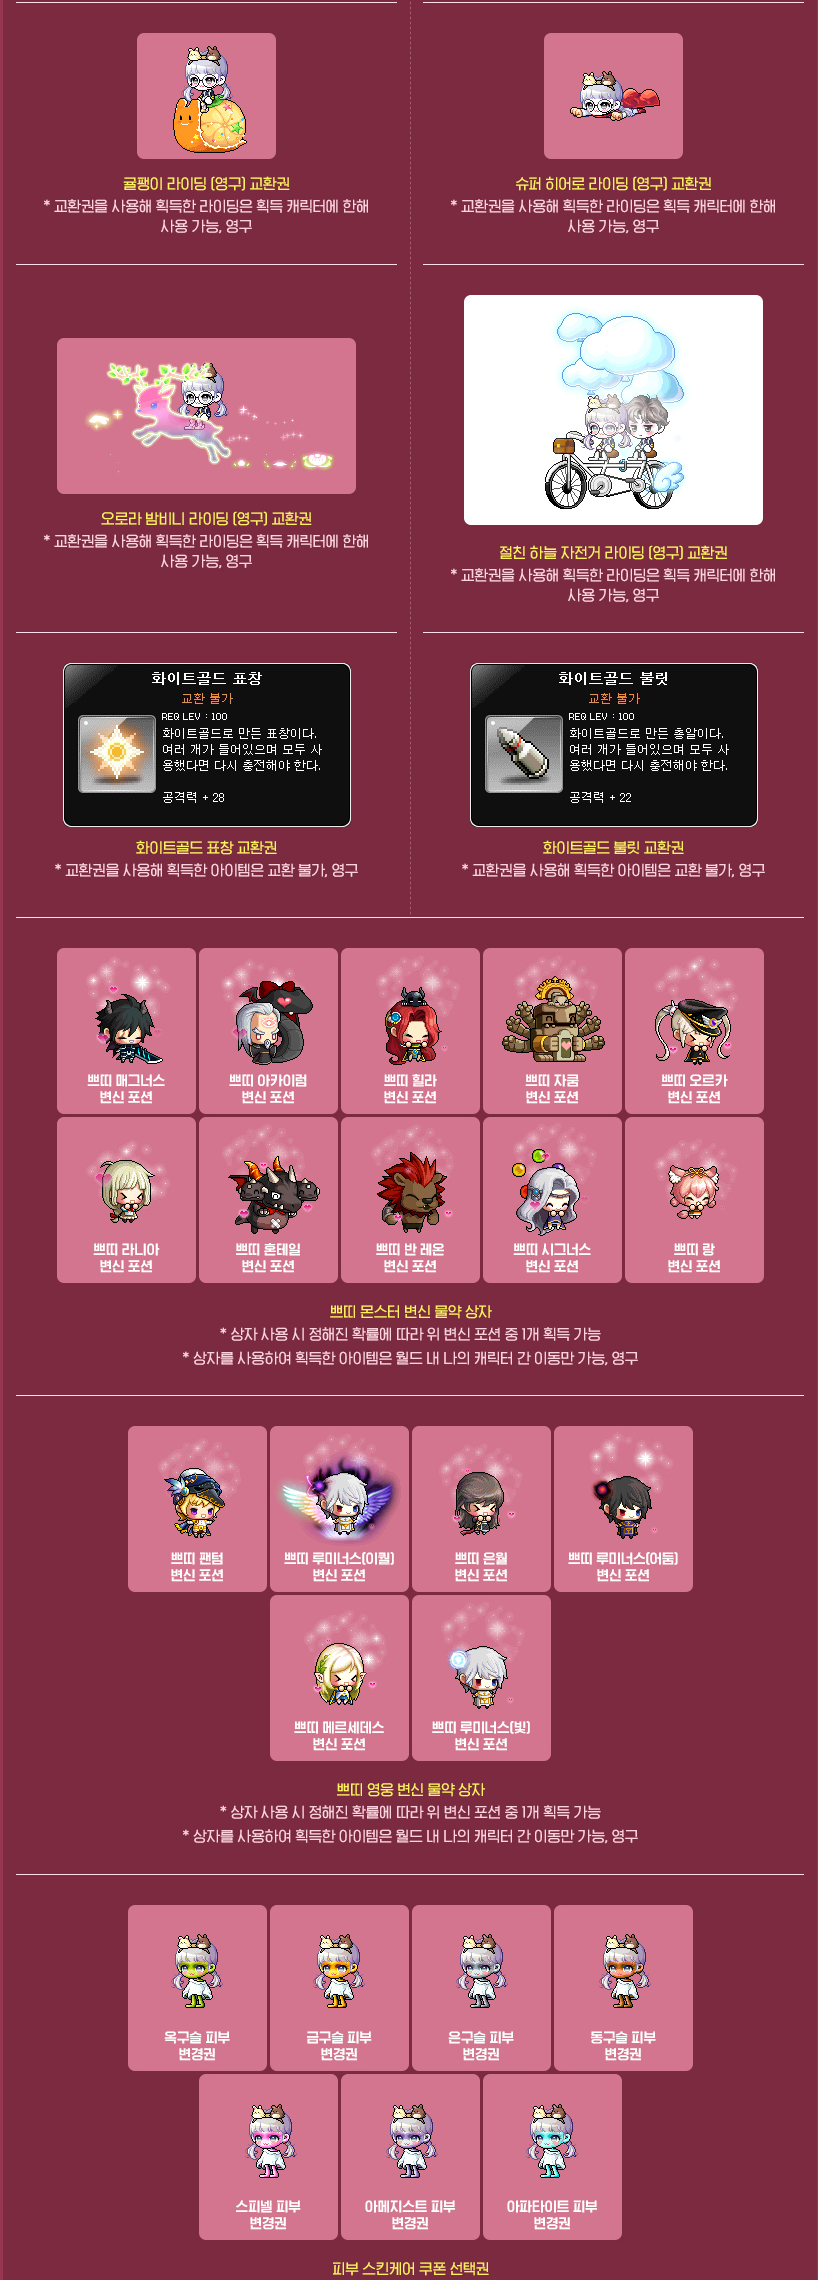
※ All items in this shop are limited per world and can only be put into storage.
Broomy’s Deep Cleaning

Help Broomy clean up and gain experience. While helping her clean up, you might get something good sometimes…?
Event Participation Requirements:
- A level 101 or higher character (or a Zero character that has completed Chapter 2) that has participated in the ‘Dawn Star Banquet Dinner Party’ event.
Event Period:
- December 19, 2024 after the maintenance ~ January 15, 2025 at 11:59 PM.
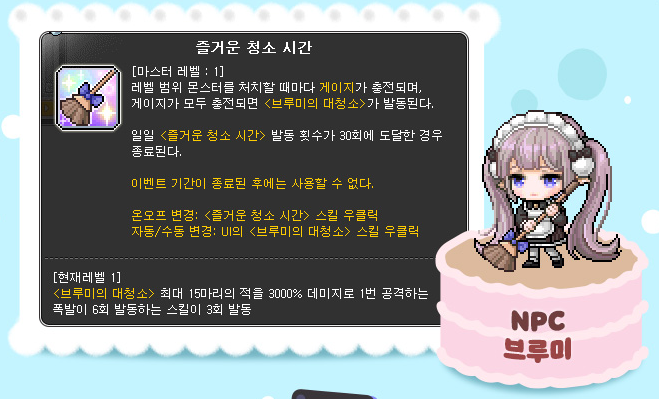
You can select the ‘Broomy’s Deep Cleaning’ event in the Event List and click the ‘Participate’ button or talk to Broomy at the <Royal Villa: Hanging Gardens> to acquire the ‘Happy Cleaning Time’ skill.

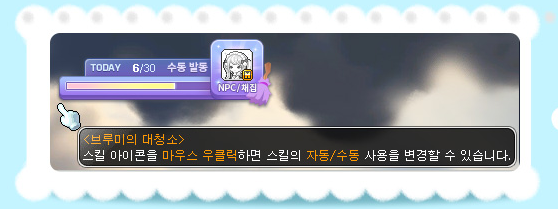
When you enter a hunting ground with monsters within your level range, the ‘Happy Cleaning Time’ skill will be automatically activated. As you defeat monsters within your level range, you will fill up the gauge.
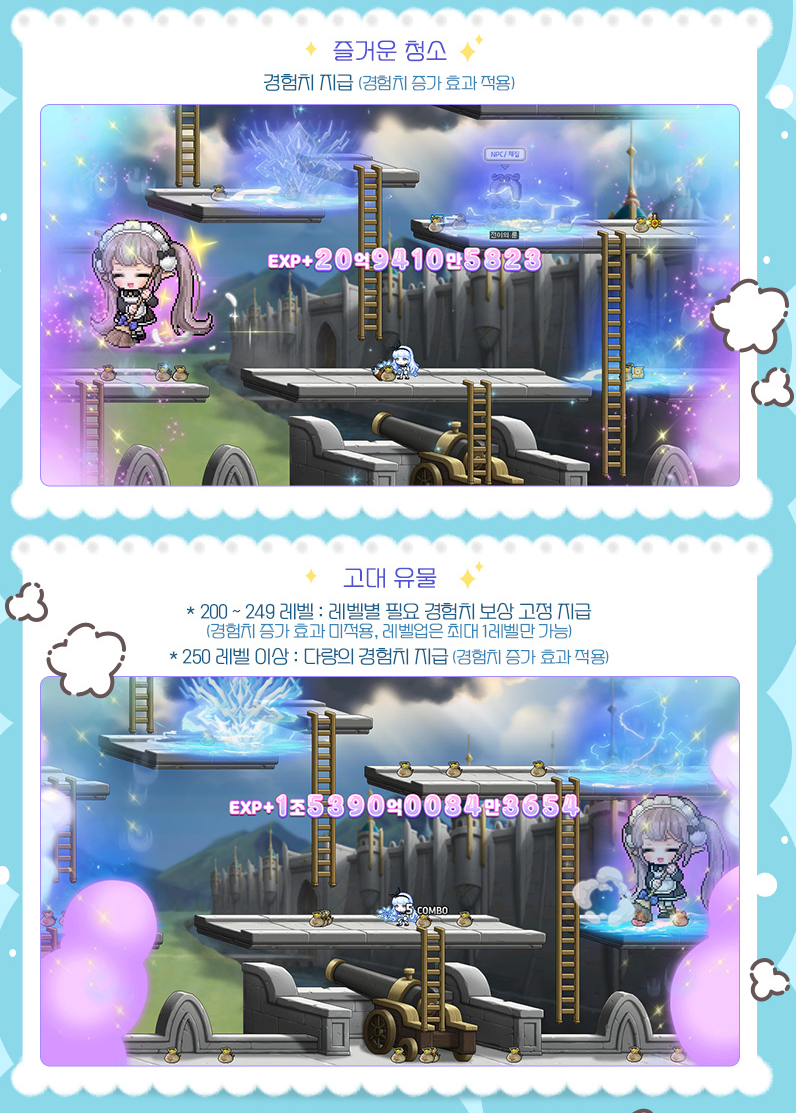
When you defeat 300 monsters within your level range, the gauge will be filled and ‘Broomy’s Deep Cleaning’ will be activated.
When ‘Broomy’s Deep Cleaning’ is activated, you will receive either ‘Happy Deep Cleaning’ or ‘Ancient Relic’ based on a set rate, and you will acquire experience based on the result.
The Happy Deep Cleaning will give you experience (affected by experience increasing effects) while the Ancient Relic will give you: a fixed amount of experience required per level for level 200~249 (not affected by experience increasing effects, you can only level up up to 1 time) or a large amount of experience for level 250+ (affected by experience increasing effects).
After you acquire ‘Broomy’s Deep Cleaning’s experience, Broomy will sweep the area with her broom to attack enemies.
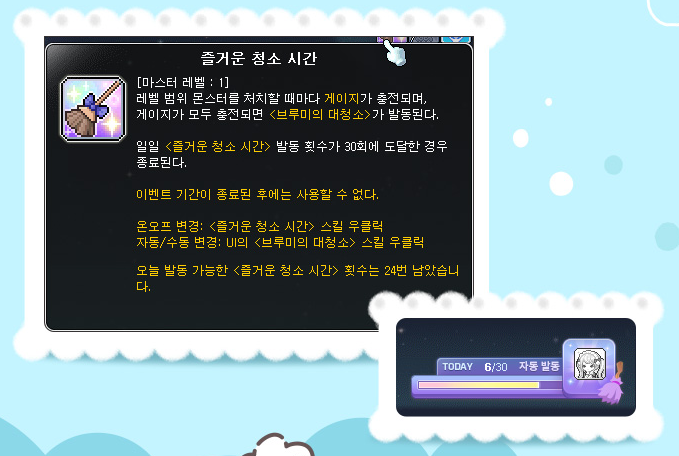
Hanging Gardens’ Attendants’ Stories
The invisible efforts of nameless attendants is required in order for the Dawn Star Banquet to be held. Complete attendant duties with the Attendant Kieran and receive hidden rewards!
Event Participation Requirements:
- A level 101 or higher character (or a Zero character that has completed Chapter 2) that has participated in the ‘Dawn Star Banquet Dinner Party’ event.
Event Period:
- December 19, 2024 after the maintenance ~ February 19, 2025 at 11:59 PM.

You can select the ‘Attendants’ Stories’ event in the Event List and click the ‘Participate’ button or talk to Kieran at the <Royal Villa: Hanging Gardens> to start the ‘[Dawn Star] Attendants’ Stories’ quest.
When you complete the ‘[Dawn Star] Attendants’ Stories’ quest, you can acquire the ‘Dawn Star Tree Display Case Chair’, once per Maple ID.
You can talk to Kieran to get hints on various achievements that can be acquired from the Dawn Star Banquet event.
| Achievement Name | Achivement Condition | Reward |
|---|---|---|
| [Dawn Star] Eat Before You Go | Complete the Special Dinner Party Preparation 24 times. | Exclusive Ornament |
| Selective Hanging Gardens’ Attendant Set Voucher | ||
| [Dawn Star] Absolutely Nothing… Happened…!!! | Return the Fuel Crystal to its original place. | Exclusive Ornament |
| [Dawn Star] A Pure and Clear Banquet | Help Broomy 100 times. | |
| [Dawn Star] Peace in the Middle of Enemy Lines | Wait in the Hanging Gardens for a total of 120 minutes. | |
| [Dawn Star] Hanging Gardens’ Attendant’s Stories | Complete all of the Dawn Star Banquet achievements. |
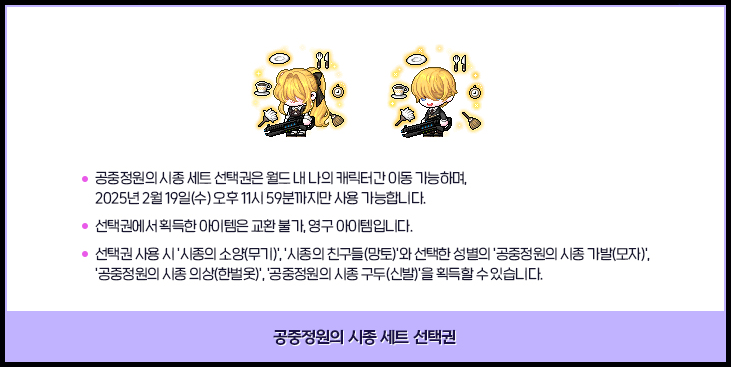
※ The [Dawn Star] Eat Before You Go achievement will not progress if you use the Special Dinner Party Pass.
※ The [Dawn Star] Peace in the Middle of Enemy Lines achievement will only accumulate time in the ‘Royal Villa: Hanging Gardens’ map.
※ The ‘Selective Hanging Gardens’ Attendant Set Voucher’ can only be put into storage and will expire on February 19, 2025 at 11:59 PM.
※ When you use the ‘Selective Hanging Gardens’ Attendant Set Voucher’, you can acquire the Attendant’s Knowledge (Weapon), Attendant’s Friends (Cape), and the Hanging Gardens’ Attendant Wig/Outfit/Shoes items based on the selected gender.
Banquet’s Blessings
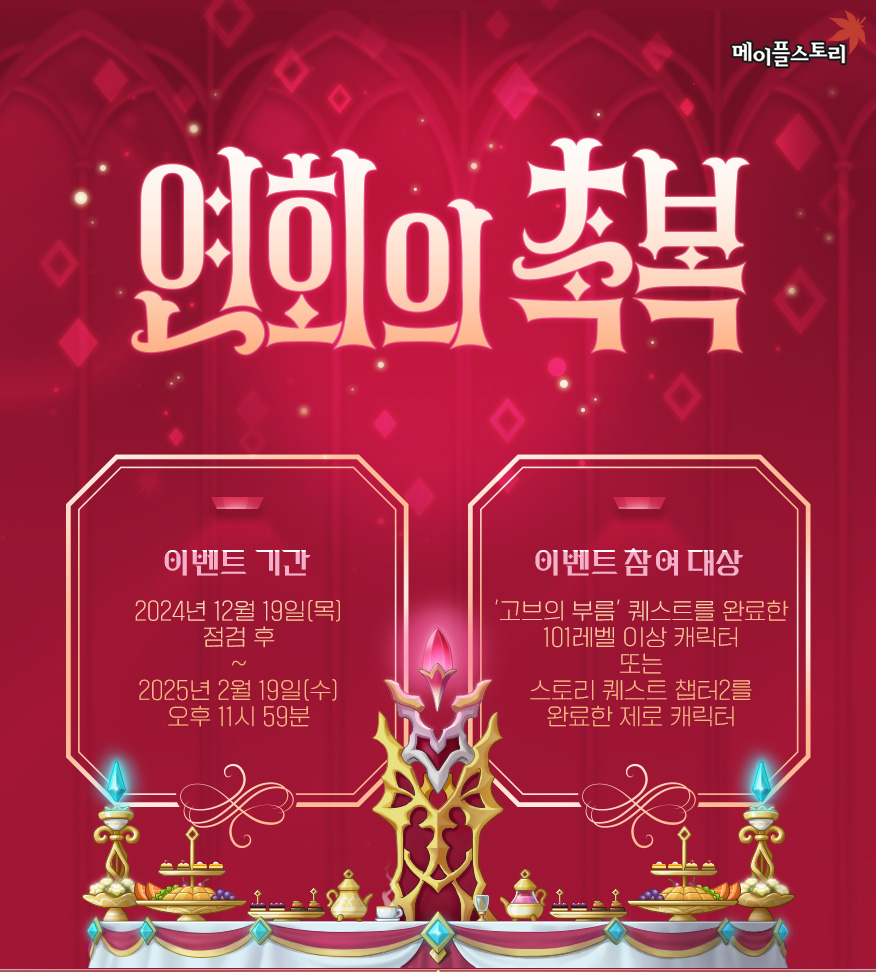
Enjoy the banquet’s atmosphere and receive abundant experience!
Event Participation Requirements:
- A level 101 or higher character (or a Zero character that has completed story quest Chapter 2) that has completed the ‘Gob’s Call’ quest.
Event Period:
- December 19, 2024 after the maintenance ~ February 19, 2025 at 11:59 PM.
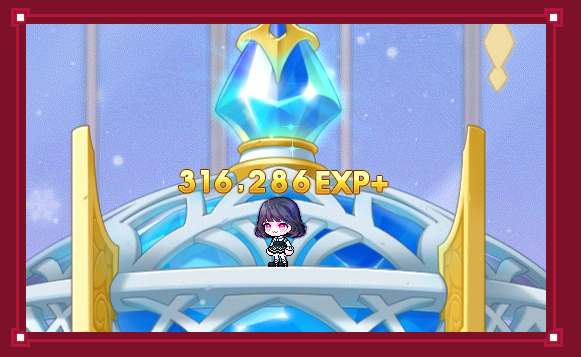
When you enter the <Royal Villa: Hanging Gardens> map, you will gain experience based on your level every 5 seconds. In Premium PC Rooms, the experience acquired is doubled.
※ If a level 289 or higher character enters the Royal Villa: Hanging Gardens map, they will receive the same experience as a level 289 character.
※ After the event period ends, you will not acquire experience even if you remain in the Royal Villa: Hanging Gardens map.
Challengers World

Fast growth! Abundant benefits! Up to 3 Tera Burning characters! They await you in Challengers World.
Event Participation Requirements:
- Newly created characters in Challengers, Challengers 2, Challengers 3, or Challengers 4 world.
Event Period:
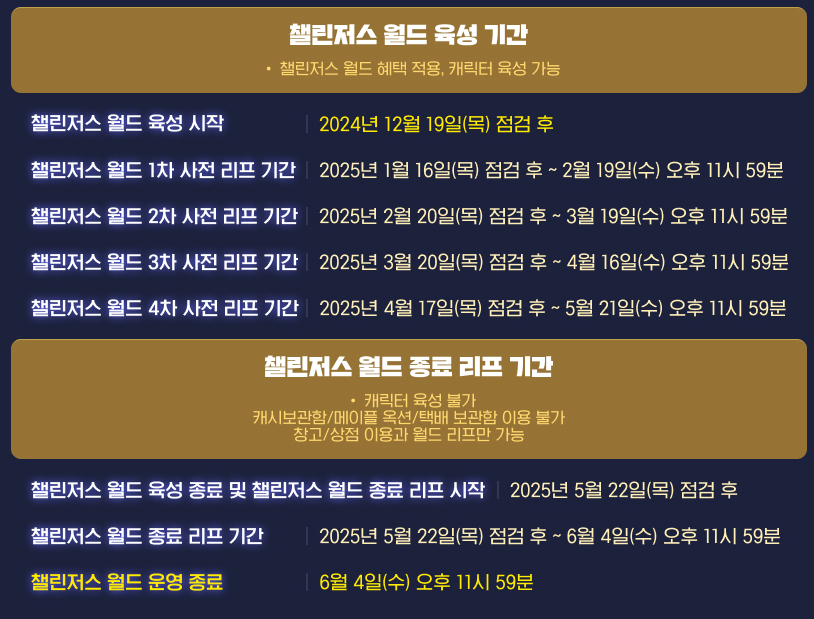
- Growth Period: December 19, 2024 after the maintenance ~ May 22, 2025 before the maintenance.
- Challengers World Leap Period
- 1st Early Leap Period: January 16, 2025 after the maintenance ~ February 19, 2025 at 11:59 PM.
- 2nd Early Leap Period: February 20, 2025 after the maintenance ~ March 19, 2025 at 11:59 PM.
- 3rd Early Leap Period: March 20, 2025 after the maintenance ~ April 16, 2025 at 11:59 PM.
- 4th Early Leap Period: April 17, 2025 after the maintenance ~ May 21, 2025 at 11:59 PM.
- End Leap Period: May 22, 2025 after the maintenance ~ June 4, 2024 at 11:59 PM.
※ You can World Leap to all worlds.
※ You can use World Leap during the Early World Leap by talking to the NPC Asaga in Henesys.
※ You can Challengers World Leap up to a total of 5 characters to other worlds.
Challengers World Benefits
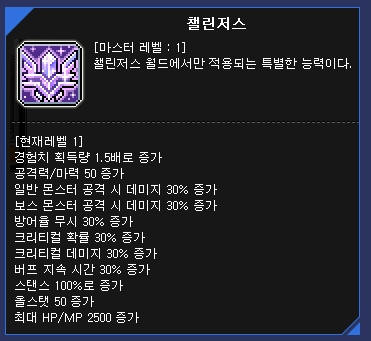
All characters in Challengers World will receive the special Challengers skill while they are in the world, which gives:
- 1.5x experience
- 50 attack/magic attack
- 30% damage to normal monsters
- 30% damage to boss monsters
- 30% defense ignore
- 30% critical rate
- 30% critical damage
- 30% buff duration
- 100% Stance
- 50 all stats
- 2500 HP/MP
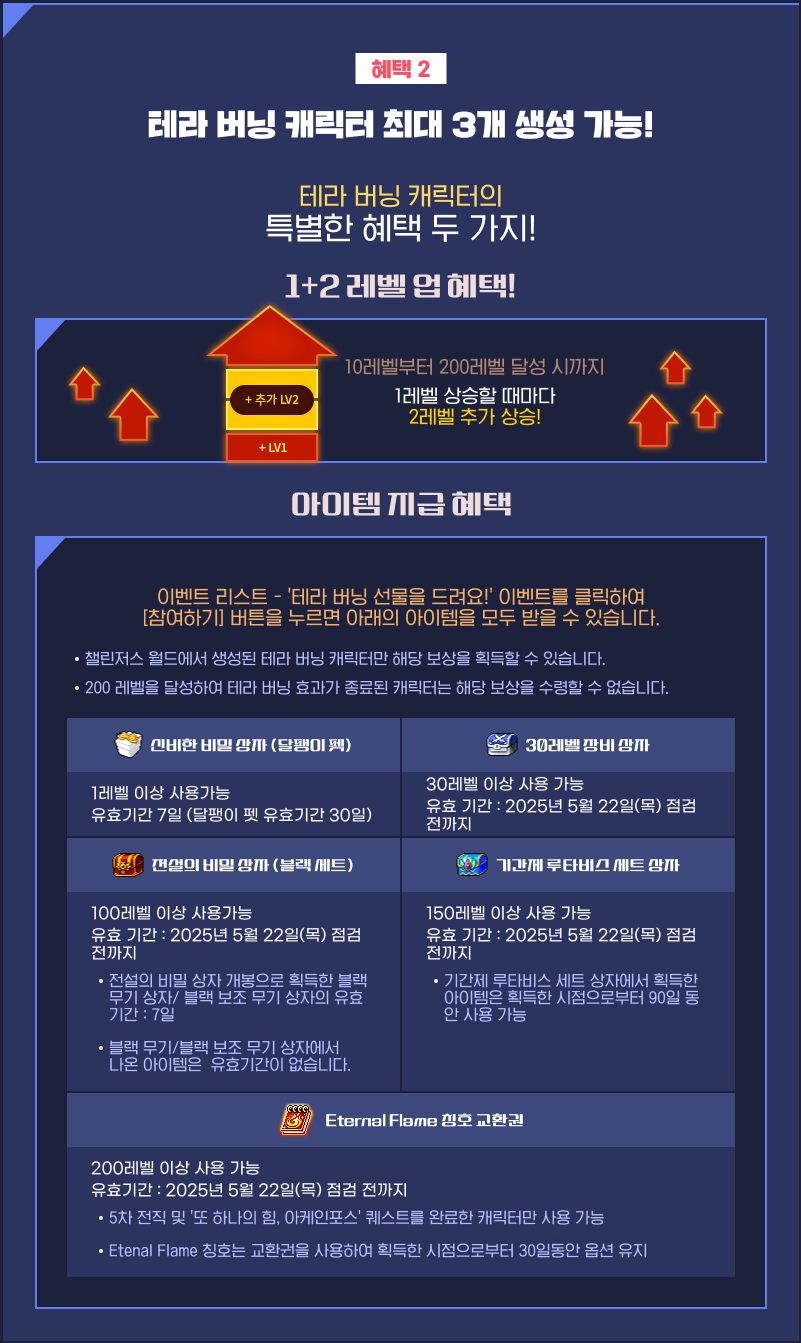
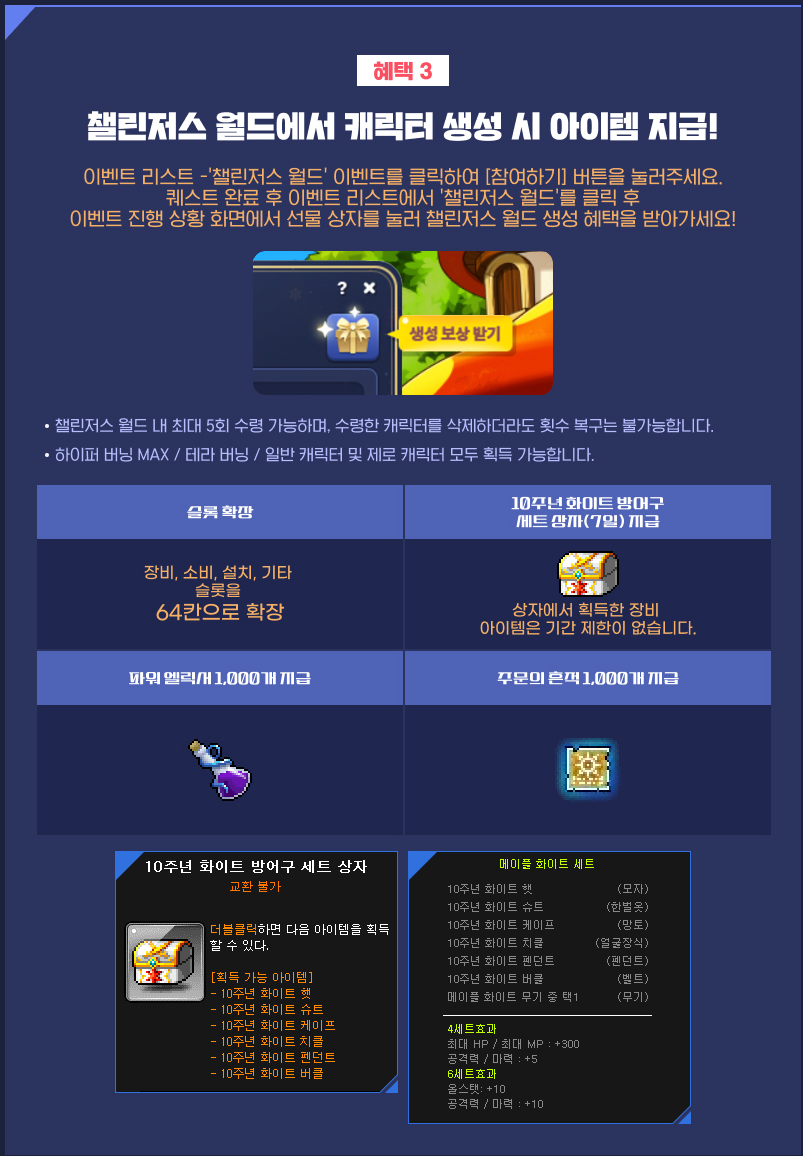
In Challengers World, you can create up to 3 Tera Burning characters who will have the following benefits:
- +2 levels for each level up, up to level 200
- Snail pet (30 days)
- Level 30 Equipment Box
- Legendary Secret Box
- Black Hat
- Black Cape
- Black Suit
- Black Weapon Box
- Black Secondary Weapon Box
- Expiring Root Abyss Set Box
- Eternal Flame Title
Characters created in Challengers World can receive the following character creation gifts through the Event List.
- 10th Anniversary White Armor Set Box
- 1,000 Power Elixirs
- 1,000 Scroll Traces
- Equip/Use/Etc./Set-up inventories expanded to 64 slots
※ These rewards can only be received up to 5 times, regardless of Burning status or character level.
In Challengers World, you can use the Meso Market by talking to the NPC Miss Brainy.
※ Characters with active Meso Market transactions cannot proceed with the Challengers World Leap.
※ The NPC Miss Brainy has been added to the World Leap Zone. In this map, you can use the Meso Market features except for new trade requests.
The Maple Guide’s recommended hunting maps for level 259 or lower will be changed into maps that have instanced monsters and can be used by up to 10 people.
※ Monsters will not be summoned for the 11th and later characters that enter the map, so please change channels.
※ Combo Kills/Multi Kills, Bounty Hunter portals, and Flame Wolf portals related to hunting will remain the same.
※ If a character dies, their monster ownership will be removed. Even if you revive in the map, you will not be able to acquire monster ownership unless you re-enter the map first.
Event Details
You can only use one world out of Challengers, Challengers 2, Challengers 3, and Challengers 4, whichever one you first create a character on. Deleting the character will not change the world you can use. You can create up to 5 characters.
You can only use the World Leap on characters level 130 or higher.
※ Zero characters can World Leap if they are level 130 or higher and have completed the story quests up to Chapter 2.
※ The Tera Burning effect applied to characters created in Challengers World will not be transferred with the World Leap.
When the World Leap period in Challengers World ends, all characters remaining in the world will be deleted along with their items and Cash items.
Items in your Cash storage, item storage, or Maple Auction will not be moved when you use the World Leap.
The Custom Backgrounds registered in the Custom Backgrounds list will not be moved.
In Challengers World, you cannot purchase the following items from the Cash Shop:
- Character Slot Expansion Coupon
- 4/8 Slot Storage Expansion Coupon
- House Wedding Ticket
The following features are not available in Challengers World:
- Transferring Link Skills
- Maple Union
- Union Artifact System
- Monster Collection
- Character Slot Expansions
- New Name Auction Unclaimed Name/Maple Points
Zero characters cannot be designated as Tera Burning characters.
※ When the growth period ends, you will no longer be able to use shops, storage, or any content other than the World Leap. Make sure you check the ‘Challengers World Benefits’ tab’s information in the Event List.
※ The Challengers World growth period, World Leap duration and target worlds are subject to change.
※ You cannot receive Special World mission rewards in Challengers World.
Challengers World Missions

Become a challenger in Challengers World! Complete Challengers World exclusive missions and acquire rewards!
Event Participation Requirements:
- Characters created (or a Zero character that has completed story quest Chapter 2) in Challengers, Challengers 2, Challengers 3, or Challengers 4 world.
Event Period:
- December 19, 2024 after the maintenance ~ May 21, 2025 at 11:59 PM.
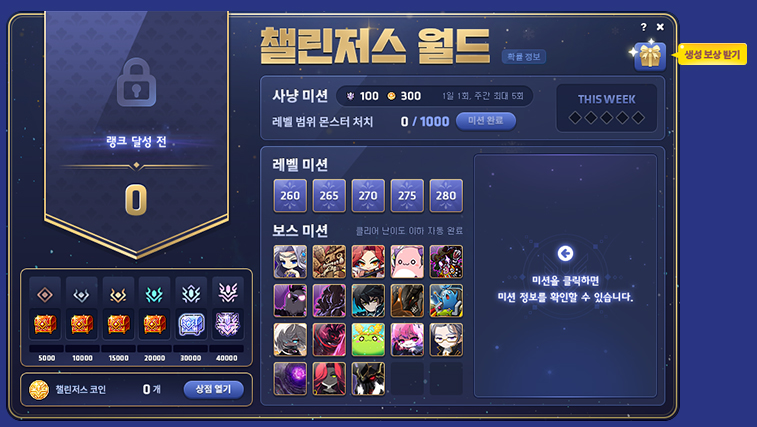
You can select the ‘Challengers World Missions’ event in the Event List and click the ‘Participate’ button or talk to Cassandra to start the event.
Through the Event List, you can check your Challengers World Missions progress.
※ The <Challengers World Missions> progress records are shared between all characters within the Maple ID.
Tiers
You can acquire Challengers Points and Challengers Coins by completing three types of missions.
As you collect Challengers Points, your Tier will increase. You can acquire corresponding rewards every time you reach a new Tier.
You can use Challengers Coins in the Challengers Shop.
※ Tier rewards and each mission’s rewards can only be received 1 time per Maple ID.
Missions
- Level Missions
- You can acquire Points and Coins by reaching the level corresponding to each mission.
- Hunting Mission
- You can acquire Points and Coins by defeating 1,000 monsters within your level range.
- The Hunting Mission can be completed 1 time per day per Maple ID, up to 5 times per week.
※ The Hunting Mission will only progress if you defeat monsters within your level range while you are in a party of 1 or are not in a party.
- Boss Missions
- You can acquire Points and Coins by defeating bosses 1 time per Maple ID.
- Your boss defeat will only be recognized if you solo the boss.
- It will be recognized even if you succeed in Practice Mode.
- If you defeat a higher difficulty boss, all lower difficulty bosses will be recognized as having been defeated.
- Certain boss monsters have reward monsters that require you to defeat them to complete the mission.
※ You must defeat the reward monsters even in Practice Mode.
- Pierre: Defeat Chaos Pierre’s Treasure Box.
- Bloody Queen: Defeat Chaos Bloody Queen’s Treasure Box.
- Suu: Defeat the Lose Control Haven Core.
- Lucid: Defeat the Last Music Box.
- Guardian Angel Slime: Defeat Slime’s Treasure Box.
※ For other bosses, the boss will be recognized as being cleared when the final phase’s boss monster is defeated.
The complete list of missions is as follows.
- Hunting Mission:
- Defeat 1000 monsters within your level range (100 Points/300 Coins).
- Level Missions:
- Reach level 260 (1000 Points/Coins).
- Reach level 265 (2000 Points/Coins).
- Reach level 270 (3000 Points/Coins).
- Reach level 275 (5000 Points/4000 Coins).
- Reach level 280 (7000 Points/5000 Coins).
- Boss Missions:
- Solo Cygnus.
- Easy Mode (50 Points/Coins).
- Normal Mode (100 Points/Coins).
- Solo Zakum.
- Chaos Mode (100 Points/Coins).
- Solo Hilla.
- Hard Mode (50 Points/Coins).
- Solo Pink Bean.
- Chaos Mode (100 Points/Coins).
- Solo Pierre.
- Chaos Mode (100 Points/Coins).
- Solo Von Bon.
- Chaos Mode (100 Points/Coins).
- Solo Bloody Queen.
- Chaos Mode (100 Points/Coins).
- Solo Magnus.
- Hard Mode (200 Points/100 Coins).
- Solo Vellum.
- Chaos Mode (200 Points/100 Coins).
- Solo Papulatus.
- Chaos Mode (250 Points/100 Coins).
- Solo Suu.
- Normal Mode (350 Points/100 Coins).
- Hard Mode (1500 Points/200 Coins).
- Solo Damian.
- Normal Mode (350 Points/100 Coins).
- Hard Mode (1500 Points/200 Coins).
- Solo Guardian Angel Slime.
- Normal Mode (500 Points/100 Coins).
- Chaos Mode (2500 Points/300 Coins).
- Solo Lucid.
- Easy Mode (500 Points/100 Coins).
- Normal Mode (1000 Points/200 Coins).
- Hard Mode (2000 Points/300 Coins).
- Solo Will.
- Easy Mode (500 Points/100 Coins).
- Normal Mode (1000 Points/200 Coins).
- Hard Mode (2500 Points/300 Coins).
- Solo Dusk.
- Normal Mode (1000 Points/200 Coins).
- Chaos Mode (2500 Points/300 Coins).
- Solo Jin Hilla.
- Normal Mode (2000 Points/300 Coins).
- Hard Mode (3000 Points/500 Coins).
- Solo Dunkel.
- Normal Mode (1000 Points/200 Coins).
- Hard Mode (3000 Points/500 Coins).
- Solo Cygnus.
Challengers World Tier Achievement Rewards
| Tier | Points Required | Reward |
|---|---|---|
| Bronze | 5,000 | Challengers World Season 1 Bronze Medal Voucher |
| 100 Sol Erda Fragments | ||
| 3 Sol Erda | ||
| Silver | 10,000 | Challengers World Season 1 Silver Medal Voucher |
| 200 Sol Erda Fragments | ||
| 5 Sol Erda | ||
| Gold | 15,000 | Challengers World Season 1 Gold Medal Voucher |
| Selective Challengers Level 4 Special Skill Ring Voucher | ||
| Emerald | 20,000 | Challengers World Season 1 Emerald Medal Voucher |
| 10 Ultimate Union Growth Potions | ||
| 30 Karma White Additional Cubes | ||
| Diamond | 30,000 | Challengers World Season 1 Diamond Medal Voucher |
| 10 Ultimate Union Growth Potions | ||
| 2 100% Karma Legendary Potential Scrolls (Level 200) | ||
| Butterfly Effect Set Voucher | ||
| Challenger | 40,000 | Challengers World Season 1 Challenger Medal Voucher |
The Challengers World Bronze, Silver, and Gold rewards can only be received in Challengers World.
The Challengers World Emerald, Diamond, and Challenger rewards can be received in your desired world through the Event List.
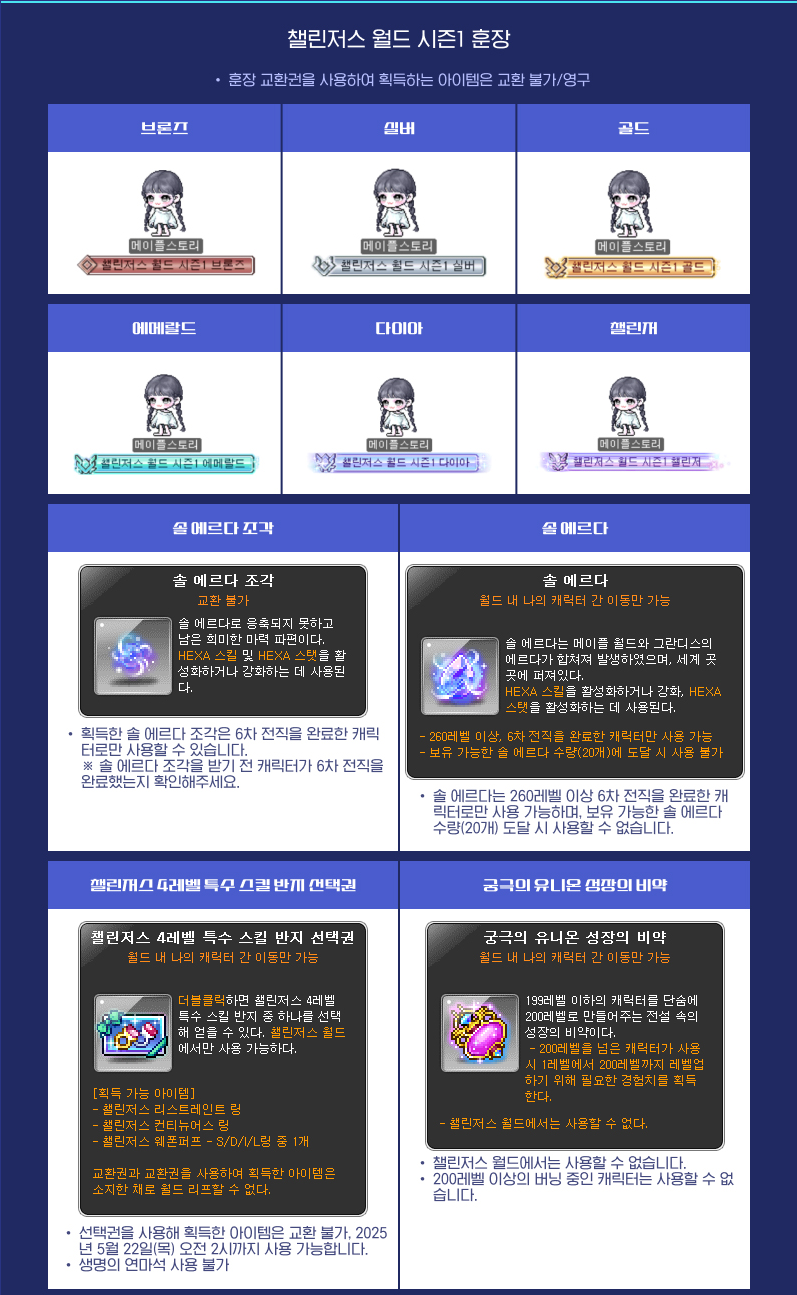
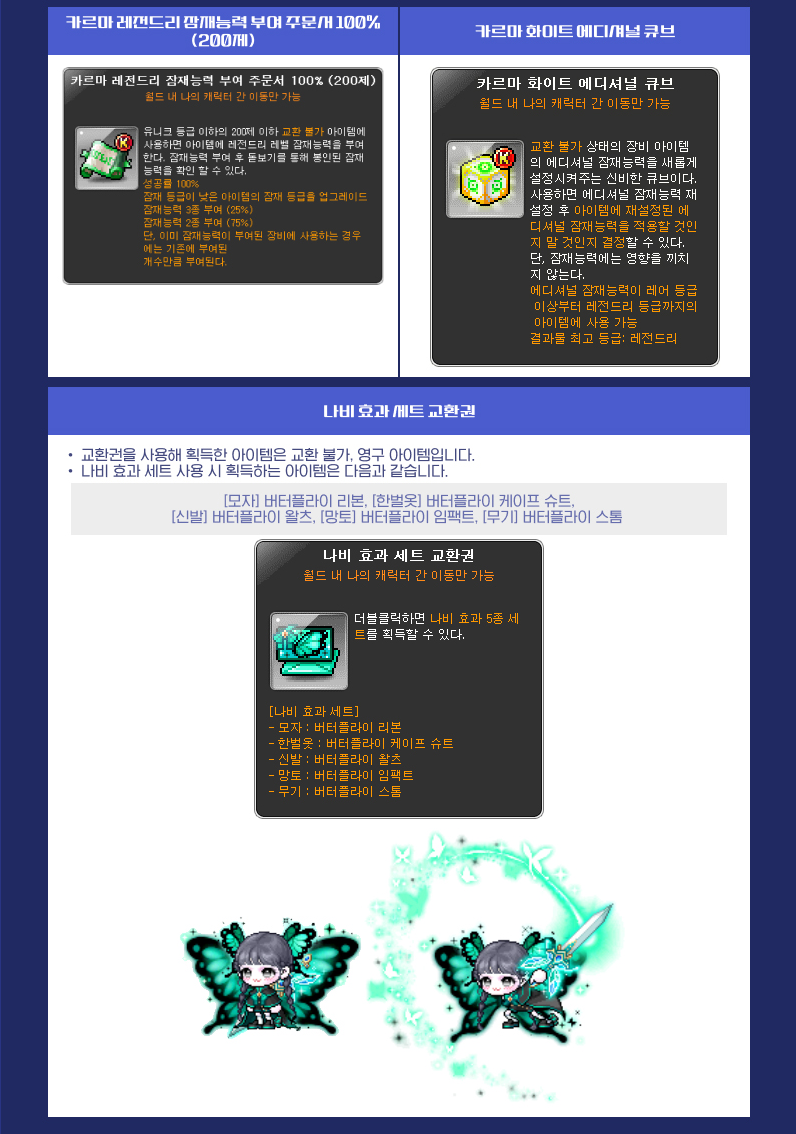
※ The Ultimate Union Growth Potion cannot be used in Challengers World.
※ The Sol Erda can only by used by characters level 260 or higher that have completed the 6th job advancement. It cannot be used if you hold 20 Sol Erda.
※ When you use the Selective Challengers Level 4 Special Skill Ring Voucher, you can choose one ring between the Challengers Restraint Ring, Challengers Continuous Ring, or Challengers Weapon Puff Ring – S/D/I/L.
※ The Selective Challengers Level 4 Special Skill Ring Voucher and the Special Skill Ring acquired when you use it can only be used in Challengers World. You cannot World Leap while you have them.
※ The Special Skill Ring acquired when you use the Selective Challengers Level 4 Special Skill Ring Voucher is untradable and expires on May 22, 2025 at 2:00 AM.
Challengers Shop
- Karma Black Rebirth Flame (50 coins) [limit of 1000]
- Strange Cube (5 coins) [limit of 1000]
- Karma Meister Cube (100 coins) [limit of 500]
- Karma Strange Additional Cube (20 coins) [limit of 1000]
- 100% Epic Potential Scroll (150 coins) [limit of 30]
- 100% Additional Potential Scroll (150 coins) [limit of 30]
- Selective Pet Equipment Scroll Voucher (500 coins) [limit of 100]
- Karma 17 Star Force Enhancement Scroll (Level 160) (10,000 coins) [limit of 3]
- 1000 Spell Traces (100 coins) [unlimited]
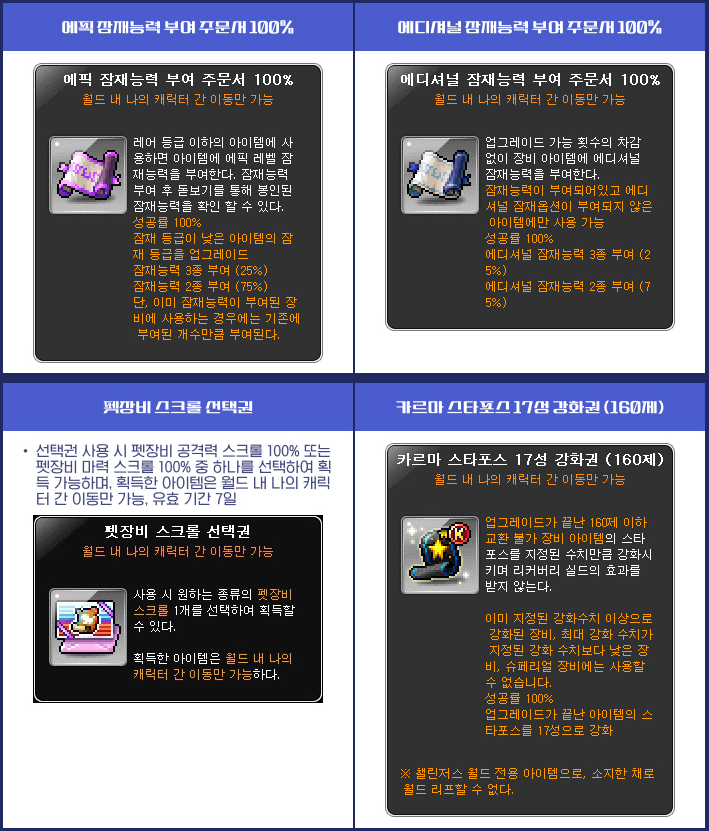
※ If you use the Selective Pet Equipment Scroll Voucher, you can choose between the 100% Pet Equipment Attack Scroll and 100% Pet Equipment Magic Attack Scroll.
※ The selected Pet Equipment Scroll can only be put into storage, and will expire after 7 days.
※ The Strange Cubes, Karma Meister Cubes, Karma Strange Additional Cubes, and Karma 17 Star Force Enhancement Scrolls (Level 160) can only be used in Challengers World. You cannot World Leap while you have them.
Hyper Burning MAX
Infinite growth with 1+4 level ups until level 260! Meet the returning Hyper Burning MAX with even more powerful benefits.
Hyper Burning Event Participation Requirements:
- A newly created character during the event period.
- An existing character level 200~258 (Zero characters must have completed story quest Chapter 2).
Event Period:
- December 19, 2024 after the maintenance ~ March 19, 2025 at 11:59 PM.
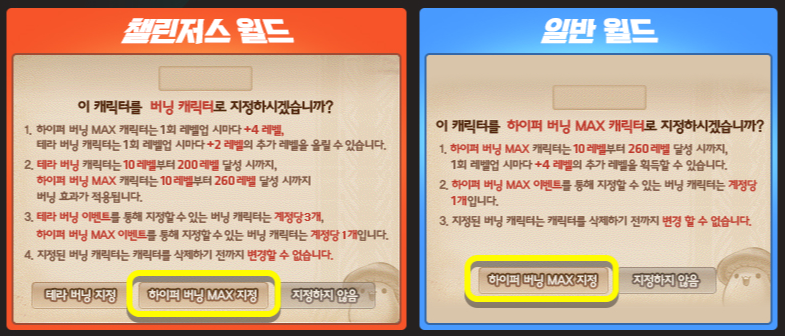

During the event, you can only create 1 Hyper Burning MAX character per Maple ID.
When creating a new character, you can designate it as a Hyper Burning MAX character, or you can designate an existing level 200~258 character as a Hyper Burning MAX character.
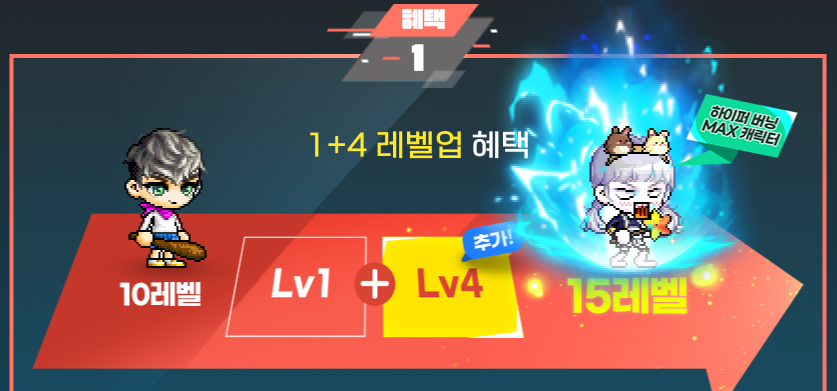
Hyper Burning MAX characters will level up an additional 4 times every time they level up, from level 10 to level 260.
※ If Zero is designated as a Hyper Burning MAX character at creation, they will not receive the 1+4 level up benefit from level 100~199.
※ If Zero is designated as a Hyper Burning MAX character at creation, they cannot claim the event rewards until after completing Chapter 2.
※ For existing level 200~258 Zero characters, only characters that have completed Chapter 2 can be designated as a Hyper Burning MAX character.
※ When a character is designated as a Hyper Burning MAX character, the following items are restricted from use until level 260: Extreme Growth Potions, Growth Potions (200~209, 200~219, 200~229).
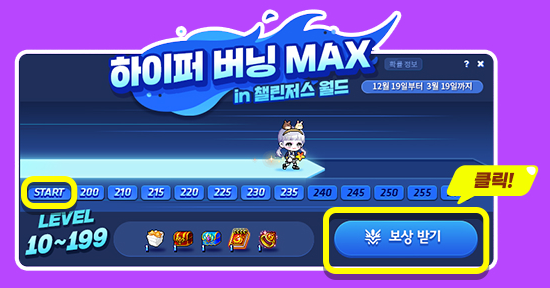
Hyper Burning MAX characters will receive the following growth support rewards through the Hyper Burning UI when they reach certain conditions. Hyper Burning MAX characters created in Challengers World can receive enhanced Challengers World rewards.
You can receive the character creation rewards on both newly created Hyper Burning MAX characters and existing characters designated as Hyper Burning. However, if you designate an existing character as Hyper Burning MAX, you will not receive previous level rewards, you will only receive the rewards for the levels you reach after you begin the event.
| Acquisition Conditions | Regular World Rewards | Challengers World Rewards |
|---|---|---|
| Character Creation | – Mysterious Secret Box (7 Days) -Snail Pet (30 Days, cannot be extended) – Legendary Secret Box (Level 100 or higher) – Black Set Armor (Hat, Overall, Cape) – Black Weapon Box – Black Secondary Weapon Box – Time-Limited Root Abyss Set Box (Can be used at level 150 or higher) – 15 Star Root Abyss Set Armor (Hat, Top, Bot) – Equipment is scrolled with 70% Scrolls of the selected stat. – Set potential of 6%/3%/3%. – 15 Star Time-Limited Fafnir Weapon Box – Weapon is scrolled with 70% Scrolls of the selected stat. – Set potential of 6% attack/magic attack/3% damage/4% critical rate. – All acquired equipment is untradable and will expire in 90 days. – Eternal Flame Title Voucher – Can be used at level 200 or higher after completing the 5th job advancement and the ‘Another Power, Arcane Force’ quest. – The Eternal Flame title acquired from the Voucher will expire in 60 days. – Eternal Flame Ring Voucher – Provided with Unique potential. – Cannot be acquired if you already hold an Eternal Flame Ring. ※ The character creation reward items will expire on March 19, 2025 at 11:59 PM. | |
| Reach Level 200 | – Level 7 Arcane Symbol: Road of Vanishing – 100 Core Gemstones – Trait Growth Potion | – Level 10 Arcane Symbol: Road of Vanishing – 200 Core Gemstones – Trait Growth Potion – Burning Boss Accessory Box (Gives 6 enhanced Boss Accessories) |
| Reach Level 210 | – Level 7 Arcane Symbol: Chew Chew Island – 100 Core Gemstones | – Level 10 Arcane Symbol: Chew Chew Island – 200 Core Gemstones – Selective 3 Event Rings Voucher – 50 Event Ring Only Meister Cubes |
| Reach Level 215 | – 100 Core Gemstones | – 200 Core Gemstones – 100 Karma Black Rebirth Flames |
| Reach Level 220 | – Level 7 Arcane Symbol: Lacheln – Selective Absolabs Weapon/Dominator Pendant Box (Choice between a 17 Star Unique Absolabs Weapon or a 15 Star Unique Dominator Pendant) | – Level 10 Arcane Symbol: Lacheln – Selective Absolabs Weapon/Dominator Pendant Box (Choice between a 17 Star Unique Absolabs Weapon or a 15 Star Unique Dominator Pendant) |
| Reach Level 225 | – Level 7 Arcane Symbol: Arcana – 100 Core Gemstones | – Level 10 Arcane Symbol: Arcana – 200 Core Gemstones – 10 Miracle Circulator Vouchers |
| Reach Level 230 | – Level 7 Arcane Symbol: Morass – Hyper Burning Outfit Voucher – 100 Core Gemstones | – Level 10 Arcane Symbol: Morass – Hyper Burning Outfit Voucher – 200 Core Gemstones – Abyss Hunters Ring Voucher |
| Reach Level 235 | – Level 7 Arcane Symbol: Esfera – 5 Experience Core Gemstones – 150 Selective Arcane Symbol Vouchers | – Level 10 Arcane Symbol: Esfera – 10 Experience Core Gemstones – 250 Selective Arcane Symbol Vouchers |
| Reach Level 240 | – 5 Experience Core Gemstones – Infinite Flame Title Voucher | – 10 Experience Core Gemstones – Infinite Flame Title Voucher |
| Reach Level 245 | – 5 Experience Core Gemstones – 150 Selective Arcane Symbol Vouchers | – 10 Experience Core Gemstones – 250 Selective Arcane Symbol Vouchers |
| Reach Level 250 | – 5 Experience Core Gemstones – 150 Selective Arcane Symbol Vouchers | – 10 Experience Core Gemstones – 250 Selective Arcane Symbol Vouchers |
| Reach Level 255 | – 5 Experience Core Gemstones – 150 Selective Arcane Symbol Vouchers | – 10 Experience Core Gemstones – 250 Selective Arcane Symbol Vouchers |
| Reach Level 260 | – HYPER BURNING MAX Medal – 100 Selective Authentic Symbol Vouchers | – HYPER BURNING MAX Medal – 100 Selective Authentic Symbol Vouchers – Level 5 Authentic Symbol: Cernium |
※ All level achievement rewards can only be acquired 1 time per Maple ID. Even if the Hyper Burning MAX character is deleted and recreated, you cannot receive the reward again.
※ All character creation rewards can be received even if the Hyper Burning character is deleted and recreated.
※ You cannot claim the Challengers World rewards and the regular world rewards for the same achievement at the same time.
※ The Eternal Flame Title Voucher, Core Gemstones, and Infinite Flame Title Voucher rewards can only be claimed by characters who have completed the 5th job advancement and the ‘Another Power, Arcane Force’ quest.
※ Each area’s Arcane Symbol reward can be claimed after completing that area’s quest that rewards the Arcane Symbol.
※ The Level 5 Authentic Symbol: Cernium can only be claimed after completing the ‘Another Power, Authentic Force’ quest.
※ When using the Selective Arcane/Authentic Symbol Vouchers, you can only acquire Symbols from areas in which you have completed the Arcane River/Grandis story quests.
※ Existing characters who already have an Eternal Flame Ring cannot acquire a duplicate Eternal Flame Ring with the Eternal Flame Ring Voucher.
※ Zero will not receive the Level 30 Equipment Box, the Black Weapon Box, Black Secondary Weapon Box, or the 15 Star Time-Limited Fafnir Weapon Box.
※ For Zero characters, they cannot use the Absolabs weapon so they will only receive the Dominator Pendant when they reach level 220.
※ If you are using Arcane Catalyst or Authentic Catalyst to move Symbols, you must first stabilize the Unstable Symbol and then receive the Level 7/10 Arcane Symbols or Level 5 Authentic Symbol from the level achievement awards to enhance them normally.
Tera Blink
Grow faster than anyone else to level 200 in the mysterious space prepared by Spiegelmann!
Event Participation Requirements:
- A level 10 or higher character that was created after the December 19, 2024 maintenance and has been designated as a Hyper Burning MAX character.
- A Zero character that was created after the December 19, 2024 maintenance and has been designated as a Hyper Burning MAX character and has completed Story Chapter 2.
Event Period:
- December 19, 2024 after the maintenance ~ March 19, 2025 at 11:59 PM.

You can start the ‘[Tera Blink] The World in a Hat’ quest through the Event List or through Spiegelmann in ‘Henesys’ and ‘Nameless Town’. After completing the quest, you can go to the ‘Tera Blink: The World in a Hat’ map by talking to Spiegelmann.
※ You can only be inside the World in a Hat for up to 40 minutes at a time.
※ You can freely enter and exit the World in a Hat through Spiegelmann.
Tera Blink: The World in a Hat

In the World In a Hat, you can complete a total of 23 missions. When you clear each mission, you will receive a large amount of experience, and certain stages will provide items and rewards for the mission.
※ For certain jobs like Cadena, Ark, and Illium, if you have not completed the beginning tutorials, experience acquisition from certain missions will be restricted.
※ For certain jobs, you must complete the beginning tutorials to be able to move to ‘The World in a Hat’.
| Stage | Mission | Items Provided | Duration and Tradability |
|---|---|---|---|
| 1 | Welcome to the World Inside my Hat! | – | – |
| 2 | Potions are Essential for Travel! | 1000 Spiegelmann’s Power Elixirs | Untradable, permanent |
| 3 | Wouldn’t It Be Nice to Have an Ally to Be With? | Brilliant Hat (pet), Brilliant Hat’s Energy (pet equipment) | Untradable, permanent (90 days of life) |
| 4 | Now It’s Time to Hunt! | – | – |
| 5 | The Beginning of Change is the 2nd Job Advancement! | – | – |
| 6 | It’s Time to Hunt Again! | – | – |
| 7 | Want to Try the 3rd Job Advancement? | – | – |
| 8 | Have you Seen a Bounty Hunter? | – | – |
| 9 | It’s Time to Hunt Once Again! | – | – |
| 10 | The 4th Job Advancement is a New Start! | – | – |
| 11 | Equipment is the Source of Strength! | Spiegelman’s Ordinary Necklace | Untradable, permanent |
| 12 | Do You Know About Equipment Imbued with Star Power? | – | – |
| 13 | Invitation to a Special Map! | – | – |
| 14 | Do You Understand the Power of Force? | – | – |
| 15 | A Special Hammer that Transfers Power! | Spiegelmann’s Brilliant Necklace | Untradeable, permanent |
| 16 | It’s the Fourth Time to Hunt! | – | – |
| 17 | Try Using Your New Power! | – | – |
| 18 | Do You Know the Monsters’ Boss? | – | – |
| 19 | A Powerful Being, Elite Boss! | – | – |
| 20 | It’s the Fifth Time to Hunt! | – | – |
| 21 | Completion of Hyper Skills | – | – |
| 22 | It’s the Final Time to Hunt! | – | – |
| 23 | Go Out Into the World! | Spiegelmann’s Hat Chair Spiegelmann’s Brilliant Hat Effect | Can only be put into storage, permanent |
※ The ‘Spiegelmann’s Brilliant Hat Effect’ and ‘Spiegelmann’s Brilliant Hat’ can only be acquired 1 time per Maple ID.
※ If you delete your Hyper Burning MAX character and recreate it, you can complete the ‘World in a Hat’ missions again. However, the ‘Spiegelmann’s Hat Chair’ and ‘Spiegelmann’s Brilliant Hat Effect’ will not be provided again.
※ ‘Spiegelmann’s Ordinary Necklace’ and ‘Spiegelmann’s Brilliant Necklace’ will be taken back if you leave the ‘World in a Hat’.
※ All skills and buff effects provided through missions will be taken back if you leave the ‘World in a Hat’.
※ The taken skills and items will be provided again if you re-enter the ‘World in a Hat’.
※ The ‘Brilliant Hat’ pet and ‘Brilliant Hat’s Energy’ cannot be moved to the Cash Storage.
Item Burning
The Challenger’s Equipment that grows together with your level as you clear missions! Wear the Challenger’s Equipment and enjoy more powerful growth!
Event Participation Requirements:
- A level 200 or higher character (or a Zero character that has completed story quest Chapter 2).
Event Period:
- December 19, 2024 after the maintenance ~ June 18, 2025 at 11:59 PM.
After completing the ‘Another Power, Arcane Force’ quest, you can select the ‘Item Burning Box Giveaway’ event in the Event List and click the ‘Participate’ button to receive the ‘Item Burning Box’.
※ The Item Burning Box can only be received 1 time per Nexon ID. It cannot be received again even if you delete and recreate the character that completed the quest.
After using the Item Burning Box, you can select the ‘Item Burning’ event in the Event List and check your Item Burning progress and proceed with missions.
Challenger’s Equipment
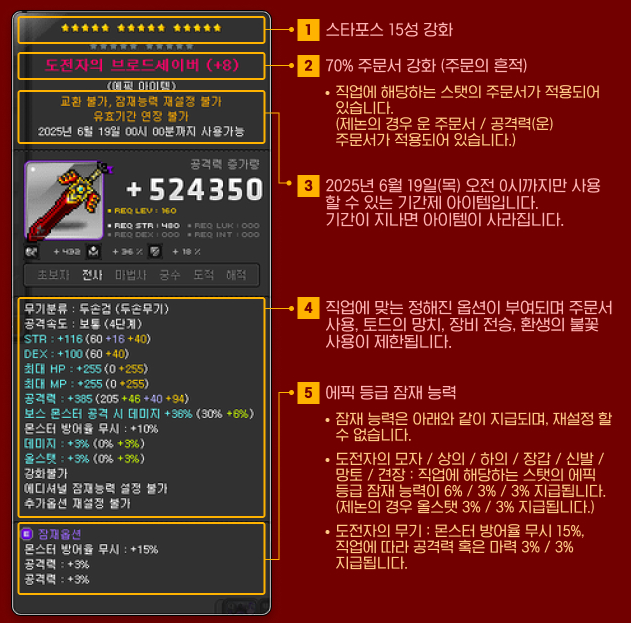
After completing the quest, you will receive the 8 Challenger’s Equipment pieces. The Challenger Equipment’s stats will match the job of the character participating in the event. The Challenger’s Equipment consists of a total of 8 equips.
- Hat
- Top
- Bot
- Gloves
- Shoes
- Cape
- Shoulder
- Weapon
※ Zero characters will not be given a Challenger’s Weapon.
※ The Challenger’s Equipment provided will expire on June 18, 2025 at 11:59 PM.
Item Burning Missions
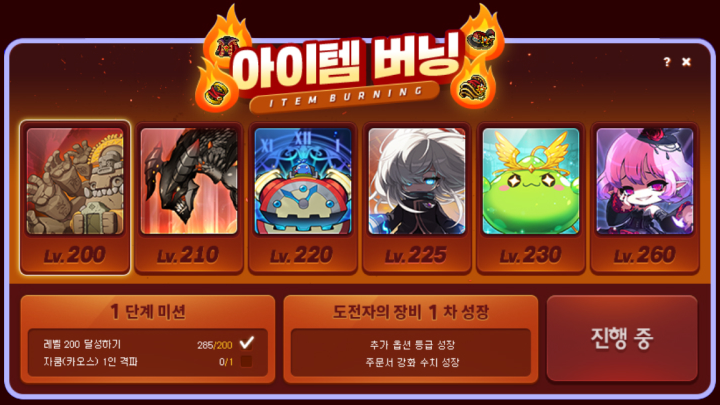
| Mission Stage | Target Level | Mission Details | Rewards | Growth Details |
|---|---|---|---|---|
| Stage 1 Mission | 200 | Solo Zakum (Chaos) | Challenger’s Equipment 1st Growth | Flame stat tiers increased. |
| Scroll enhancement values increased. | ||||
| Stage 2 Mission | 210 | Solo Vellum (Chaos) | Challenger’s Equipment 2nd Growth | Flame stat tiers increased. |
| Additional potential revealed. | ||||
| Stage 3 Mission | 220 | Solo Papulatus (Chaos) | Challenger’s Equipment 3rd Growth | Star Force increased to 17 stars. |
| Stage 4 Mission | 225 | Solo Suu (Normal) | Challenger’s Equipment 4th Growth | Potential tier increased to Unique. |
| Stage 5 Mission | 230 | Solo Guardian Angel Slime (Normal) | Challenger’s Equipment 5th Growth | Star Force increased to 18 stars. |
| Scroll enhancement values increased. | ||||
| Stage 6 Mission | 260 | Solo Lucid (Easy) | Challenger’s Equipment Final Growth | Armor additional potential tier increased to Epic. Weapon additional potential tier increased to Unique. |
※ For each Mission, you can also complete them by soloing the same boss at a higher difficulty than the one presented in the Mission.
※ You can complete the next Stage’s Boss Mission in advance, even if you have not completed the previous Mission yet.
※ Even if you complete the next Stage’s Mission in advance, you cannot proceed to the next Mission until you complete all previous Missions.
※ You cannot complete a mission by defeating the boss in Practice Mode.
Winter Tutorial Missions
A guide for warriors travelling through Maple World. Winter Tutorial Missions! Complete the missions to receive gifts.
Event Participation Requirements:
- A level 101 or higher character (or a Zero character that has completed story quest Chapter 2).
Event Period:
- December 19, 2024 after the maintenance ~ February 19, 2025 at 11:59 PM.

You can select the ‘Winter Tutorial Missions’ event in the Event List and click the ‘Participate’ button to talk to Spiegella to start the ‘Winter Tutorial Missions’ quest.
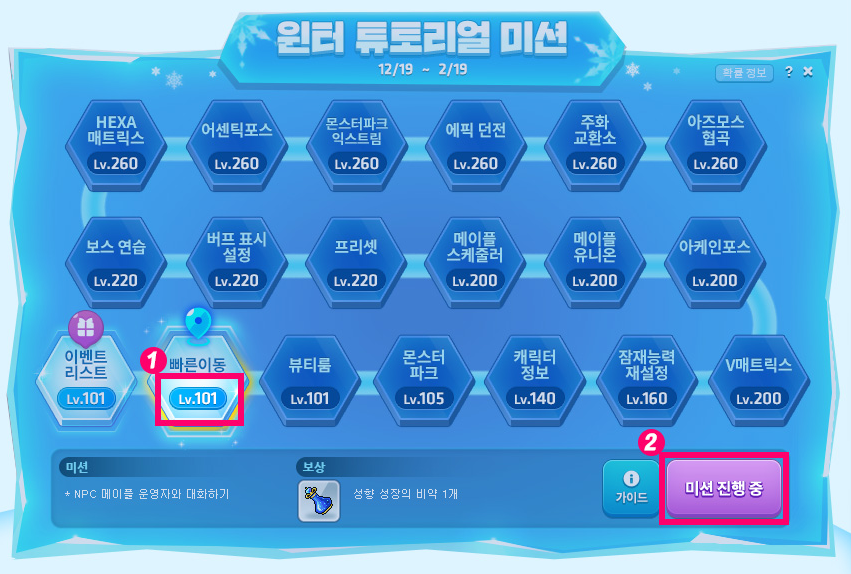
Through the Event List, you can check your Winter Tutorial Missions progress.
Each Winter Tutorial Mission can be completed at certain levels. You can proceed with the mission after listening to Spiegella’s guide. When you accept the mission, you can choose to check the guide or not.
When you complete a mission, the next stage’s mission will be unlocked and you can receive rewards.
| Mission Name | Level Required | Mission Completion Conditions | Rewards |
|---|---|---|---|
| Event List | 101 | Participate in the [Dawn Star Banquet] event. | 2 3x Experience Coupons (30 Minutes) |
| Quick Move | 101 | Talk to the Maple Admin NPC. | Trait Growth Potion |
| Beauty Room | 101 | Save an appearance in the Beauty Room. | First Steps in Life Voucher |
| Monster Park | 105 | Clear Monster Park 1 time. | Monster Park Free Entry Voucher |
| Character Info | 140 | Change your Custom Background. | First Time in Life Gloves Voucher |
| Reset Potential | 160 | Equip an item with Epic or higher rank potential. | 100% Epic Potential Scroll |
| V Matrix | 200 | Equip a level 5 or higher V Core. | Experience Core Gemstone |
| Arcane Force | 200 | Reach 50 Arcane Force. | 50 Selective Arcane Symbol Vouchers |
| Maple Union | 200 | Check the Maple Union Mission Guide. | 2 3x Experience Coupons (30 Minutes) |
| Maple Scheduler | 200 | Add 1 daily content to the Maple Scheduler. | First Time in Life Hat Voucher |
| Preset | 220 | Change and save a Character Preset setting. | 5 Karma Black Rebirth Flames |
| Buff Display Settings | 220 | Apply the Buff Auto Sort feature. | 2 Selective VIP Buff Vouchers |
| Boss Practice | 220 | Complete the [Collector’s Request’ quest. | Legendary Elixir Voucher |
| HEXA Matrix | 260 | Complete the 6th job advancement. | Sol Erda Energy |
| Authentic Force | 260 | Reach 20 Authentic Force. | 10 Selective Authentic Symbol Vouchers |
| Monster Park Extreme | 260 | Clear Monster Park Extreme 1 time. | First Steps in Life Suit Voucher |
| Epic Dungeon | 260 | Clear an Epic Dungeon 1 time. | 5 Karma Black Rebirth Flames |
| Coin Exchange | 260 | Open the Coin Exchange. | 2 3x Experience Coupons (30 Minutes) |
| Azmoth Canyon | 260 | Complete Azmoth Canyon 1 time. | Completely Understood Medal Voucher |
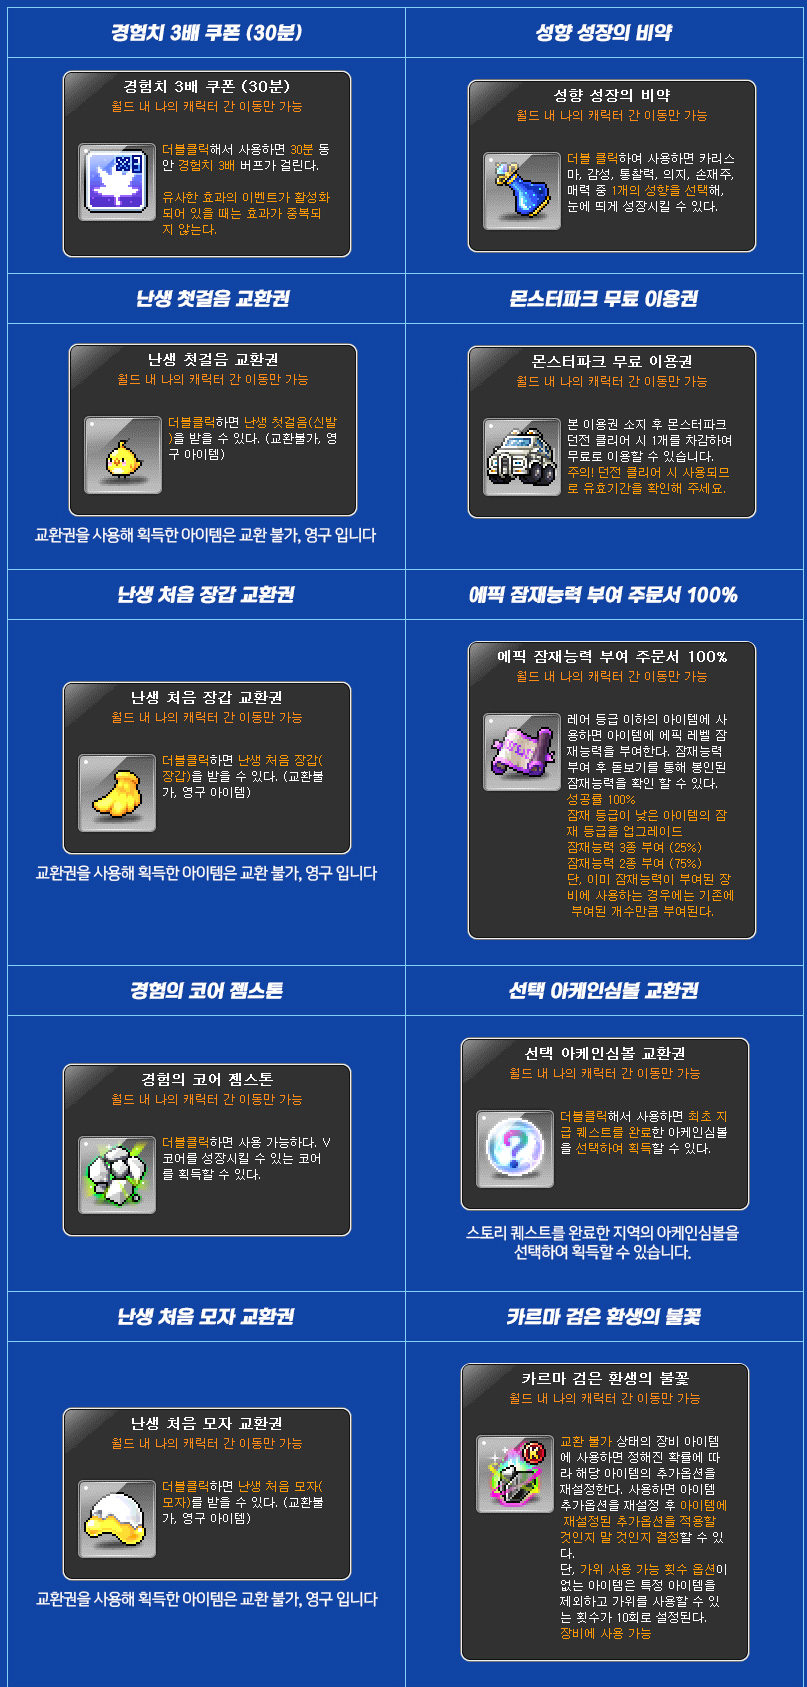
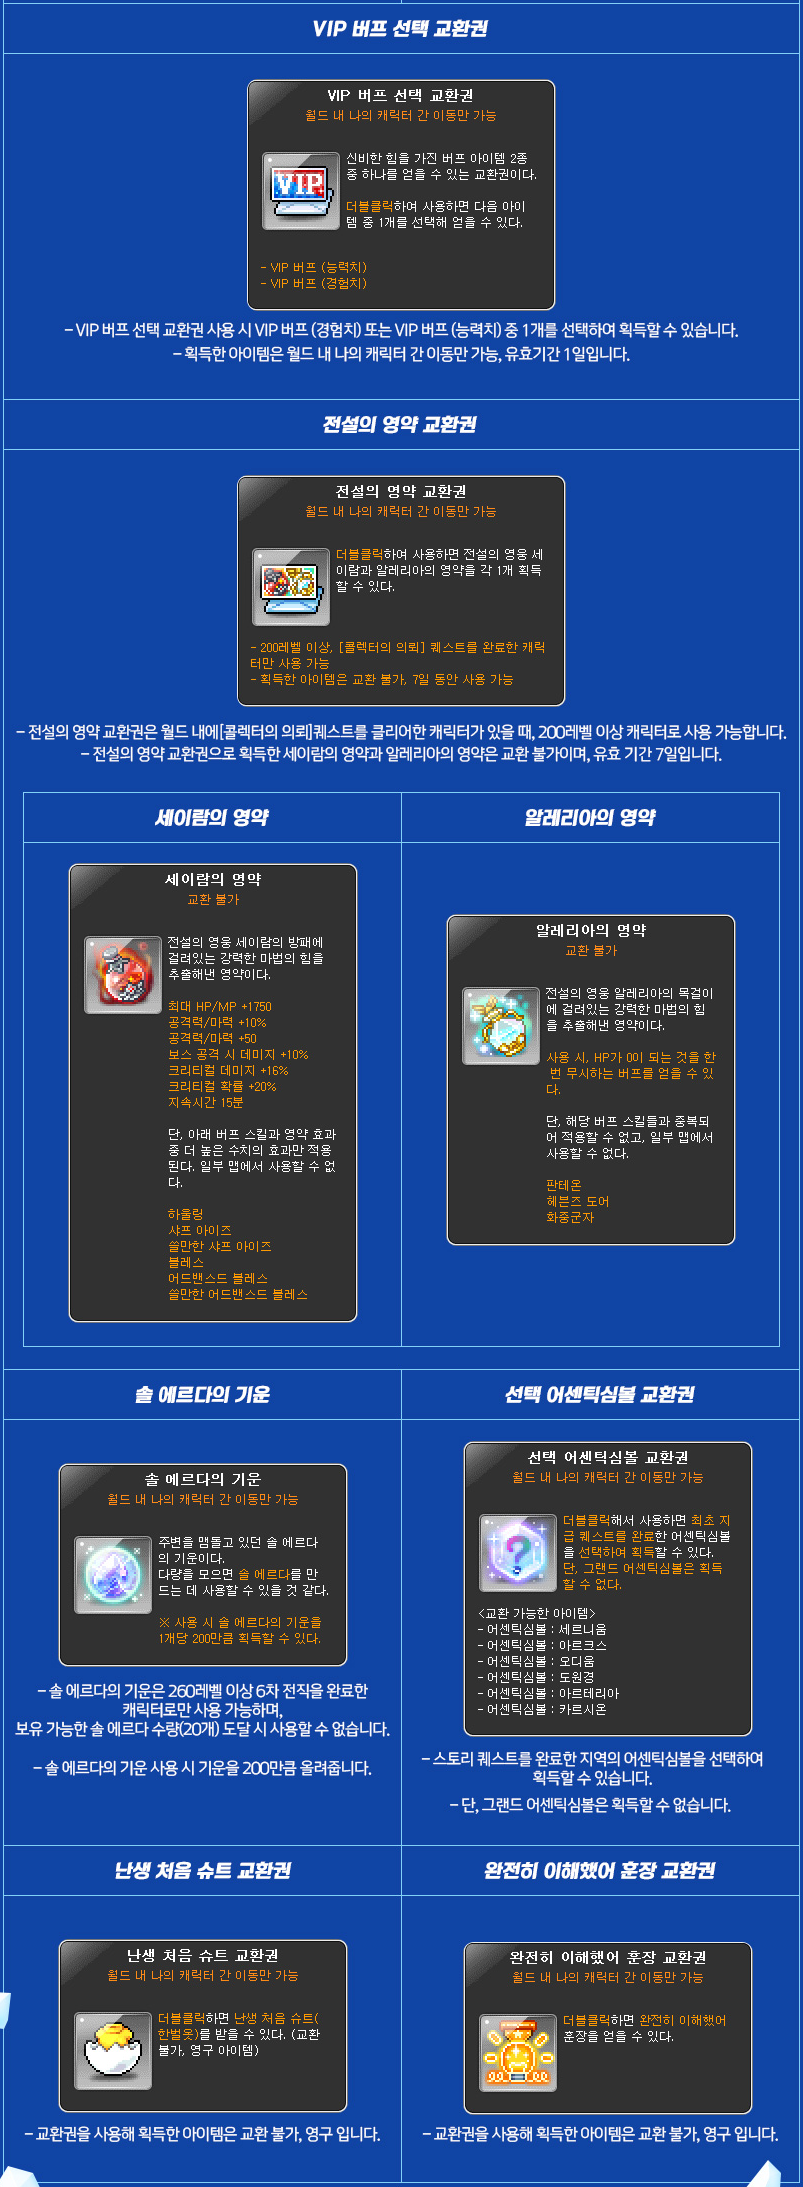
※ The ‘Winter Tutorial Missions’ participation records are shared between all characters within the Maple ID.
※ Each mission reward can only be received 1 time per Maple ID.
※ All reward items can be received until February 19, 2025 at 11:59 PM and will expire on February 20, 2025 at 2:00 AM.
※ If you use the Selective VIP Buff Voucher, you can choose between the VIP Buff (Stats) and VIP Buff (Experience).
※ The selected VIP Buff can only be put into storage, and will expire after 1 day.
※ The Legendary Elixir Voucher can only be used by characters level 200 or higher that have completed the [Collector’s Request] quest within the world. When used, you can acquire Sayram’s Elixir and Alleria’s Elixir.
※ The Sayram’s Elixir and Alleria’s Elixir acquired from the Legendary Elixir Voucher are untradable and expire in 7 days.
※ The items acquired from the First Steps in Life, First Time in Life Gloves, First Time in Life Hats, and First Time in Life Suit Vouchers are untradable and permanent.
VIP Sauna

Spend time in the VIP Sauna to acquire a large amount of experience!
Event Participation Requirements:
- A level 101 or higher character (or a Zero character that has completed story quest Chapter 2).
Event Period:
- December 19, 2024 after the maintenance ~ February 19, 2025 at 11:59 PM.
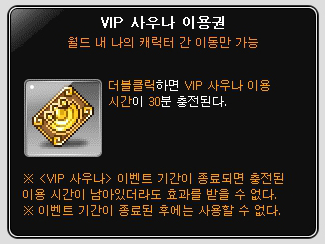
In the Event List’s ‘Use the VIP Sauna’ event, you can use 3,000 Maple Points to charge your VIP Sauna usage time by 1 hour. You can charge it by up to 24 hours per week in this way.
If you use a VIP Sauna Ticket, your VIP Sauna usage time will be charged by 30 minutes.
※ The charged VIP Sauna usage time is shared between all characters within the Maple ID.

While you have remaining VIP Sauna usage time, you can select the ‘VIP Sauna’ event from the Event List and click the ‘Participate’ button or talk to the Hotel Staff in <Sleepywood: Sleepywood Hotel Lobby> to enter <Sleepywood: VIP Sauna Room>.
While you are inside the <Sleepywood: VIP Sauna Room>, you will automatically acquire experience based on your level every 5 seconds.
※ Characters over level 289 that enter the VIP Sauna Room will receive the same amount of experience as a level 289 character.
※ When the VIP Sauna usage time runs out, you will automatically return to your original location or <Sleepywood: Sleepywood Hotel Lobby>.
※ After the event period ends, you will not be able to acquire experience even if you had remaining VIP Sauna usage time.
MapleStory M Link Event

Get cool rewards in MapleStory and MapleStory M!
Event Participation Requirements:
- A level 200 or higher character (or a Zero character that has completed story quest Chapter 2).
Event Period:
- December 19, 2024 after the maintenance ~ January 15, 2025 at 11:59 PM.
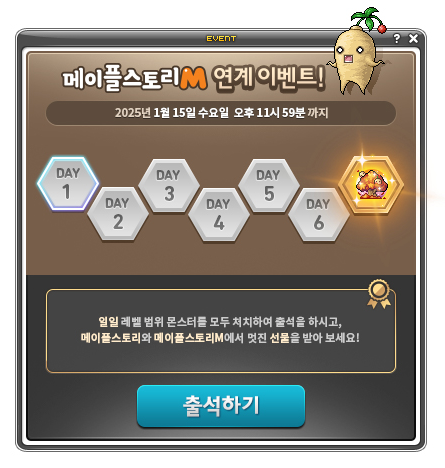
You can select the ‘MapleStory M Link’ event in the Event List and click the ‘Participate’ button to start the event.
Every day, you can defeat 1,000 monsters within your level range then click the ‘Attendance Check’ button in the event UI to complete the attendance check.
※ The [MapleStory M Link Event] participation progress is shared between all characters within the Maple ID. The attendance check can only be completed 1 time per day.
If you complete the attendance check without linking your MapleStory M account, you will not receive that day’s attendance reward in MapleStory M.

If you complete 7 days of the attendance check, you can acquire the ‘Bellflowers in the Maple Tree’ Chair.
※ The reward can only be received 1 time per Maple ID.
Christmas with the Blue Girl

Christmas with the Blue Girl! Apply to win the 30th anniversary surprise gift and receive application completion gifts too!
Event Participation Requirements:
- A level 101 or higher character (or a Zero character that has completed story quest Chapter 2).
Event Period:
- December 19, 2024 after the maintenance ~ December 25, 2024 at 11:59 PM.
You can select the ‘Christmas with the Blue Girl’ event in the Event List and click the ‘Participate’ button to start the event.

Every day, you can defeat 1,000 monsters within your level range then click the ‘Participate’ button in the event UI to apply to win the 30th anniversary surprise gifts.
- 30k Nexon Cash (300 winners per game)
- Nexon 30th Anniversary Commemoration Keyboard (1,500 winners)

You will also receive an application completion gift.
- 3x Experience Coupon (15 Minutes) (expires in 7 days, can only be put into storage)
※ The 30th anniversary surprise gifts can only be won 1 time per Nexon ID.
※ The application completion gift can only be received 1 time per Maple ID.
Blue Girl’s Special Gift
Receive the 30th anniversary appreciation gift prepared by the Blue Girl!
Event Participation Requirements:
- A level 101 or higher character (or a Zero character that has completed story quest Chapter 2).
Event Period:
- December 26, 2024 at 12:00 AM ~ December 26, 2024 at 11:59 PM.
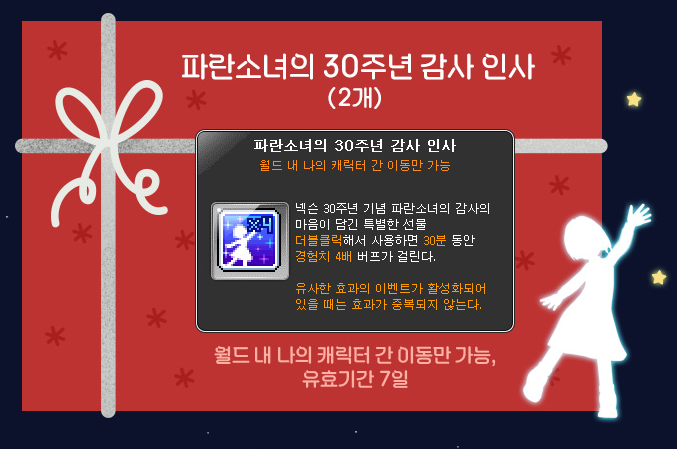
You can select the ‘Blue Girl’s Special Gift’ event in the Event List and click the ‘Participate’ button to receive the Blue Girl’s special gift.
- 2 Blue Girl’s 30th Anniversary Appreciation Greetings (expires in 7 days, can only be put into storage)
※ The Blue Girl’s special gift can only be received 1 time per Maple ID.
※ When you use the Blue Girl’s 30th Anniversary Appreciation Greeting, a 4x experience buff will be applied for 30 minutes.
※ The Blue Girl’s 30th Anniversary Appreciation Greeting cannot be used with other experience coupons.
Christmas Snowman

Snowman appears for Christmas! Visit Snowman’s Christmas shop and receive gifts!
Event Participation Requirements:
- A level 101 or higher character (or a Zero character that has completed story quest Chapter 2).
Event Period:
- December 24, 2024 at 10:00 AM ~ December 30, 2024 at 11:59 PM.
You can select the ‘Christmas Snowman’ event in the Event List and click the ‘Participate’ button or talk to the Scarfed Snowman in main towns to start the event.
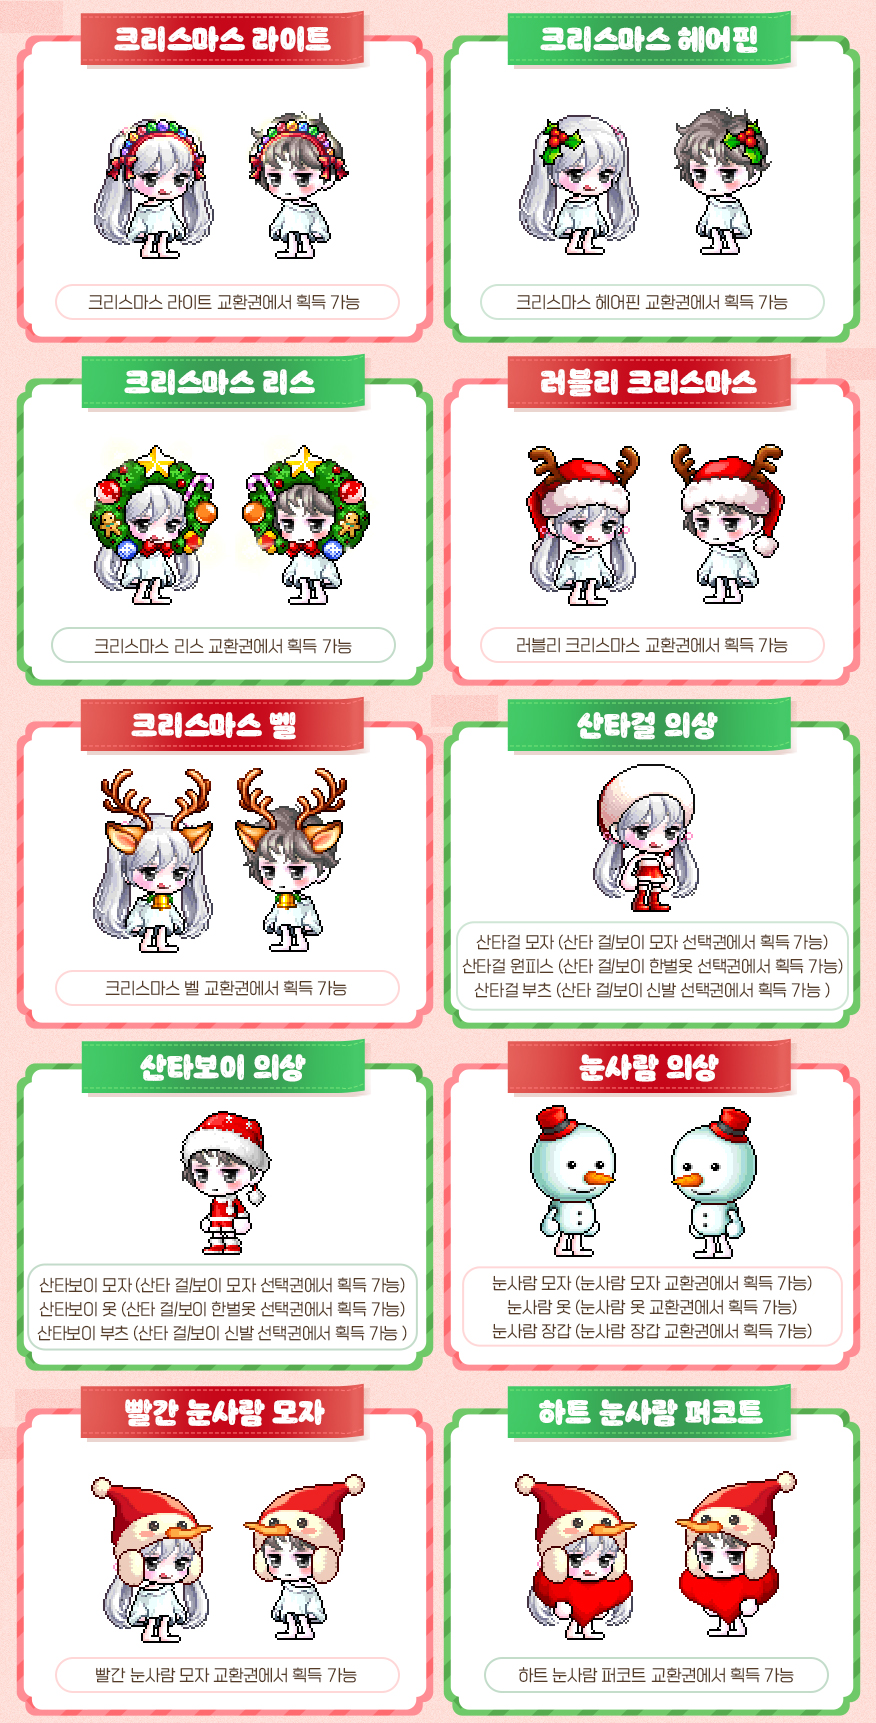

Afterwards, you can use the Christmas shop through the Event List or the Gift Box NPC in main towns.
- Christmas Light Voucher
- Christmas Hair Pin Voucher
- Christmas Wreath Voucher
- Lovely Christmas Voucher
- Christmas Bell Voucher
- Selective Santa Girl/Boy Hat Voucher
- Selective Santa Girl/Boy Outfit Voucher
- Selective Santa Girl/Boy Shoes Voucher
- Snowman Hat Voucher
- Snowman Outfit Voucher
- Snowman Gloves Voucher
- Red Snowman Hat Voucher
- Heart Snowman Peacoat Voucher
- Santa Beard Voucher
- Rudy’s Hat Voucher
- Rudy’s Outfit Voucher
- Christmass Ball Riding (Permanent) Voucher
- Christmas Stocking Riding (Permanent) Voucher
- Christmas Gold Ball Riding (Permanent) Voucher
- Christmas Gold Stocking Riding (Permanent) Voucher
- Christmas Star Riding (Permanent) Voucher
- Pink Bean Snowball Fight Chair
- Yeti Snowball Fight Chair

If you visit the Christmas shop, you can receive the Snowman’s gift through the Event List or the Scarfed Snowman.
- Shining Christmas Riding (Permanent) Voucher (expires in 7 days, can only be put into storage)
※ Snowman’s gift can only be received 1 time per world.
Lady Blair’s Dream Express

Event Period:
- December 20, 2024 at 10:00 AM ~ December 27, 2024 at 10:00 AM.
During this time, you can freely move your Cash items between characters, regardless of cash restrictions.
Special Sunday Maple

Event Period:
- December 22, 2024
- December 29, 2024
- January 5, 2024
- January 12, 2024
On December 22, the following benefits will take place:
- +250% experience from Monster Park clears (does not affect Monster Park Extreme)
- Rune reappearance and cooldowns decreased to 10 minutes
- +100% Rune experience buff effect
- +300% experience from Combo Kill Orbs
- 5x experience from Polo, Fritto, and Especia Bounty Hunting
- 5x experience from Flame Wolf
- 4x experience from Banquet’s Blessings
On December 29, the following benefits will take place:
- +250% experience from Monster Park clears (does not affect Monster Park Extreme)
- Rune reappearance and cooldowns decreased to 10 minutes
- +100% Rune experience buff effect
- +300% experience from Combo Kill Orbs
- 5x experience from Polo, Fritto, and Especia Bounty Hunting
- 5x experience from Flame Wolf
- 4x experience from Banquet’s Blessings
On January 5, the following benefits will take place:
- Shining Star Force Time
- 30% discount on Star Force enhancement costs
- 100% success rate when enhancing items at 5/10/15 stars
- 4x experience from Banquet’s Blessings
On January 12, the following benefits will take place:
- When your [HEXA Stat]’s Main Stat is level 5 or higher, the chance to enhance the Main Stat is increased by 20%
- Receive 1 Sol Erda and 3 Mysterious Monster Eggs
- 50% discount on Ability reset costs
- 5x chance to receive Magnificent Souls
- 50% discount on Spell Trace enhancement costs
- +100% chance to register monsters in Monster Collection
- When hunting, the number of Elite Monsters summoned is increased from 1 to 3
- 4x experience from Banquet’s Blessings

common Max w
Hi Max, Genesis missions were shown to be changed in the patch notes (lotus + damien went from 800>1000, jin hilla 1500>1000)
Black mage also gived 600 traces instead of 500, could you double check?
Oh yeah you’re right, I missed that, thanks. Updated!
wheres the aran gangbang
Hey Max,
As always, awesome work! Do you know if you need to blue dot to get darkness traces from the bosses?
Reboot is dead in KMS brother
KMS does not have Reboot anymore so there’s no way to know
Vengeful Hate:
Typo?
That is exactly what the patch notes say!
How difficult will it be to get 30,000 points in Challenger World?
There’s a few guides online already, it doesn’t seem too hard. E.g. doing the daily attendance the entire event + reaching level 270 + soloing HSuu/Damian/Chaos Dusk/Normal Lucid/Will/Dunkel is enough. If you reach level 275 you don’t even have to solo CDusk.
Thanks so much Max for ur work. Sorry if I missed it in notes, do we know if we will have to reflame and/or repot gene wep after upgrade? Or have to wait until March?
It’s still unclear tbh but from what I understand, when you upgrade Gene -> Destiny, it will keep the flame and pot stats literally (like the #s will not change) and if you want the updated flame/pot stats (for a level 250 weapon) you will have to reflame/recube.
Are the Item burning rewards the same as last time?
The Challenger equipment has a new unique look this time, and it gets upgraded one last time after beating Lucid this time (Unique weapon bpot and Epic armor bpot). I think they moved the rewards that used to be there (Sol Erda Frags + Cernium Symbol) to the Challenger World and regular Hyper Burning rewards.
The Broomy’s Deep Cleaning event, is the ancient relic effect really a magnificent pot effect per day per character under level 250? Or is the rate kinda low?
Yeah its very rare, none of my friends and I have gotten it even once yet
Hi Max, for the MP medal, you mentioned that it will retain the number of MP clears, does it reduce the requirements as well for players that have the quest in progress? Eg. Currently i have it at 57/77 each, will it become 57/33 and able to complete quest immediately?
Yes you will!
Excellent translation Max! One small thing – the cost of White Cubes in the Commemoration Badge Exchange is missing. That’s all!
Fixed!
Cannot WAIT for Broomy’s big cleaning time to hit GMS!!!
Is item burning new characters or anyone?
Any level 200+ character this time!
hey max
does the new monster park medals conditions is also count from all the times i cleared monster park extreme before the update?
if i did 3 times monster park extreme 3 or more times each day before the update it will count also?
Not sure, I don’t know if it kept track before which days you did Monster Park Extreme. All the characters I did MPE on before the patch already had the medal so I can’t confirm
I aalso asked Steve, so the answer that he said me
Iirc yes
that what he wrote me ib discord
Also i want to ask
Does the hyper burning max characters that got burn from the hyper burning max booster item can get the hyper burning max event rewards?
this event achievement doesn’t have a display chair for the ornaments? The display chair is in the meso shop? There r 5 achievements, and the last 1 is to complete the other achievements, what does that achievement gives? There is only 4 ornaments this event?
Also, this event supporse to be something about the gerand darmoor apostles, and i see that in this event there r another ppl as waiters, so what does doing the darmoor apostles in this event? Cuz i heard that the story event is talking about them
Hpyer Burning Booster rewards were stated in the 2nd patch notes https://orangemushroom.net/2025/01/16/kms-ver-1-2-399-maplestory-next-union-champion/#event8
You get the Dawn Star Tree Display Case Chair from accepting the event achievements quest. Yes there’s only 4 ornaments. The last one doesn’t seem to give anything.
Not much story yet, I’m assuming the end of the event will have the big cutscenes.
Hi, what does the Ultimate Union Growth Potion do/give ?
Instantly levels a character up from level 10 to 200!
can this apply to zero characters?
The item description doesn’t seem to have any restrictions for Zeros so maybe! Someone would have to test it out manually I guess.
Nighrlord’s Showdown seems to cast slower than normal or is it just me?
Hey max! Awesome work!
do we know if the hyper burning max coupon will give enhanced rewards if its made in challenger world?